Outboard Motor Lift Installation
--Blogpost written by Bob
Having decided on a 10 HP 4-stroke outboard engine for our dinghy (weighing about 85 pounds), it is important that we have a way to lift it onto the boat's stern rail mount for storage. The dinghy's outboard motor will be stored while transiting the ICW and crossing the gulf stream.
 |
Eighty-five pounds is a lot to lift, let alone lifting it from a dinghy bobbing in the water. |
After looking at several different brands of outboard motor lifts we decided to buy one from Kato Marine in Annapolis. We liked the rugged design and the fact that it was rated at 230 pounds. With it's 4-to-1 purchase, it could even be used to lift me out of the water if necessary. I purchased the KatoLift 230 at the Miami boat show in mid-February.
An Unique KATO Design Feature
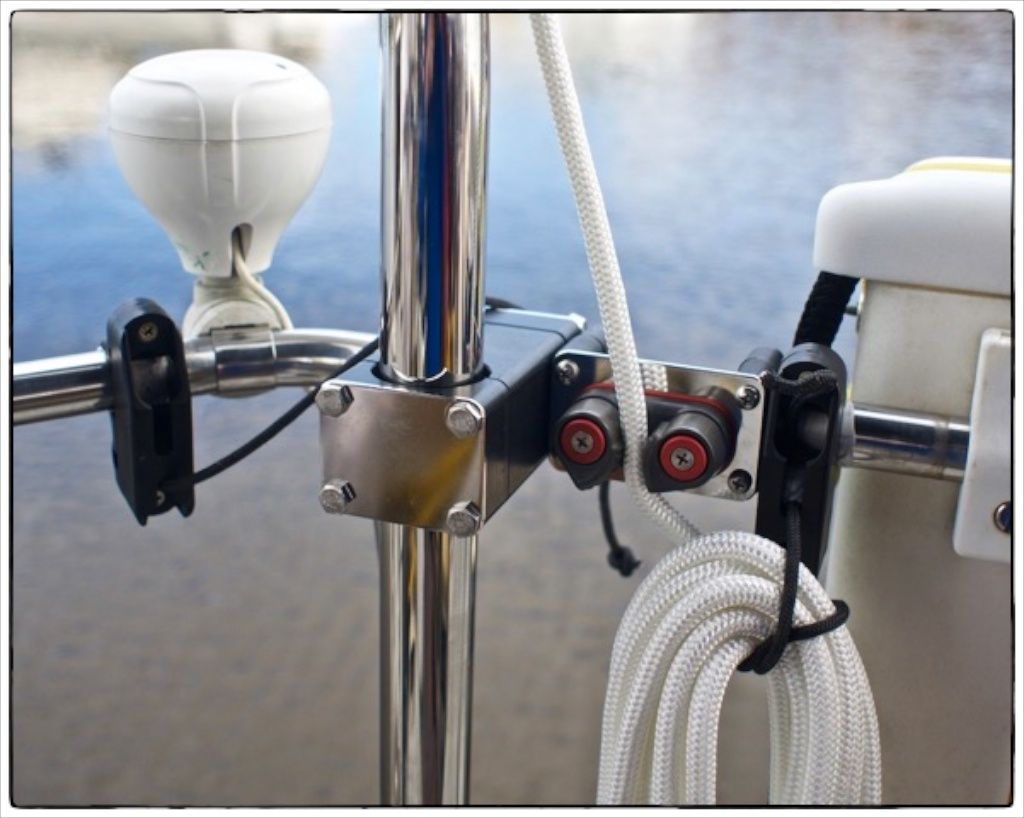
Besides the numerous different base plates offered by Kato, one major design feature is not initially obvious--the ability to accommodate various rail slopes in the offset brackets. This is something the average buyer wouldn't even think about but Kato has the solution (angling the holes in the offset bracket).
 |
| The small detail of having the holes for the vertical shaft angled allows the design to accommodate various angles between the rail and the deck. |
Location & Mounting
The selected location for the outboard motor lift is on the port aft corner on s/v Rainy Days. Kato Marine supplied a cardboard template to assist in finding a suitable location. By observation, to me it seemed like the vertical shaft should be mounted on the port rail of the stern pulpit--I consider my spatial visualization to be pretty good.
Because Kato Marine is close by, when I picked up the unit in Annapolis I decided to simply take two different offset rail mounts and try to make one of them work and return the one that didn't work. The longest offset worked the best--it was surprising to me how much our stern pulpit angled outboard.
The reach for the outboard motor lift is 21 inches--this means that the distance from the center of gravity of the outboard motor to the centerline of the vertical shaft of the lift should be close to 21 inches when the outboard motor is on the stern mount.
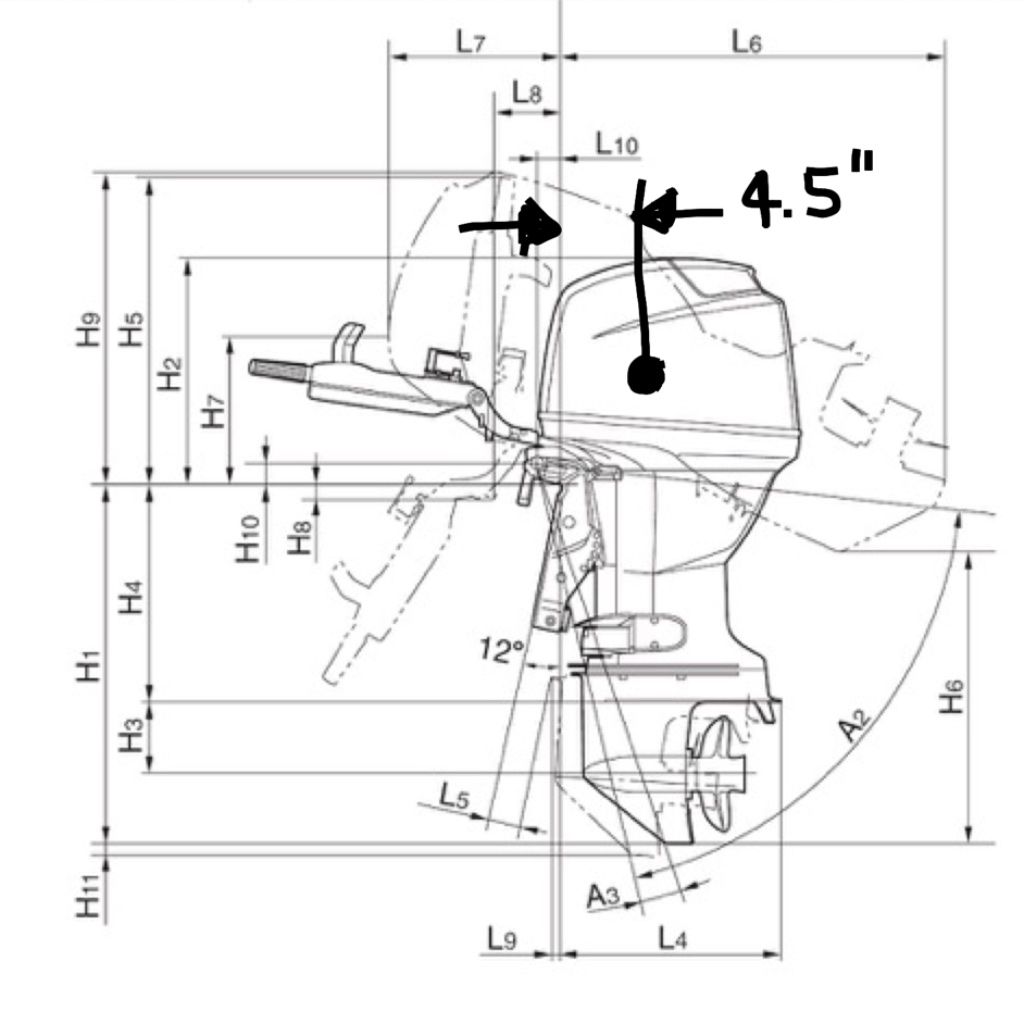 |
| I assumed that the center of gravity (and the hook on the outboard harness) will be 4-1/2 inches from the engine mount. |
The location I had initially selected interfered with the cable deck seal for our external GPS antenna. I really don't need this external GPS antenna since my chart plotter has an internal GPS but I prefer having the redundancy of two antennas.
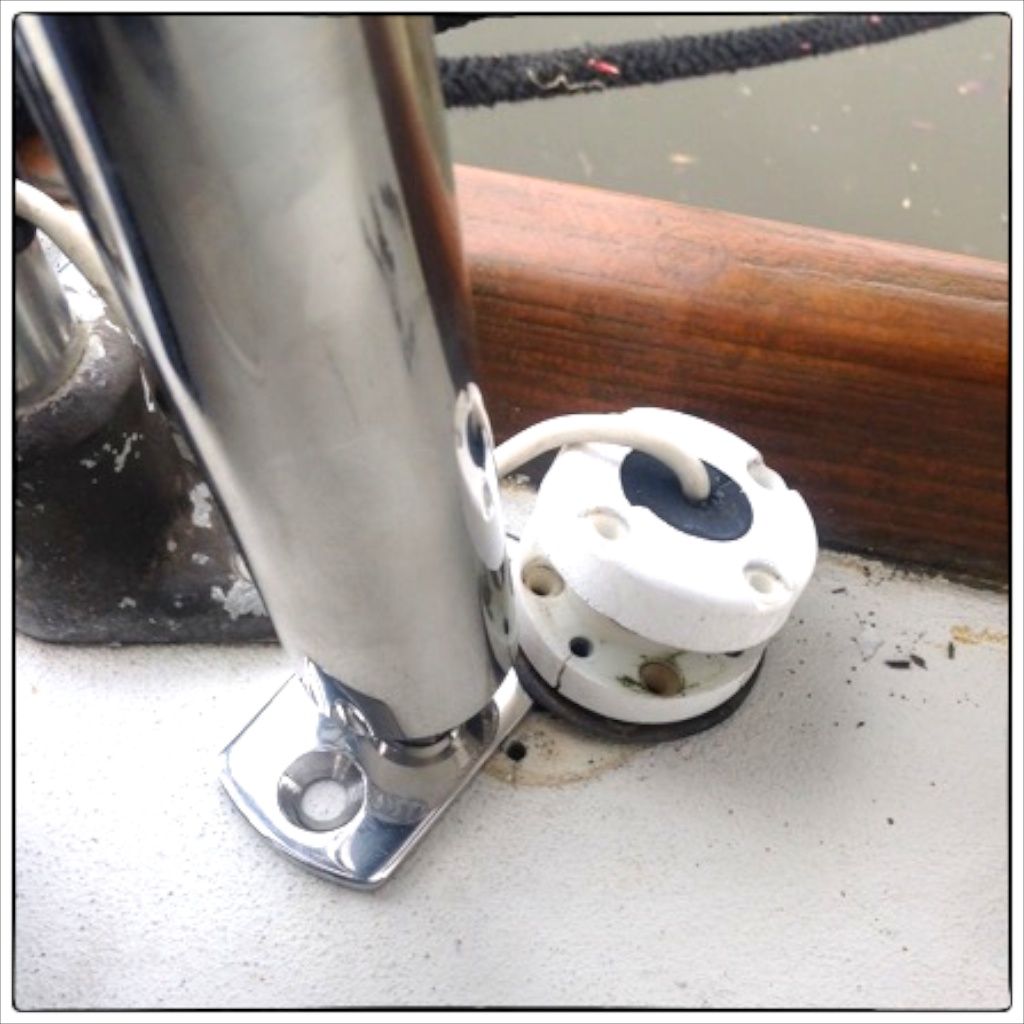 |
| My initial location and the rectangular base caused mechanical interference with my GPS antenna cable and deck seal. |
When I returned the unneeded (shortest) offset rail mount to Kato Marine, I showed them the pics on my iPad of the difficulty I faced with the cable deck seal.. They offered me a triangular base with offset mounting bolts which would solve the problem. Kato also advised me to try to move the vertical shaft further astern for more versatility in lifting positions. The short trip back to Kato Marine was very worthwhile!
 |
| The triangular base in its final location further astern. This base and location worked out perfectly! |
Shifting the vertical shaft further astern provided a less complicated mounting position and more clearance between the bimini frame and the outboard motor lift at the top--it was great advice from Kato!
Access to the Underside of the Aft Deck
On our Landfall 38 the only access to the underside of the aft deck is a bolt-on panel behind the propane locker (which is under the helm seat). There is a large fiberglass gusset on the centerline of the boat that is immediately behind the bolt-on panel. I cannot imagine a way that anyone, regardless of their small size could get into that area to access nuts on the bolts that mount the base plate.
I decided to cut a hole in the cockpit facing aft so that I could access the nuts and fill the hole with a small circular screw-in port--I found such a port at Bacon's. The access worked great and the port will nicely fill the 4-1/2-inch diameter hole. Problem solved.
 |
| The access hole allowed me to reach into the area under the aft deck and fasten the nuts to the cap screws. This is the only way I could reliably access this area. |
Uh Oh, Mission Creep
As I was searching for things to use to fill the access hole before I purchased the 4-inch round port, I looked at SSI Custom Plastic's website. I have installed a lot of their products on s/v Rainy Days like the outdoor shower head and controls, the glove box, and two cockpit bins, to name some that come to mind. I found a small square bin that would fit in the space on each side of the helm seat in the area where I cut the access hole. I plan to add netting on the front and use them to contain small items like sunscreen and the like but this will be a separate project.
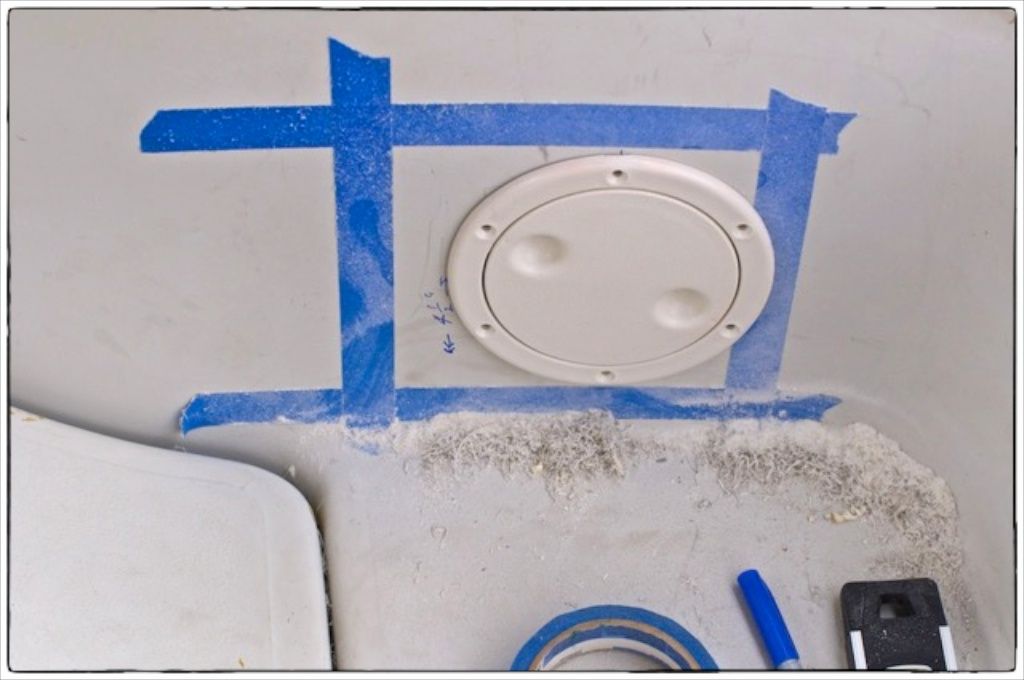 |
| Even though a round opening port is sitting in the access hole, the blue taped outline represents the future addition of a storage bin for sunscreen and similar things. |
Summary
 |
| The completed installation as viewed from the cockpit. |
 |
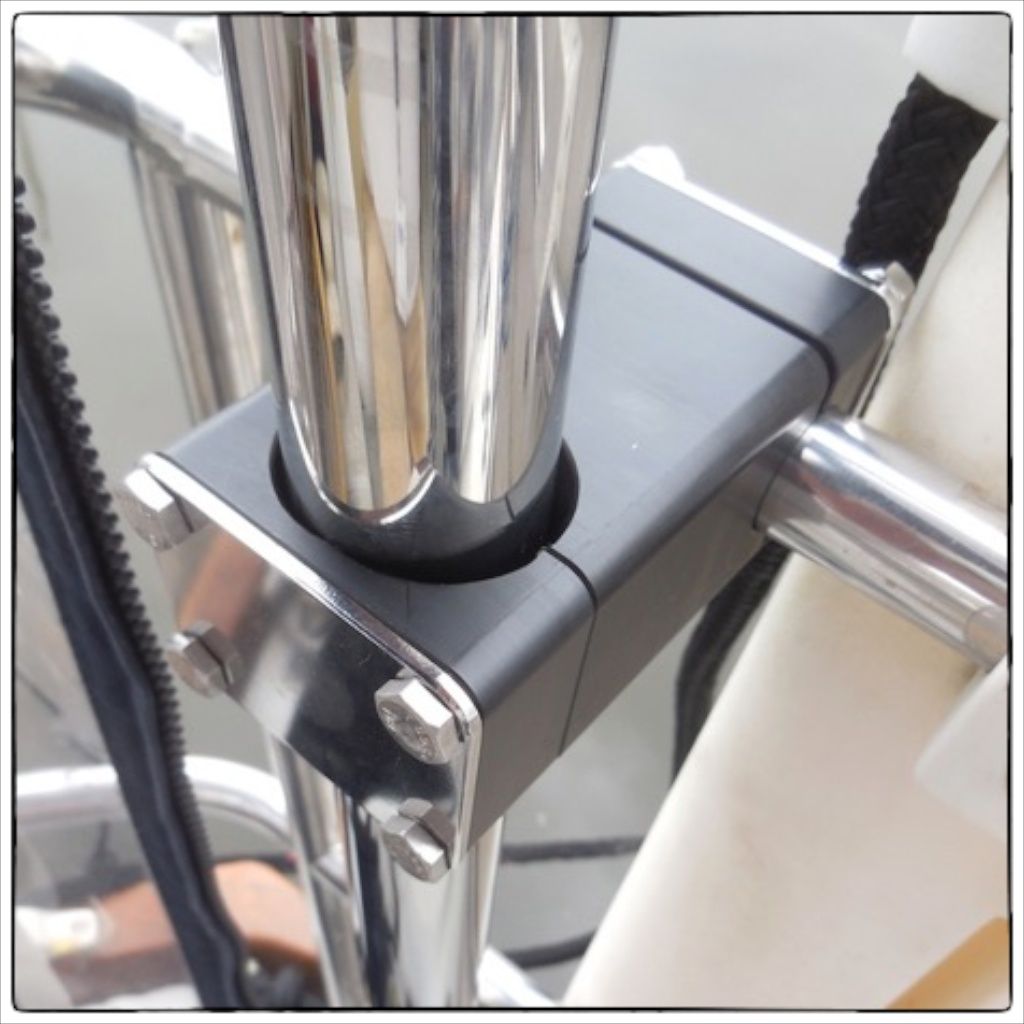
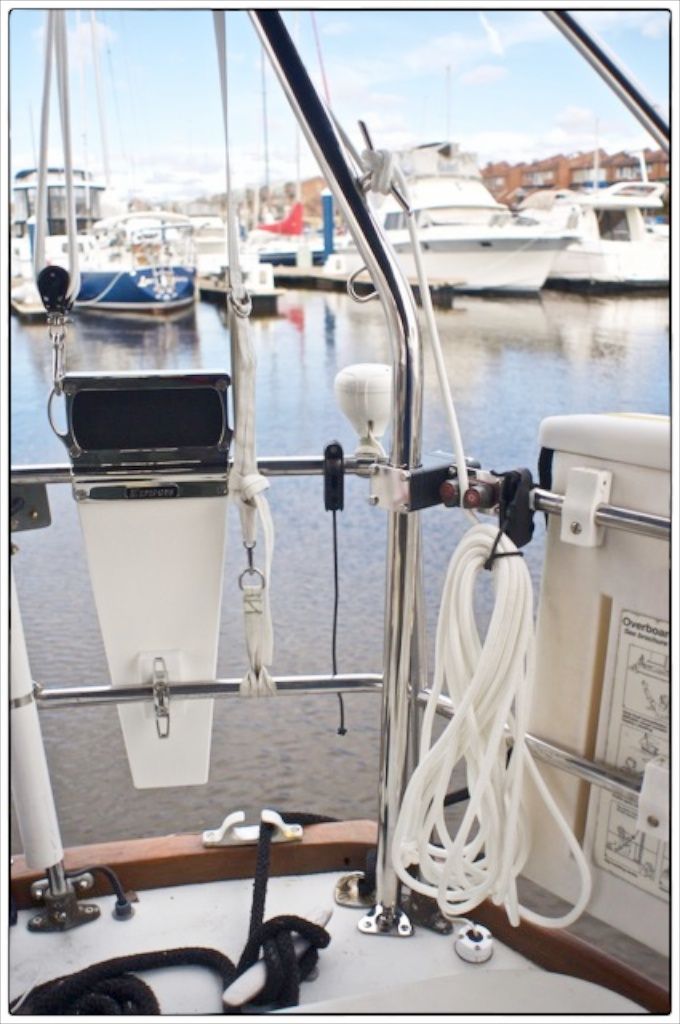
| The completed installation in the area where it is attached to the stern pulpit rail. I slightly relocated the GPS antenna and our LIFESLING to make enough space for the lift hardware. |
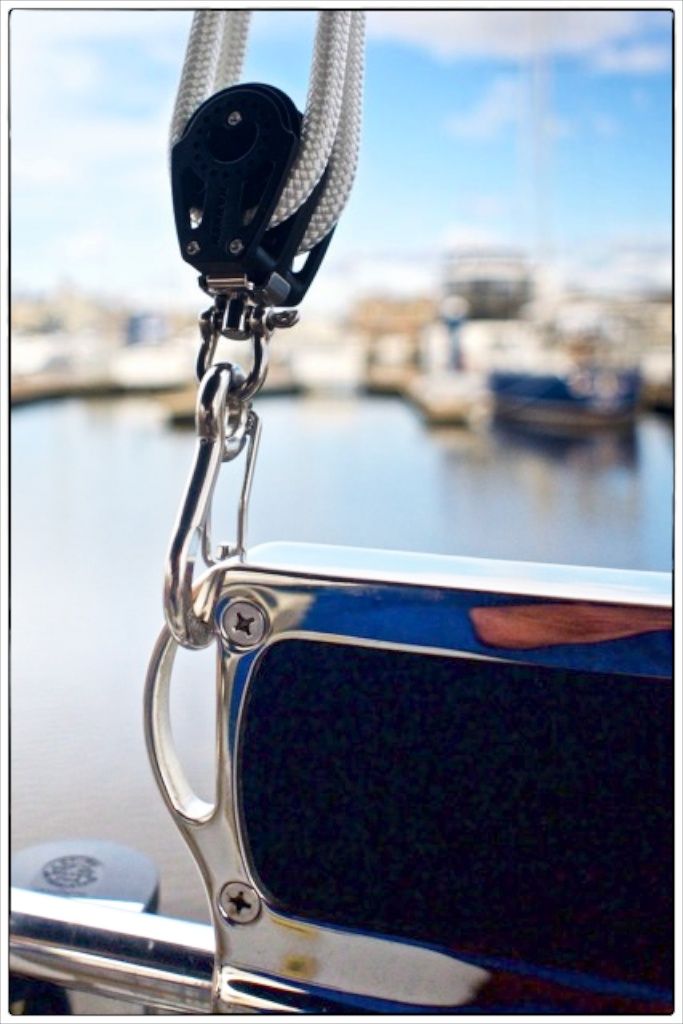 |
| When not in use, I hook the lower block to the outboard motor mount to keep it from swinging freely. |
This was one of the easiest installations I've done on s/v Rainy Days--thanks to Kato Marine. Our new mainsail will be delivered on Tuesday and will be the subject of our next blogpost.
Thanks for following our blog!
No comments:
Post a Comment