Prior Redesign of the Windows
--Blog post written by Bob
Leaky windows have been a well-known problem for C&C boats built in the early 80's. The original 3/8-inch thick Plexiglas windows were fastened to the cabin with a structural adhesive (Plexus). Every couple years the structural adhesive would break down and one corner of the window would come loose and allow leakage of rain water into the boat. (I think the flexibility of the boat's structure was partially responsible for the structural adhesive breaking down.) After several window replacements, I decided to redesign the window structure. This redesign and replacement of the windows was done (by me) about 10 or 12 years ago while I was living aboard--this is not part of my 30-year retrofit of S/V Rainy Days being performed now.
The first step in this process was to trace the existing windows using tracing paper and a pencil. From this tracing of each window, I was able to develop detailed dimensions for the new Plexiglas as well as the new stainless steel window frames so that I could get them fabricated.
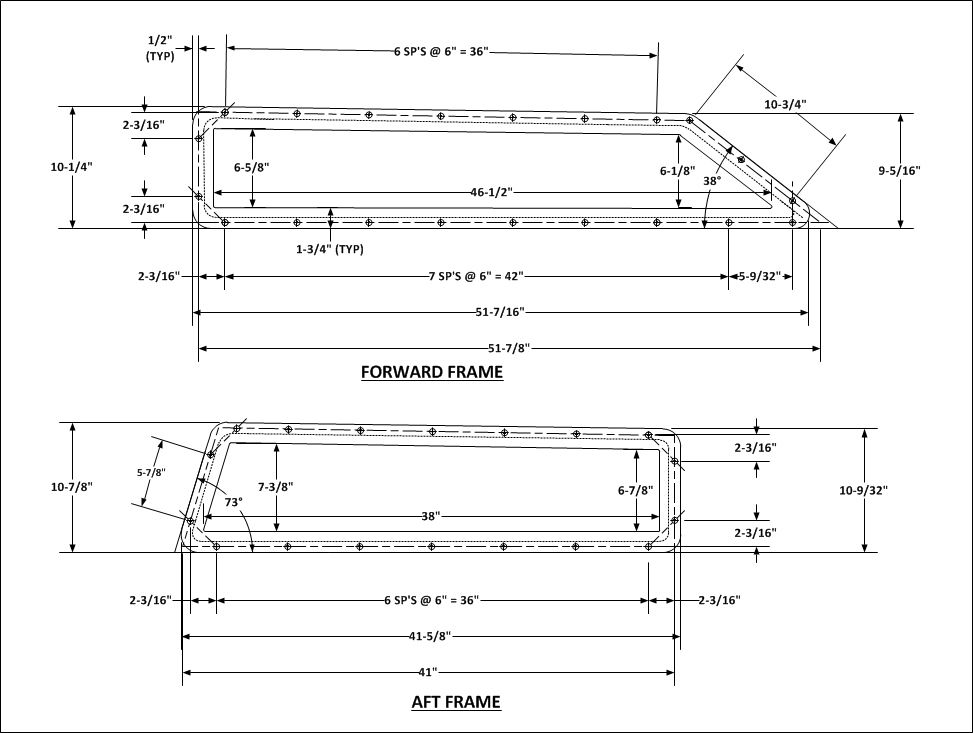 |
| Drawings of the new window frames for my C&C Landfall 38 |
My redesign of the windows involved building stainless steel frames that would be mounted on the outside of the cabin sides. The new frames were about 1-inch larger than the original windows all around--the width of the frames was 1-3/4 inches. The shape of the frames was exactly the same as the old windows. The frames were constructed from 1/8-inch thick Type 316L stainless steel--the best grade of stainless steel for salt water exposure. They we're cut from plate using a numerically-controlled plasma cutter by Hampshire Metal & Industrial Services in Romney WV. After cutting to size, 1/4-inch flathead screws were welded to the back of the frames by Atlantic Spars & Rigging in Annapolis MD. The sides of the cabin top were drilled through to receive these screws. I counter bored the inside of the holes (with a 7/8-inch hole saw so that the nuts would be recessed below the inside surface of the cabin. (The plugging of these holes is now part of my 30-year refit.) Then, using a router, I created a setback into the cabin to keep the new plastic windows flush with the outer sides of the cabin.
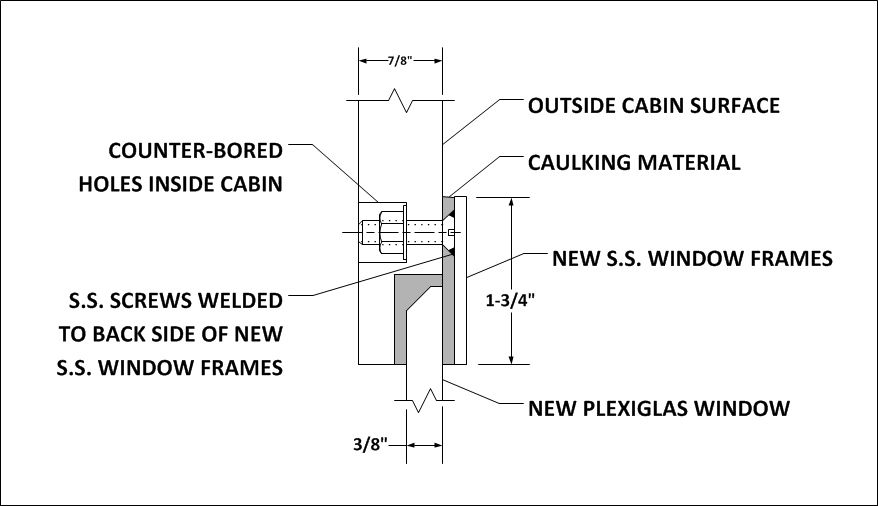 |
| Cross section of joint between cabin top, window, and new stainless steel frames |
All plastic windows and new window frames were test fit to assure satisfactory fit up. As they were test fit, I traced the outline of new window frame on the cabin with a pencil and traced the inside perimeter of the window frame on the paper-covered Plexiglas. I taped off an area outside this traced line on the cabin and removed about 1-inch of the paper cover from the outside edge of the Plexiglas so that I could minimize cleanup of the caulking material after installation. The caulking material is very important to the longevity of the seal--I used GE Silpruf (SCS-2000 in black) and it was obtained from Maritime Plastics in Annapolis MD.
At this point, I polished the outside surfaces of the new stainless steel window frames--this was very time-consuming, to say the least. Once all the frames were sufficiently polished, I started the final assembly, one window at a time and with some help from a friend. The final assembly was the easiest part of this project and the most satisfying. I recall that this project took twice as long as I thought it would--a factor that has followed me on many other boat projects over the years.
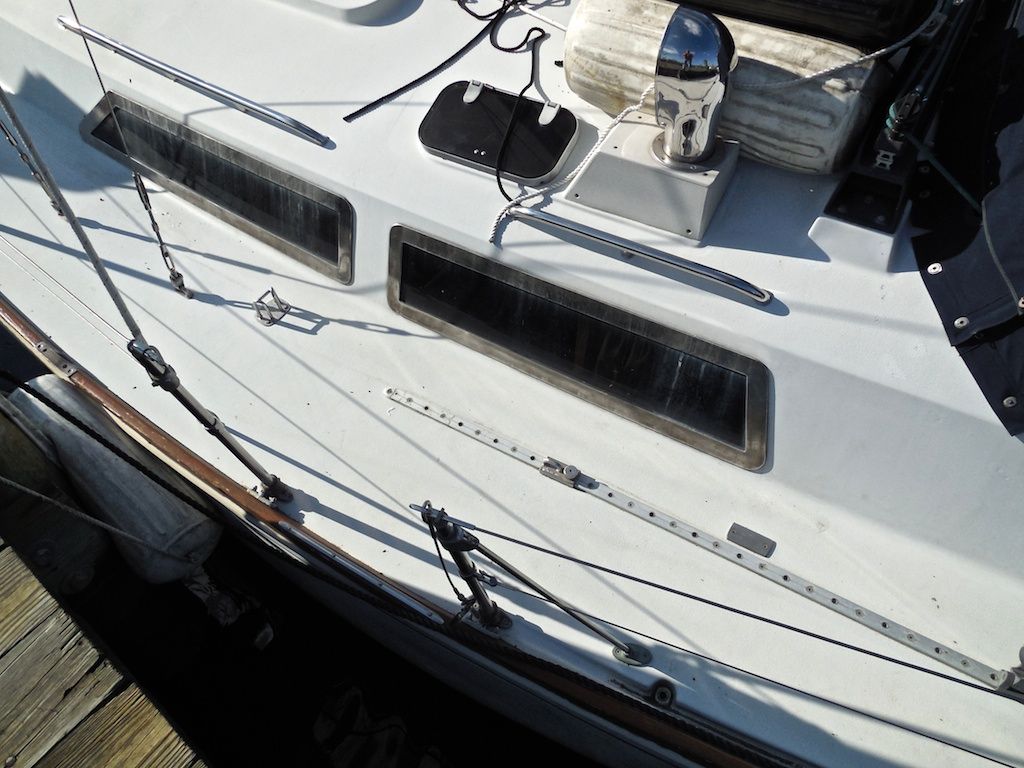 |
| Stainless steel window frames on S/V Rainy Days |
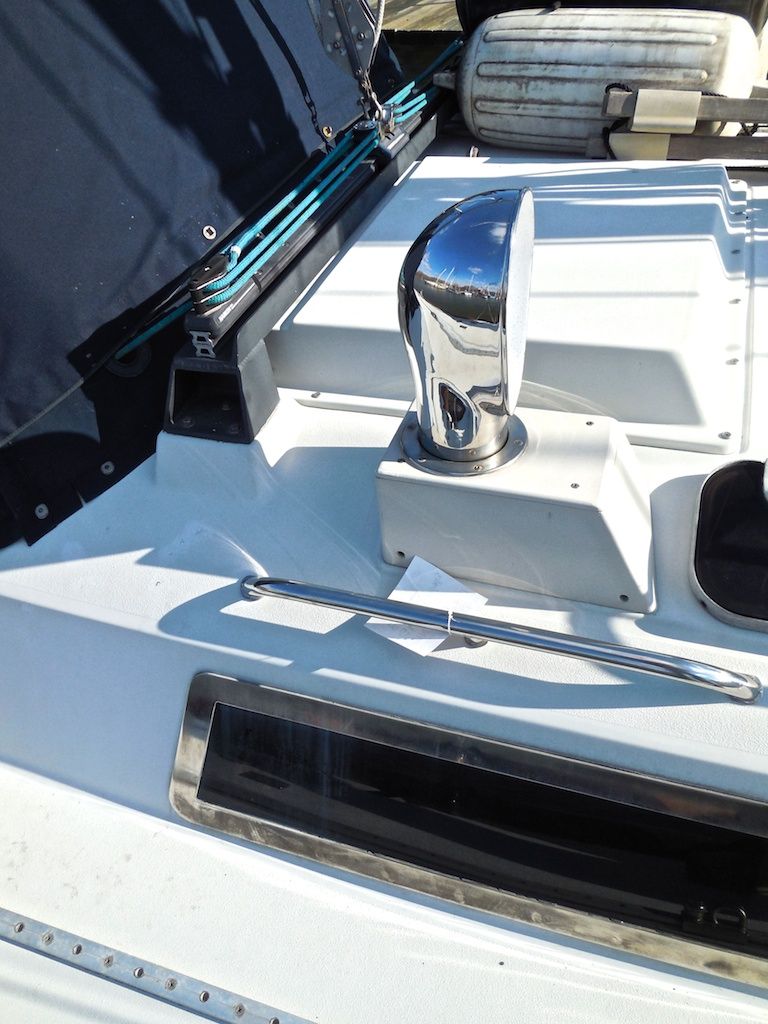 |
| New stainless steel window frames, new stainless steel handrails, new dorade boxes and stainless steel dorade vents make for a very classy look and reduce annual maintenance. |
Thanks for following our blog!
No comments:
Post a Comment