Jerry Jug Restraints
--Blogpost written by Bob
Jerry Jugs
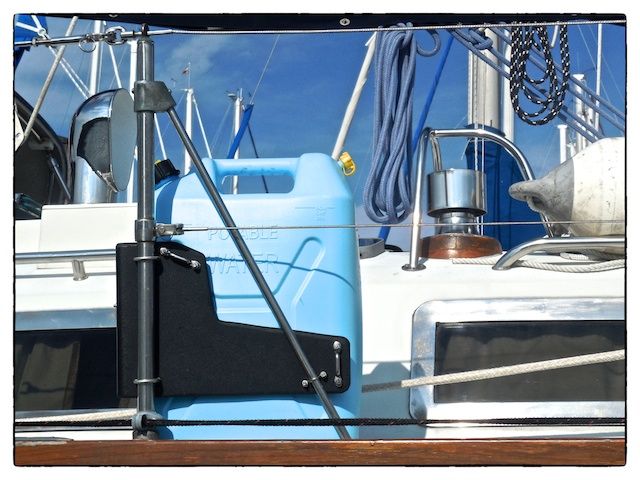
Jerry cans were developed in Germany in the 1930's for military use and were made from pressed steel. While the design and capacity has not changed since then, the material of choice is now polyethylene. Five-gallon (actually 20-liter or 5.3 gallon) plastic jerry jugs are the ideal containers to carry additional water and fuel on deck while cruising. Most cruisers have a 2 x 6 board fastened between two lifeline stanchions and then a number of jerry jugs are fastened to the 2 x 6, arranged in a straight line. However, this arrangement on S/V Rainy Days would take up too much valuable foredeck space, particularly since we will be storing our dinghy on the foredeck for passages.
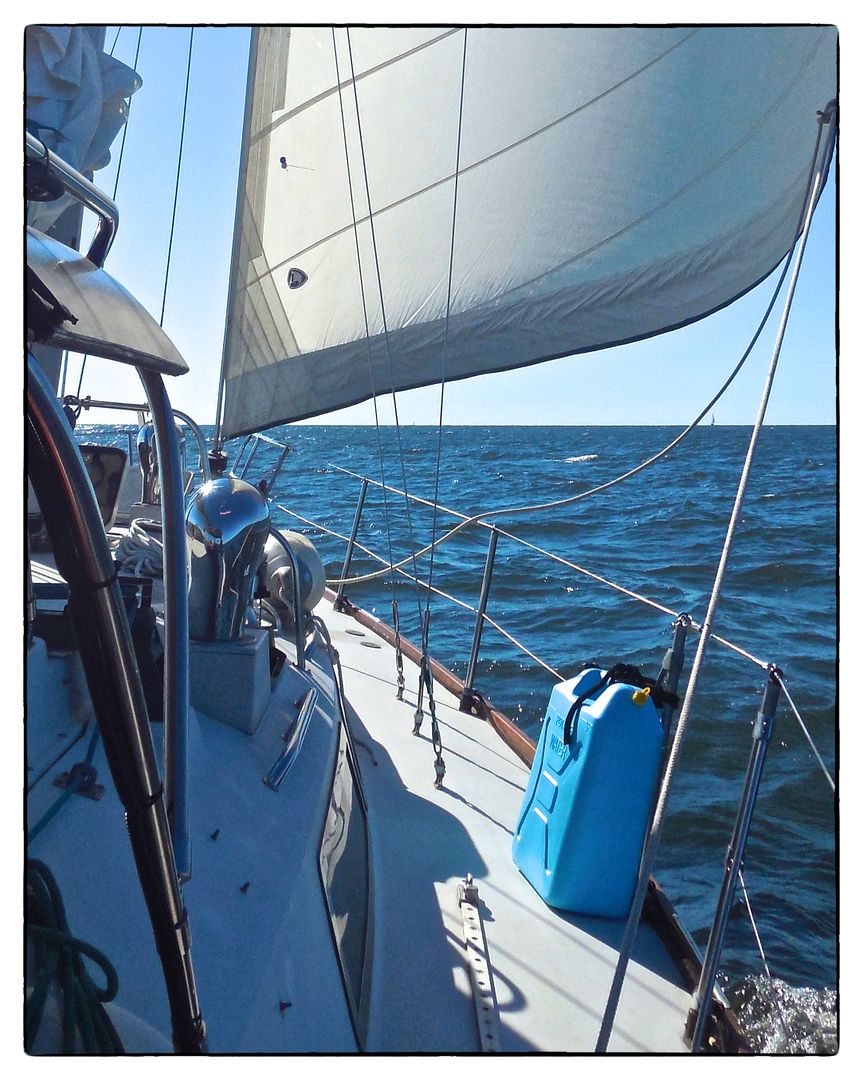 |
| During our month-long sailing trip this past July we carried one 5-gallon jerry jug of fresh water (for drinking water) and merely tied it to the stanchions next to our lifeline gates at midship. Simply tying the jerry jug didn't work very well--it has to be held securely near the bottom and held down. |
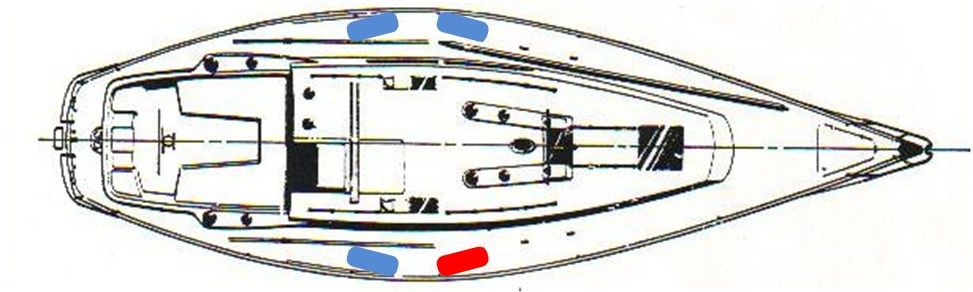 |
By using the locations one each side of both lifeline gates, we can accommodate storing four jerry jugs. |
The location adjacent to the lifeline gates is perfect for us--it is ideal for getting them to/from the dinghy for refilling while cruising. (Five gallons of water weighs 42 pounds--we wouldn't want to be lugging these around too much.) Three (blue) jerry jugs will be used for drinking water and one (red) will be used for gasoline for the dinghy. (We are planning on adding an auxiliary 20-gallon diesel tank below decks--so, we don't think we'll need to store diesel fuel on deck.
Mounting Plates
I designed a 1/2-inch thick (black Starboard) L-shaped mounting plate that fastens to the 1-inch diameter stanchion closest to the lifeline gate and the 1/2-inch diameter diagonal strut bracing the stanchion--this provides a secure 3-point structural contact.
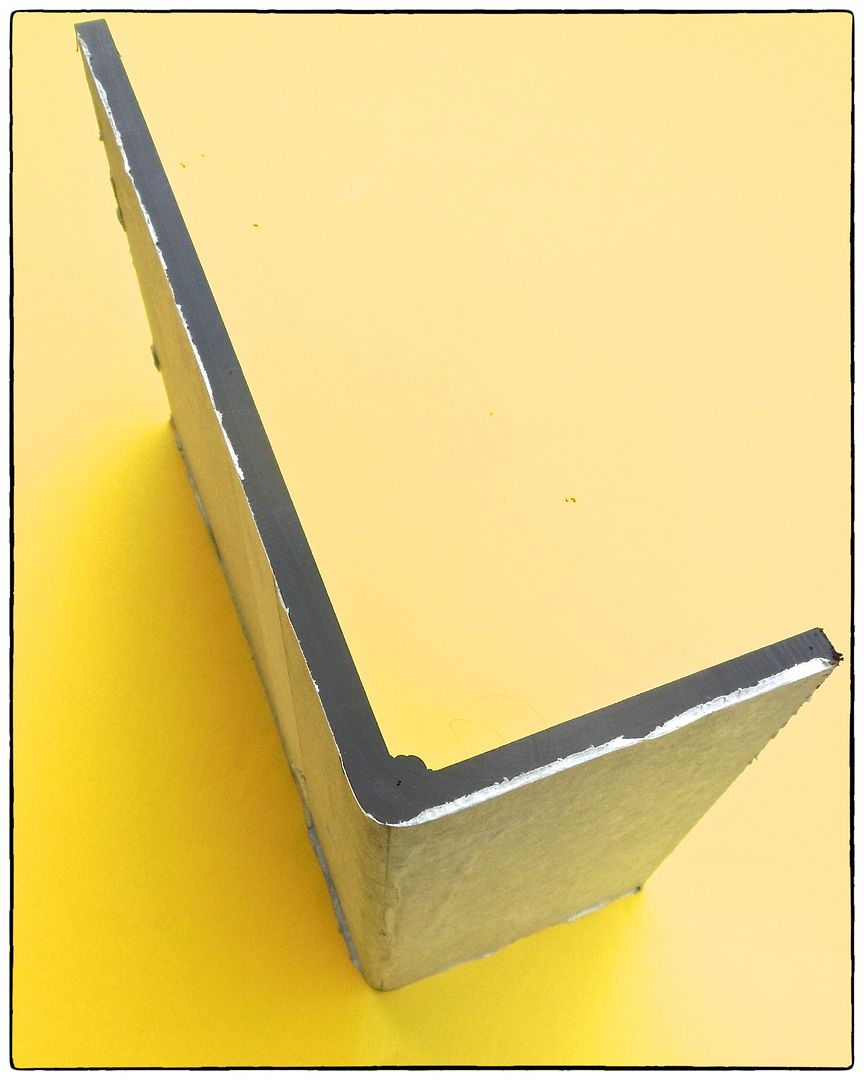 |
| Maritime Plastics cut the Starboard to size and made the 90-degree bends--the vertical 90-degree bend provides two solid surfaces to which the jerry jug can be clamped. I received the L-shaped brackets with paper on one side--this was great for laying out hole locations, |
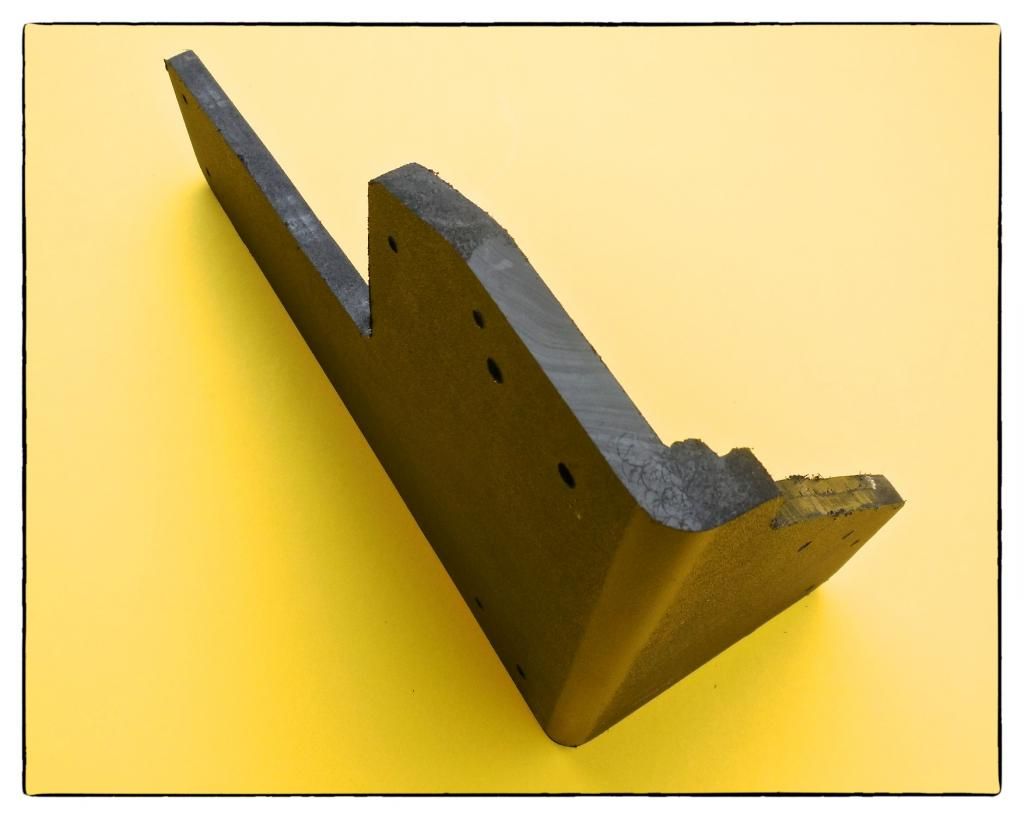 |
| The L-shaped mounting plate with excess material cut away and holes drilled. Edges were not rounded at this point yet. |
 |
| I wanted to make the mounting plates minimalistic in nature--so, I cut away all the excess material. I left material where fasteners had to be located, where straps terminated against the mounting plate, and areas that were needed to maintain stiffness. |
Once the excess areas were cut away with a jigsaw, I used a router to round all the edges of the mounting plates and then sanded all edges with an orbital sander and 120-grit sandpaper. To make the edges look polished I momentarily exposed them to a flame from a propane torch--this had to be done very lightly and carefully but it worked great.
I used two u-bolts at the lifeline stanchion and a 1/2-inch eye strap at the diagonal strut to fasten the mounting plate. (I was planning on counter-boring the holes for the u-bolts so they didn't abrade the jerry jug but I didn't have to do this because of the large radius on the jerry jug.) I countersunk the holes for the flathead screws (from the inside) for the fastening the eye strap to the diagonal strut.
Fastening the Jerry Jugs to the Mounting Plates
I decided to strap the jerry jugs to the mounting plates. All the strapping and associated stainless steel hardware items were purchased online from strapworks.com.
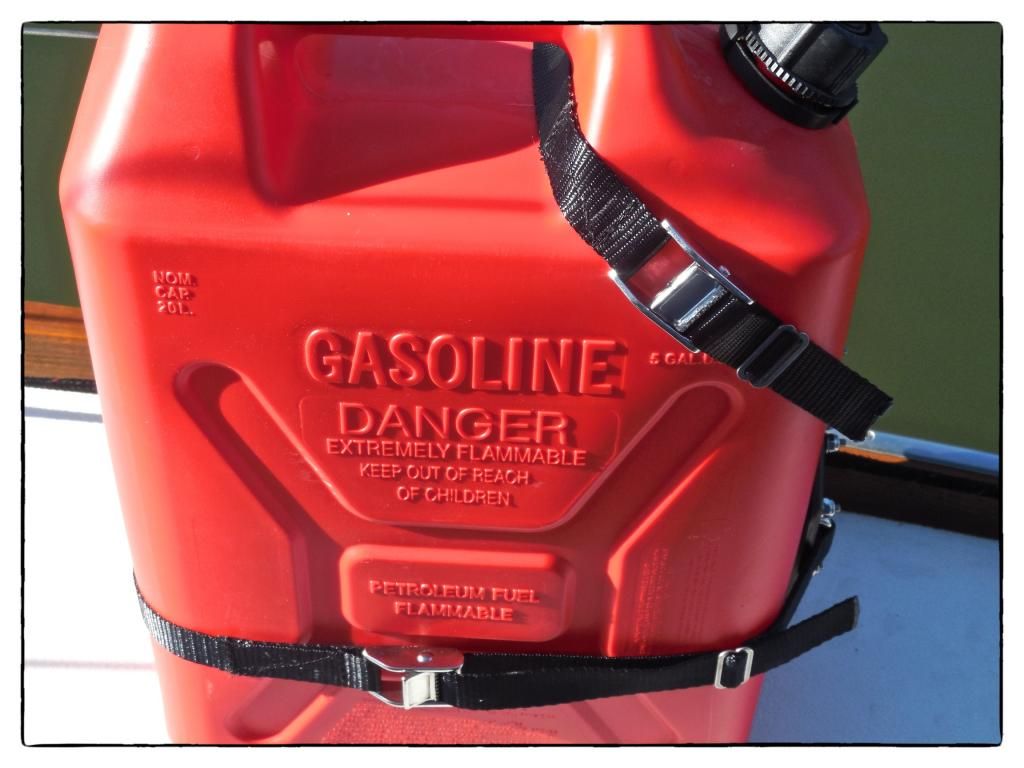
The jerry jugs are fastened to the mounting plates using 1-inch wide (black) polyester webbing. The webbing terminates on each end at the mounting plate on footman loops. There is a stainless steel cam buckle on each strap and a stainless steel slide to neatly store the small amount of excess belt length. (In retrospect, I would rather have used a thicker webbing only because the webbing looks a little flimsy in comparison to the robust stainless steel cam buckles.)
I had to have loops sewn into the ends of all straps and the cam buckle had to be sewn into one end of the belt. The sewing (using Tenara thread) of all the strapping was done by Marty's Bag Works in Edgewater, Maryland.
The jerry jug covers (hopefully, next up on Maggie's list of projects) can be slipped over the jerry jugs prior to fastening the straps. The jerry jug covers will be used to protect the jerry jugs from discoloration and damage from UV exposure.
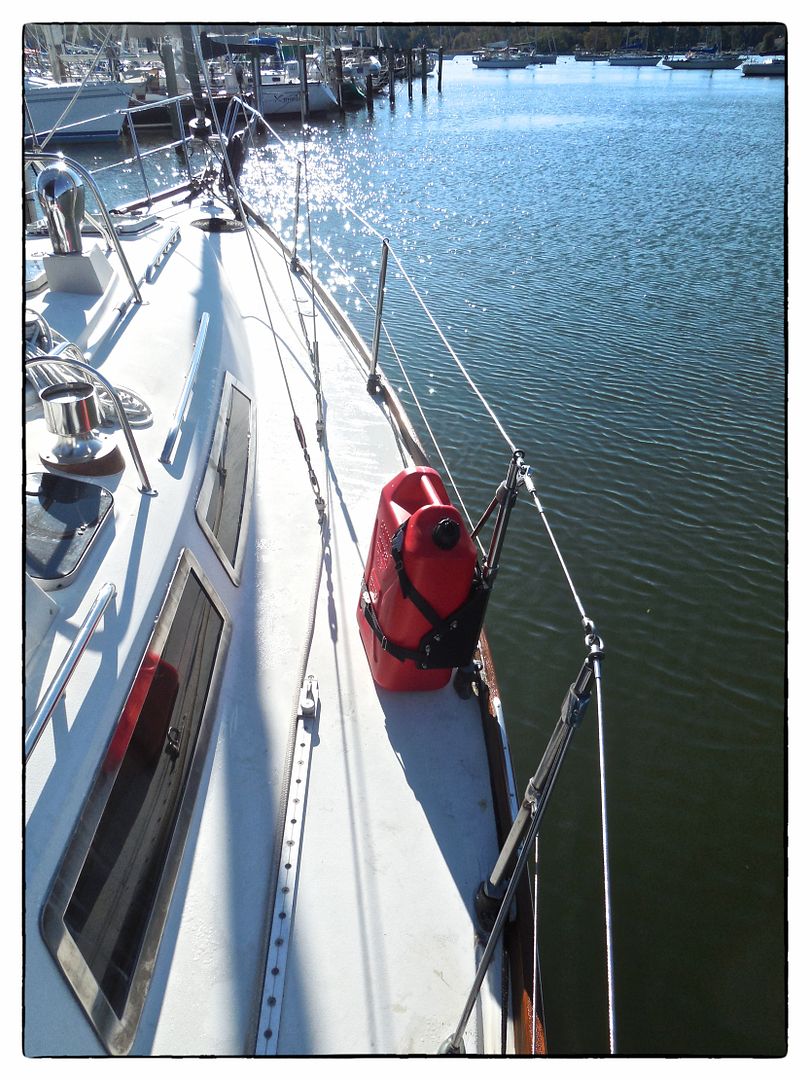 |
| One jerry jug restraint system completely installed on s/v Rainy Days. |
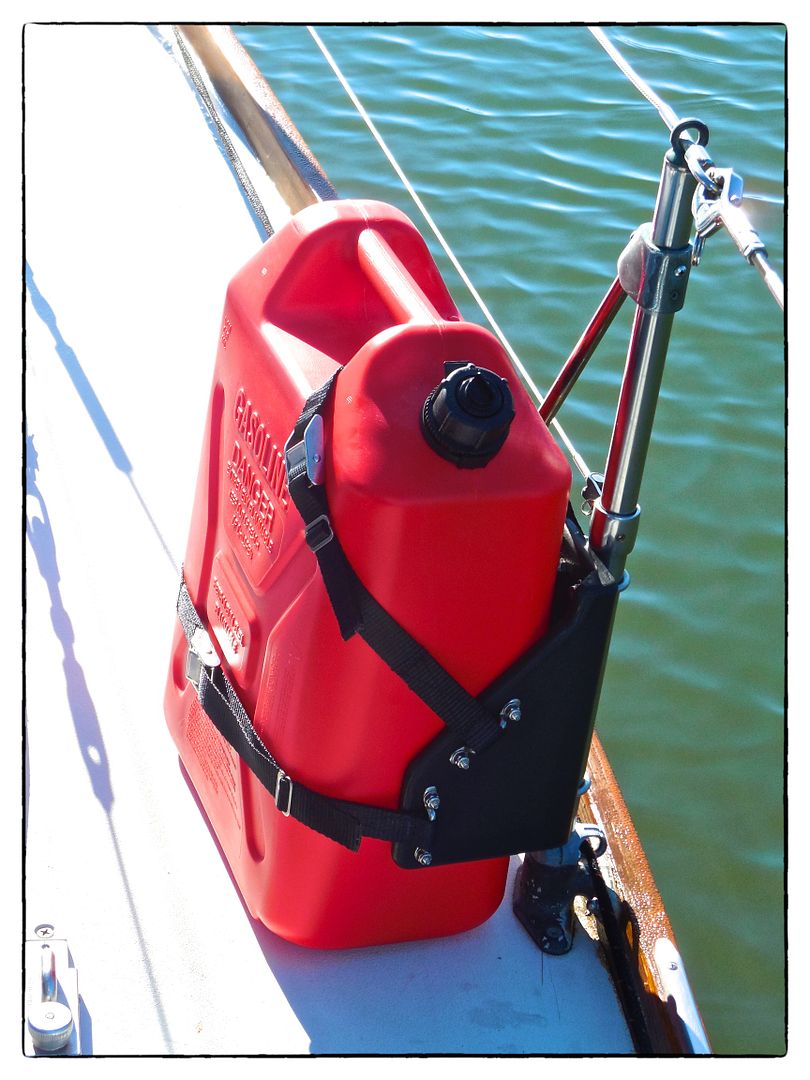 |
| A close up view of the jerry jug restraint. |
Conclusion
 |
| Initially, I thought it was too time-consuming to attach these straps, particularly using the buckle to take up the excess belt length. However, I like the durability of the system. |
The total cost of this project was a few hundred dollars, including all four jerry jugs. This was a fun project for me since it provided some design challenges, and could be completed in my home workshop. The 15 gallons of drinking water should last us about 15 days while cruising and I would guess that 5 gallons of gasoline for the dinghy would last about the same time period. (I should point out that we carry 104 gallons of fresh water in our three onboard tanks but we don't use it for drinking.)
Thanks for following our blog!
No comments:
Post a Comment