Composting Toilet: Part 2
--Blogpost written by Bob
Back at the end of March 2014, we decided to replace our
conventional marine toilet with a composting toilet. (I suppose if you
want to be technical, it is actually a desiccating toilet because it removes
moisture, rather than true composting, simply because there is not enough
elapsed time for composting.) At that time, we were pretty much set on a
Nature's Head but I wanted to investigate the Air Head a little closer before
purchasing the toilet. After a more thorough evaluation, we decided on
the Air Head, primarily because of the angled back version which was more
suitable for our installation.
 |
| I was glad to get rid of the old conventional marine toilet, the holding tank, and the odors emanating from the discharge hoses. It always seemed unnatural to me to mix seawater (and all it's little critters) with a week's worth of human wastes and store it on a boat which is closed up most of the week in the hot summer heat. |
There is some interesting terminology that is used in relation to
the composting toilet. The toilet includes a "liquids container" and
a "solids container"--these terms are self explanatory. When
using the composting toilet, one makes a "deposit" or
"donation"--this is somewhat self explanatory too. The collection of the
composted solids after a month or more of usage is called a
"harvest".
Removal of all Old Hoses & Fittings
While it was a dirty and smelly job, I was glad to get rid of all the old discharge hoses, the siphon loop, and the y-valve. ( I had already removed the holding tank and installed the auxiliary diesel tank in its place.). Because of the confined space, it took about 3 hours to remove the marine toilet, all the old hoses, and fittings.
 |
| It's hard to believe all the volume that is consumed by hoses and fitting used in a conventional marine toilet and this load didn't include the holding tank. |
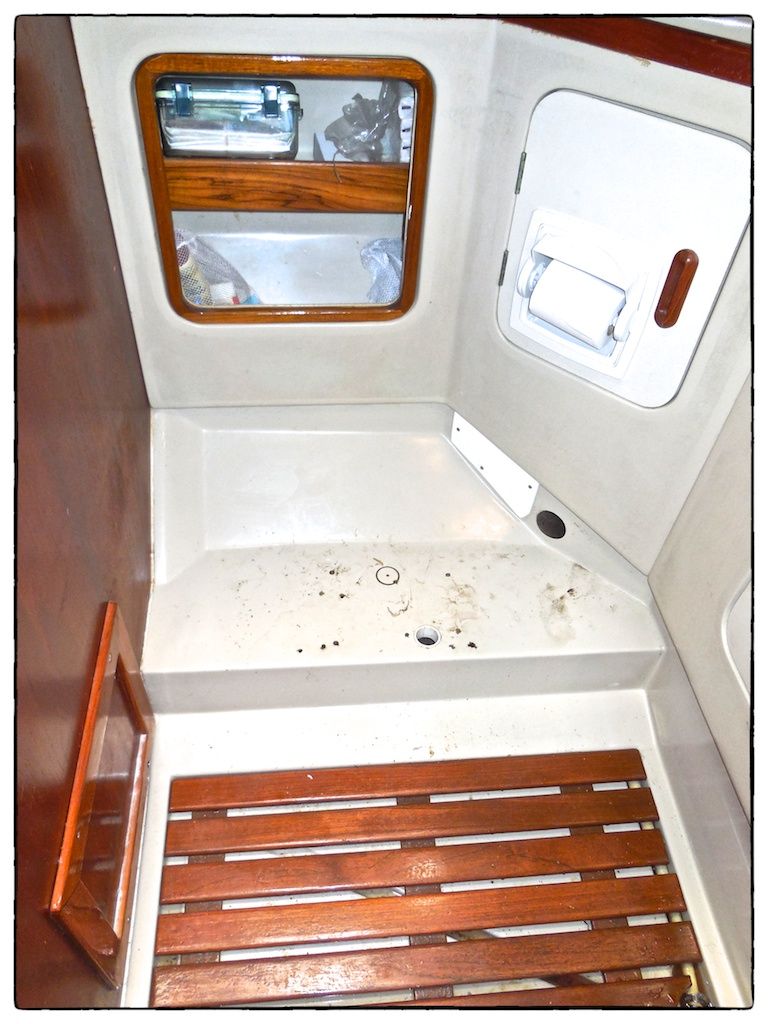 |
| In this photograph the old conventional marine toilet was removed and the new composting toilet had not yet been installed. It looks like a lot of space is available. |
After the old toilet was removed, Maggie thoroughly cleaned the head
cabinet and the area surrounding the toilet--this took a couple hours to
finally get rid of the odor. When the cleaning was complete, I
reinstalled the large shelf in the head cabinet--I refinished this shelf over
the winter, removing the holes for the old discharge hoses. We gained a
lot of storage space in this cabinet as result of the conversion.
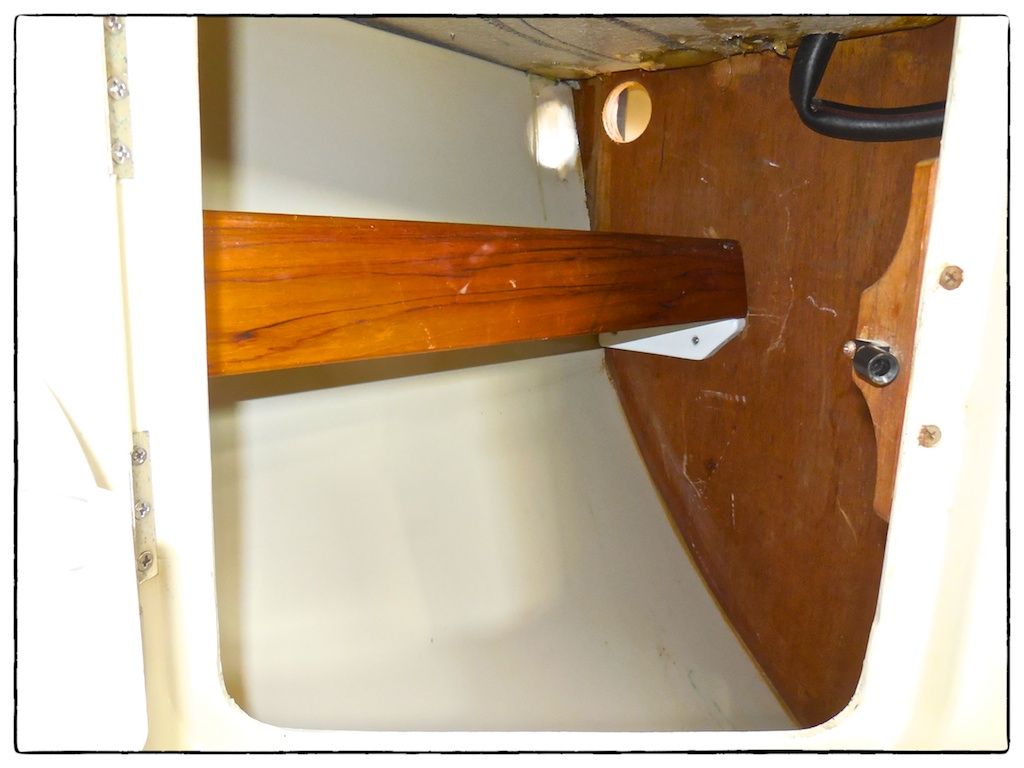 |
| We gained a lot of space in this cabinet (located to the right of the toilet) as result of the conversion to a composting toilet. The hole in the upper center of this image is for the new toilet's air exhaust hose.(The kinked shower sump pump discharge hose in the upper right of this image was changed to using a plastic elbow to eliminate the kinking.) |
Preliminary Fit Up of Toilet
Before hooking up the toilet, we simply sat it in position on the
shelf in the hull liner where the conventional marine toilet was previously
mounted. Our first impression was that it was quite tall and we would
actually needed a stool to sit on it comfortably. Because it was so much
taller than our old toilet, we hit our head on the underside of the deck as
well. It seems to me that the composting toilet could have been made
shorter but we are going to learn to live with it since many others are using
the same design.
Another thing that became obvious is that we needed to extend the
supporting shelf by about 3 inches to support the liquids container on the
front. I decided to fabricate a shelf extender from some pine boards I
had in my home workshop. When I test fit the shelf extender on the boat,
I realized that I had to shape it with a belt sander because the riser and
the shelf were not a 90-degree angles. This took about an extra hour to
get it to fit correctly. I fastened the shelf extender using two 1/4-inch
stainless steel lag screws.
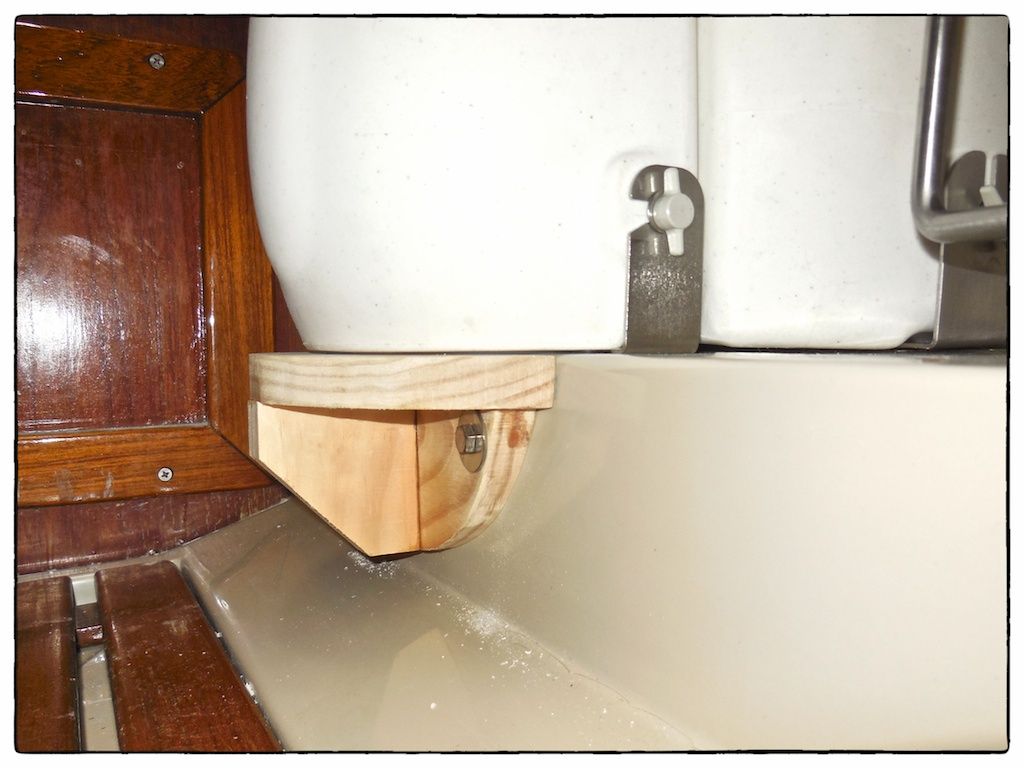 |
| This photograph shows the shelf extender in place before the toilet was mounted. After this photograph was taken I removed the shelf extender for varnishing. |
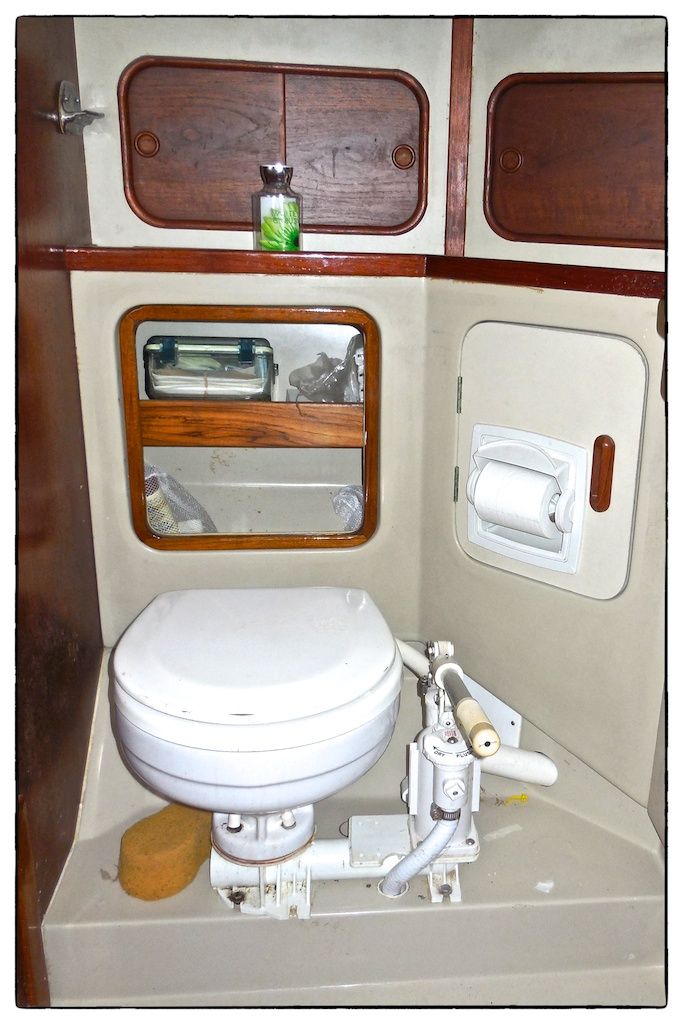
Mounting the Toilet
With the shelf extender in place and the toilet sitting in position, I carefully marked the locations of the toilet supports on the liner shelf. I removed the toilet from the area and removed the support feet from the toilet, marked the mounting hole locations, and drilled them out per the instructions.
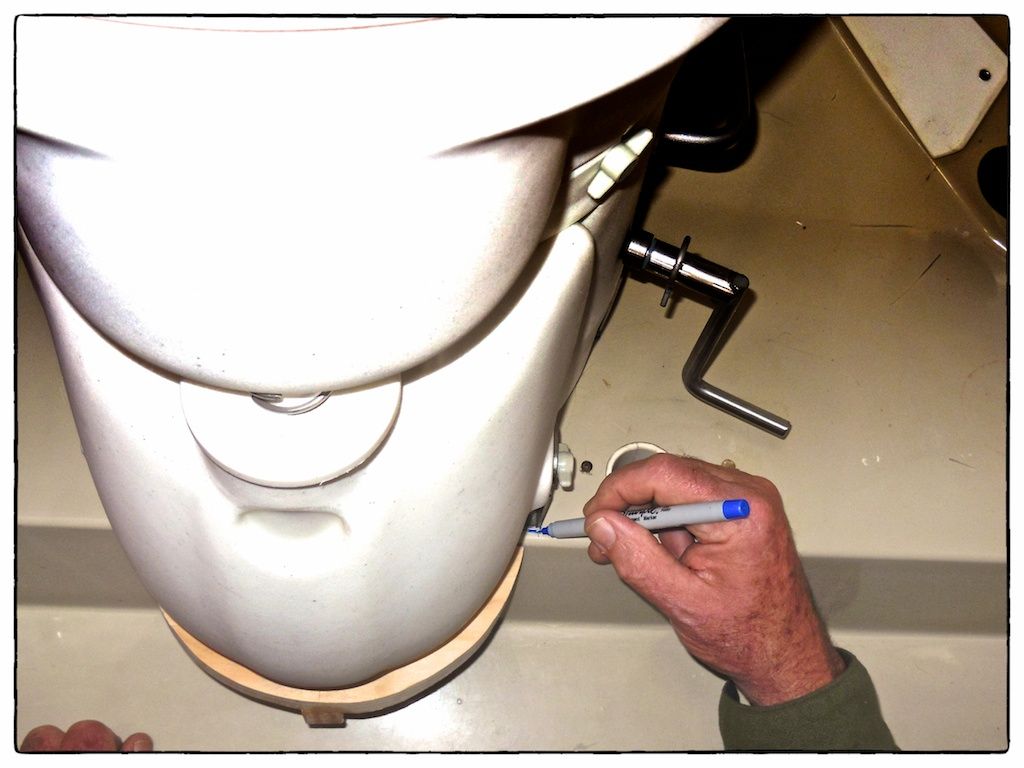 |
| Following the instructions exactly, I first marked the outside surfaces of the toilet's support feet while fastened to the toilet and before mounting. Then, I removed the toilet and the feet and marked the hole locations. |
Air Handling
The continuous movement of air is what makes a composting toilet work (particularly in humid environments). Air is drawn into the toilet through a screened opening, into the solid waste compartment, and then it flows out through the exhaust hose until it leaves the boat. The exhaust fan is located at the exit point from the boat. (I ordered 20 feet of air hose with the composting toilet since I was unsure how much length I would need--this turned out to be a smart move.)
The most convenient place to exhaust the air from the toilet was
outside the cockpit coaming just forward of the trailing edge of the dodger
window. I purchased a (SeaDog-brand stainless steel) cowl vent to protect
the fan (located just inside the coaming) and to direct the exhaust downward
toward the deck. I had to cut the cowl vent's length so that it would fit
the available space in the coaming and locate it such that the opening was
directed straight downward.
The cut down cowl vent has an open exit area of 6.3 square inches
and accounting for a screen with 60% open area, the open area is reduced to 3.8
square inches--the flow area of the 2-inch diameter inlet hose is 3.1 square
inches. So, the cut down cowl vent with a stainless steel (9-mesh) screen
will not restrict air flow.
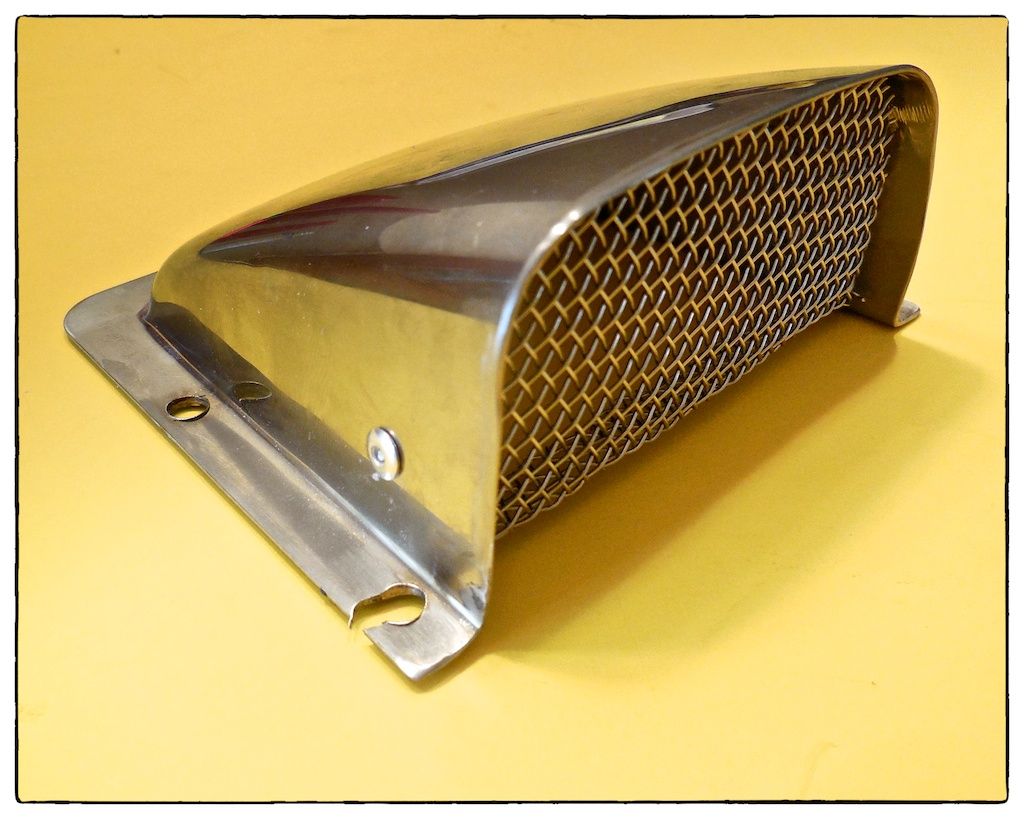 |
| I fastened a 9-mesh stainless steel screen into the cut down cowl vent using two pop rivets. The screen is intended to prevent wasps and spiders from building nests in the cowl vent and blocking the egress of air from the new toilet. |
I used the right-angle fan discharge mount supplied by
AirHead. I designed an adaptor plate constructed from 1/2-inch thick
Starboard that was to be mounted inside the cockpit coaming. The right
angle fan housing mounts on this adaptor plate on the inside while the cowl
vent mounts to it through the fiberglass coaming on the outside. I
installed eleven stainless steel threaded inserts (two different bolt patterns)
to receive the 10-24 screws used to mount the fan housing on the inside and the
cowl vent on the outside.
 |
| The custom adaptor plate allows the right angle exhaust with the enclosed fan to be mounted on the inside the cockpit coaming while the cowl vent is mounted outside the cockpit coaming. I used stainless steel inserts to receive all the mounting screws. |
I used computer-drawn templates to define the pattern of holes in
the coaming. I drilled the top center hole in the pattern from the
inside. Then, I applied the adhesive-backed template to the coaming on
the outside and drilled all six holes through the coaming.
 |
| The hose opening for the right angle exhaust mount actually faces aft and the exhaust hose makes a generous U-turn just prior to the exhaust. The fan is very quiet--you can barely tell it is running. |
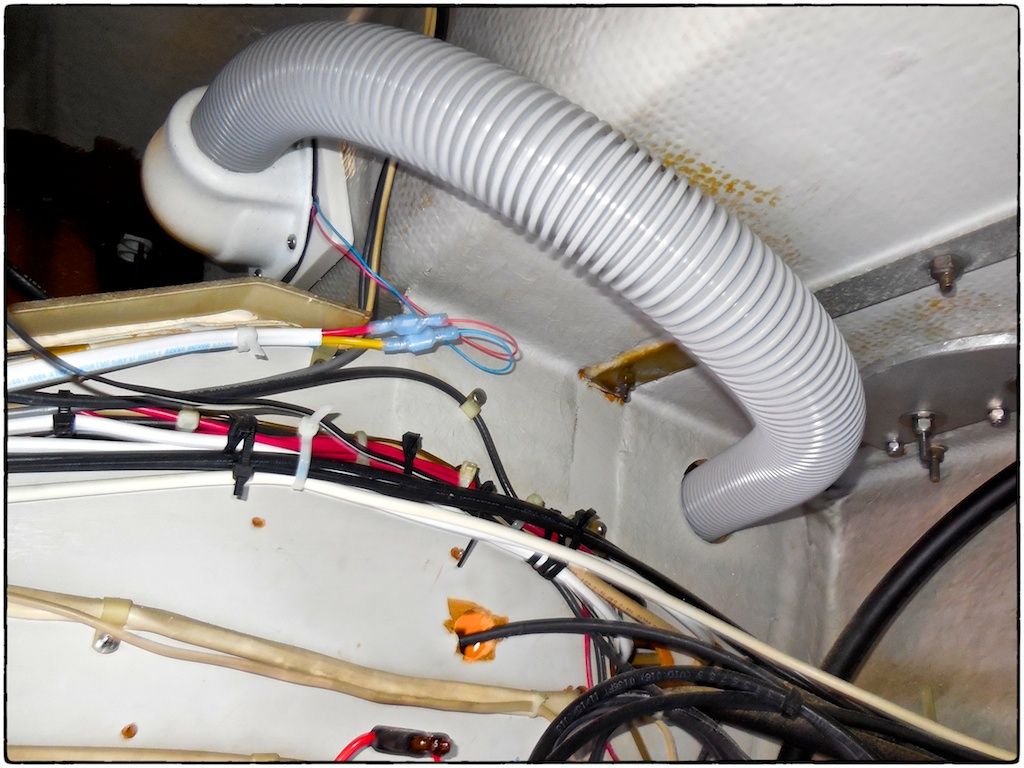
Because of its out-of-the-way location, to replace the fan in the
future, I have to remove the cowl vent on the outside which releases the
adaptor plate--it will be a two-person job! The small fan is not going to
last forever and I plan to carry a spare or two while cruising. The fan
will run continuously (24/7/365) and will draw about 5 watts of power--this is
a negligible draw on our solar panels.
Adding the Composting Medium
The medium to be added in the solid container comes in the form of a 650 gram brick (about the size and color of an actual brick). We put the coco coir brick in a bucket with 2 quarts of fresh water and kept breaking it up. We allowed it to sit overnight and, by the morning, it absorbed all the water and was ready to be put into the solids container.
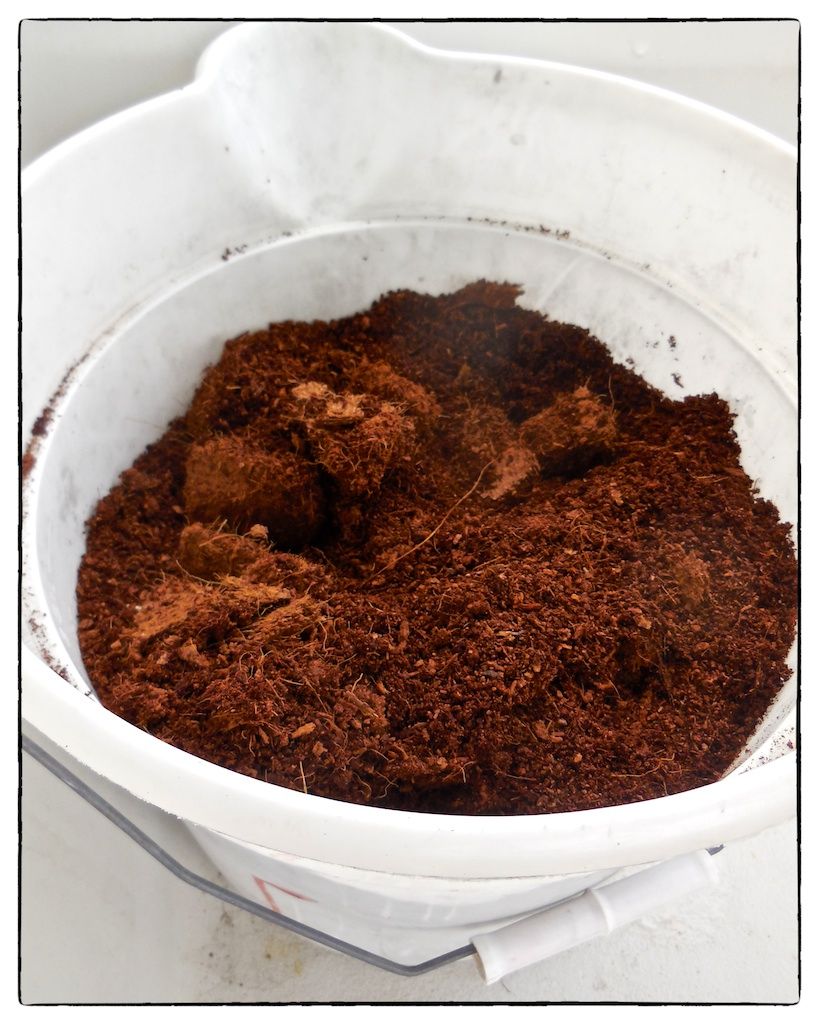 |
| The coco coir brick and two quarts of water turned into about 3/4 of a bucket of composting medium, ready to be put into the solids container. |
Summary
We are now a "zero discharge" boat and, not only environmentally responsible but, we also save money in holding tank pump out costs.
 |
| The installation was completed within two weekends, with some additional work done in the evenings during the week. Note the holes from the old hoses on the lower right side of this image--they will be addressed in our next blogpost. |
 |
| The cut down cowl vent is inconspicuous and works perfectly so far. I have some concerns about the possibility of a wave hitting the deck in rough seas, getting up inside the cowl vent and shorting out the fan but we'll see how it goes. |
We used 12.5 feet of air hose in our installation--5 feet of
hose is the length normally included with the toilet and I ordered 20 feet. The total cost of
this project was about $1200, not including eliminating the discharge seacock
and thru-hull fitting (no longer needed) during my next haul out at the end of
May.
For a boat owner contemplating a similar do-it-yourself
installation, the composting toilet installation is clearly a two-weekend job.
Because of the small spaces in which to work, the fact that a boat's structure
involves angles and curves, and a few little unexpected glitches along the
way, no boat project ever gets accomplished as quickly as one would
expect.
Our next blogpost will be about covering up the old holes used for discharge hoses for the old marine toilet. I will make a follow up blogpost on our
new composting toilet after we've used it for a couple of months.
Thanks for following our blog!
We had great luck with the airhead in our old boat. Our new lf38 still has a traditional head but I expect I'll be returning to the airhead in the next couple of seasons.
ReplyDeleteWhy wait a couple of seasons? Thanks for your comment!
ReplyDelete