Covering Old Hose Holes
--Blogpost written by Bob
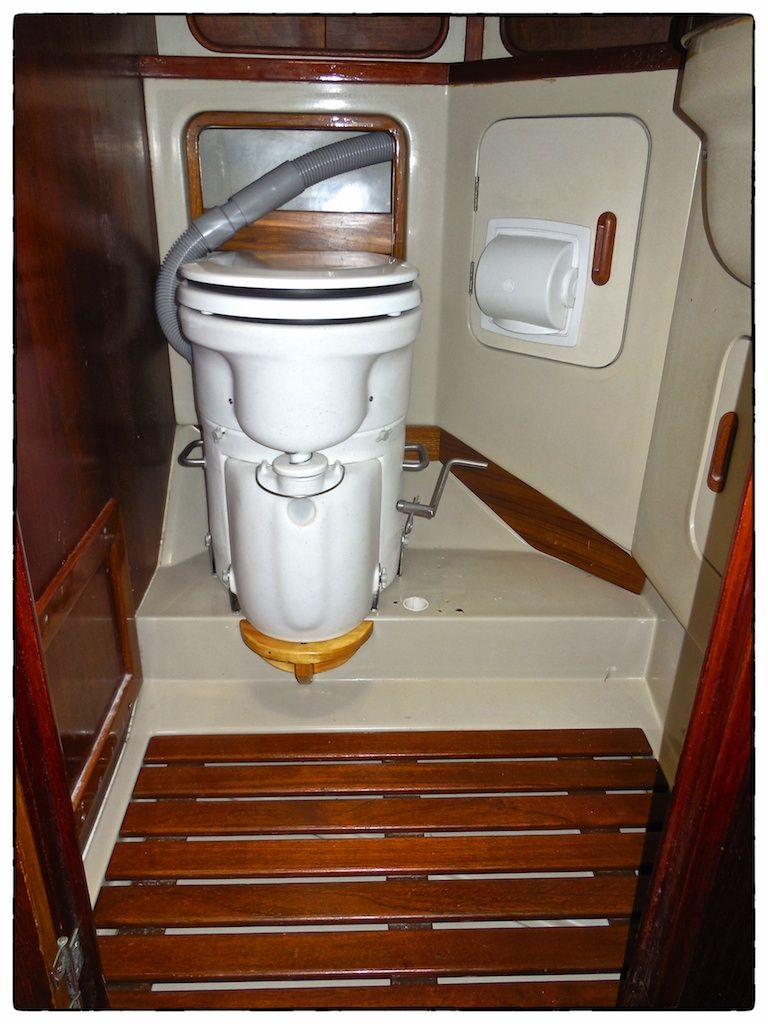
After converting to our new composting toilet, there were a number of holes left behind where the old discharge hoses passed through the fiberglass liner on their way to a siphon loop and the holding tank. The holes were unsightly to say the least. I decided to make teak-veneered panels to cover them and make the head more attractive in the process. My goal was to make the new panels seem like they have always been there.
 |
| This photograph was taken after completion of the installation of our new composting toilet. The four holes to be covered by the new teak panels can be seen on the lower right side of this image. |
Cardboard Templates
This process started with making cardboard templates for the two panels, one behind the toilet and one on the right side. I needed two panels (even though only one actually covers holes) to achieve my goal of "seeming like they were always there."
Cutting cardboard templates was a trial and error effort and taping on little pieces of cardboard to bigger ones to get a complete template of each panel.
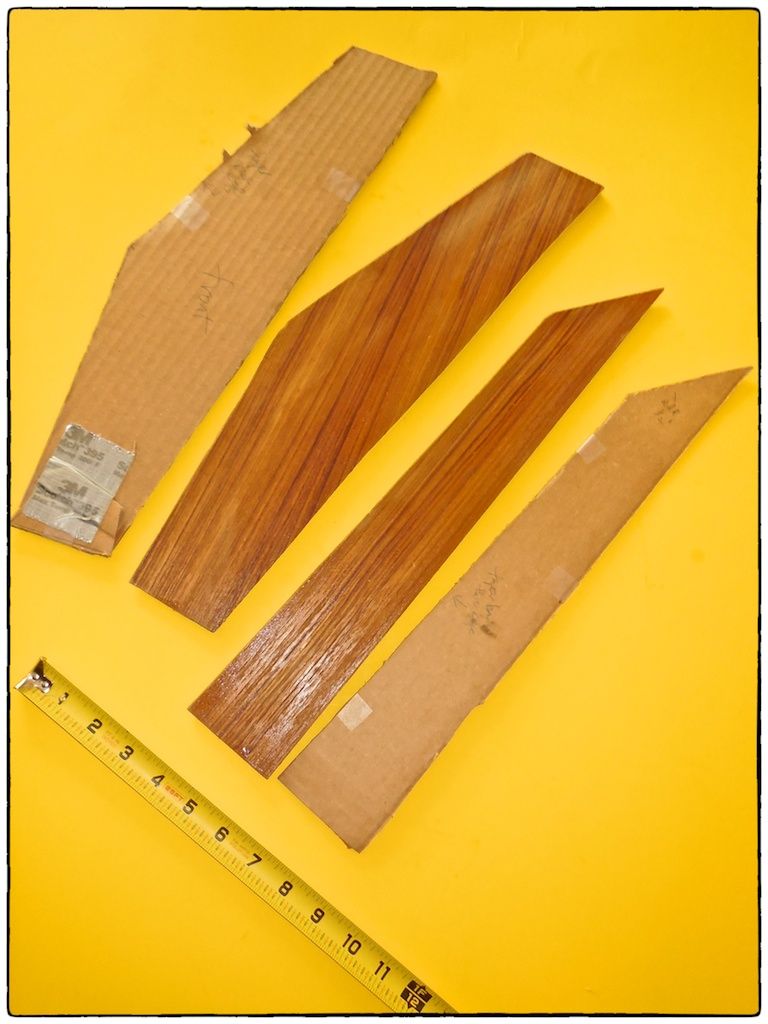 |
| The cardboard templates only get the pattern so close since there was thickness to consider in the plywood panel. The templates are shown here with the corresponding teak panels. |
Making the Teak Panels
I purchased a quarter sheet of 1/4-inch thick teak-veneered plywood to use for the panels. This material was much thinner than I am accustomed to using but in this case, thinner is better. I traced each template onto the teak veneered plywood and cut the templates with a 45-degree bevel on the backside edges--this was to accommodate the inside radius of the fiberglass liner.
After cutting, I applied the first coat of (Epiphanes Gloss) varnish to each side of both panels. After the first coat of varnish dried, I took the panels to the boat for further fitting.
Varnishing the Teak Panels
This involved an almost week-long effort of varnishing the panels (mornings and evenings) (and concurrently making minor adjustments to the size) until I had a nice smooth gloss finish. It took 7 coats, sanding between each coat to create the smooth glossy appearance I wanted.
Installing the Teak Panels
Rather than using fasteners, I decided to fasten both panels in place using thickened epoxy. I roughened the fiberglass liner area with course sandpaper and then wiped it down with acetone prior to adhering the new panels. After mixing up thickened epoxy to the consistency of chunky peanut butter, I smeared the epoxy onto the back of one panel at a time and placed them in position and then applied clamps to anything I could find to keep them in position. After several hours the epoxy cured and the clamps were removed.
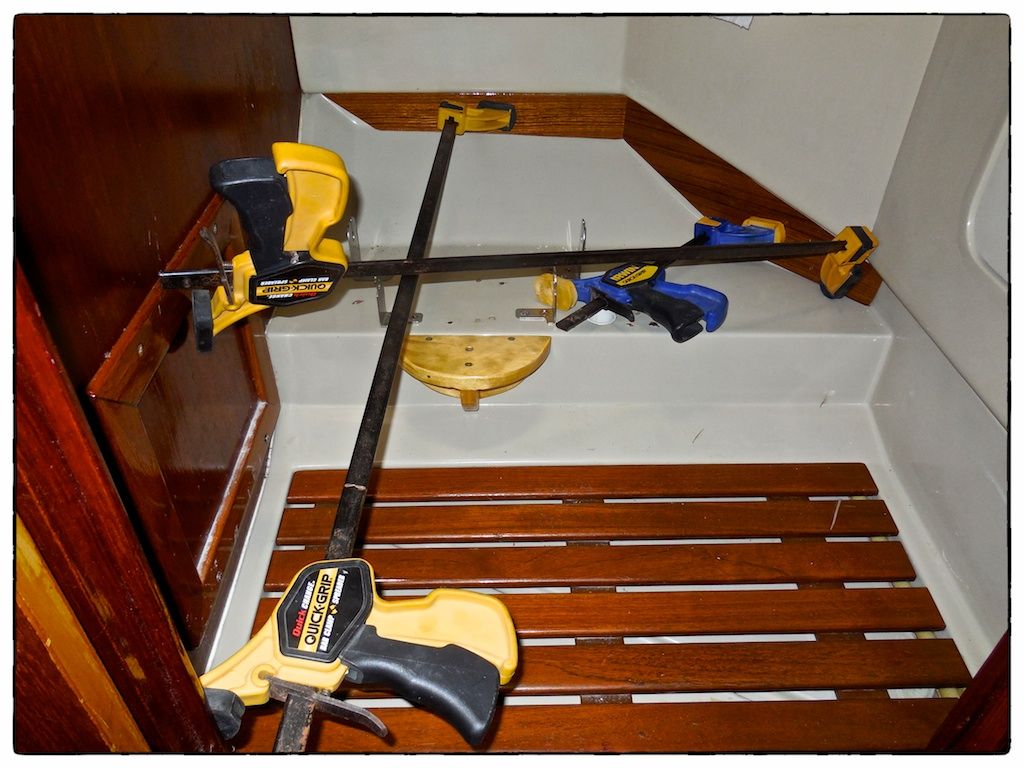 |
| This clamping system seems very complicated but it kept the new teak panels from moving while the thickened epoxy cured. |
Covering Holes Inside the Upper Cabinet
The old 1-1/2-inch diameter discharge hoses were routed up through the upper cabinet behind and to the right of the toilet where they fastened to a vented siphon loop. I plugged these holes with epoxy, starting out by placing duct tape on the underside of the holes and then building up the epoxy thickness in layers of wetted cloth and matt. The final layer of epoxy was thickened with #410 microlight filler so that it could be easily sanded.
 |
| After sanding the epoxy plugs flat, I removed the duct tape temporarily used below the holes. These holes were plugged so that small items in the cabinet wouldn't fall through the holes in to the cabinet below. |
Summary
The total cost of this project was only $38--the cost of the quarter sheet of 1/4-inch thick teak-veneered plywood and I've only used only a small portion of it for this project. All other materials came from my stockpile of boat materials.
 |
| As you can see in this photograph, the holes are now covered by the new teak panels and they look like they have always been there. |
The project took a total of about 8 to 12 hours spread over five or six days. I like small projects like this that are not very time consuming still but create a big difference in the appearance. I think I achieved my goal of having the panels look like they've always been there.
Another project has been completed! We currently have completed 175 boat projects since 2013 and we have 41 boat projects still on the list to be done and only 17 months to go until we cast off our dock lines.
Thanks for following our blog!
Excellent!
ReplyDelete