Our Dinghy Nightmare - Part 1
--Blogpost written by Bob
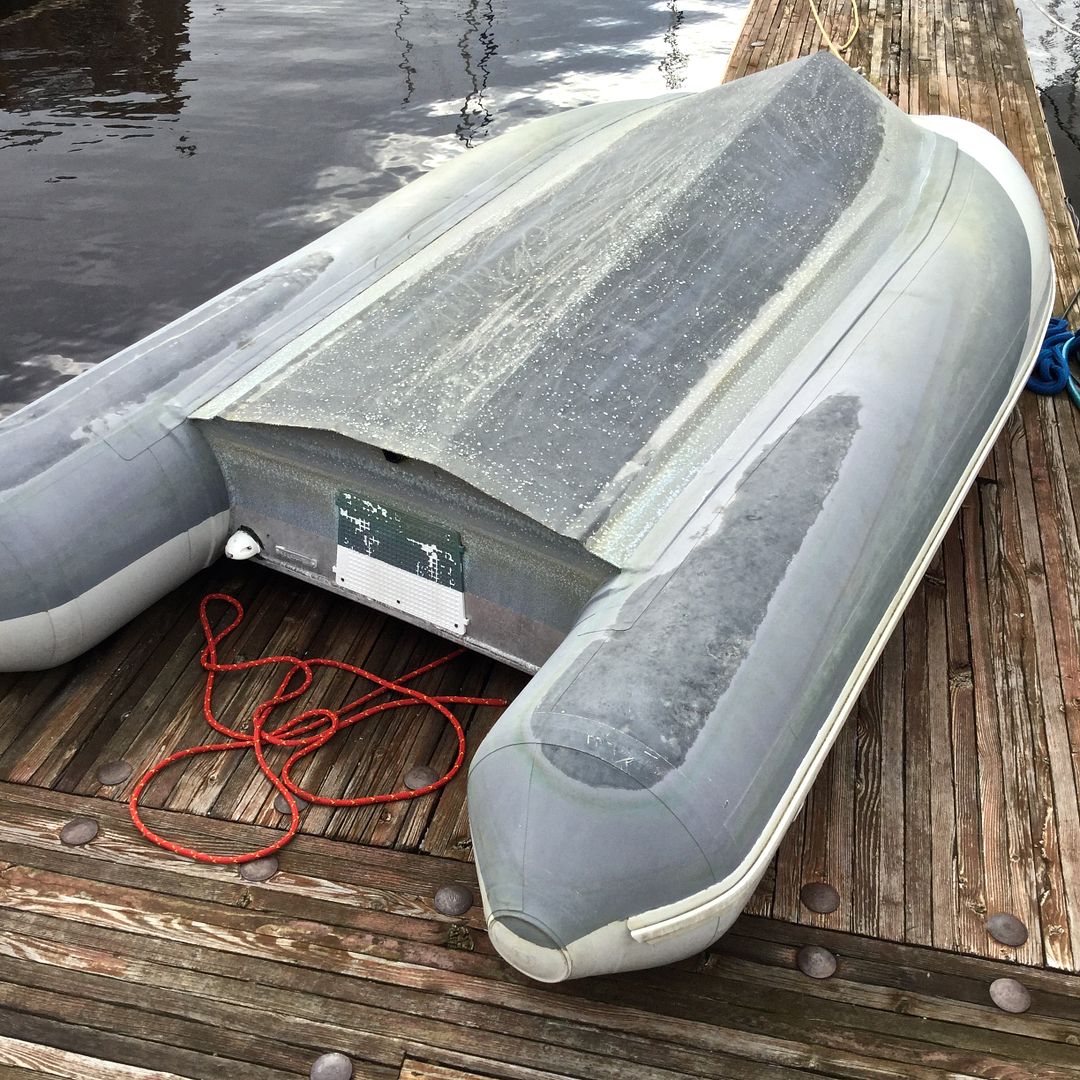
This past week, I pulled our new (aluminum) rigid hull inflatable dinghy out of the water to put the name on the transom. (We decided to name it Storm since our sailboat is named Rainy Days). As I pulled the lightweight dinghy up onto our floating dock I heard a lot of crunching sounds beneath it, like soda crackers crumbling. I turned the dinghy upside down to investigate further and found about 3/4-inch thick marine growth in the areas that were in the water. I simply couldn't believe this much marine growth could develop in one month of non-use in the dinghy's short three-month lifespan.
My first thought was how completely ineffectively the anti-fouling bottom paint performed--it was applied by the dealer from whom we bought our new dinghy and its outboard motor.
Maggie and I scraped and cleaned the thick marine growth from the bottom. It was a time-consuming and dirty job. There were a lot of small barnacles attached to the aluminum hull. At this point we went back to the dealer and discussed the problem of the complete breakdown of the anti-fouling paint.
First Meeting with the Dealer
During the first meeting with the dealer we found out that no primer was used on the aluminum and Aquagard-brand bottom paint (for inflatables) was used on the aluminum hull and hypalon pontoons. At this point in time we were all narrowly focused on fixing the problem.
The course of action we developed together was to sand the aluminum bottom with 80-grit sandpaper to roughen the surface before re-painting. Then, apply two coats of zinc phosphate primer on the wetted aluminum surfaces followed by five coats of Interlux Primocon, an underwater primer. The final anti-fouling would consist of 2 or 3 coats of Petit's Ultimate Eco, a water-based copper-free bottom paint that could be safely used on both the primed aluminum hull and the hypalon pontoons.
The dealer credited us with the original value of the bottom paint and application services (about $500).
Back at the Marina
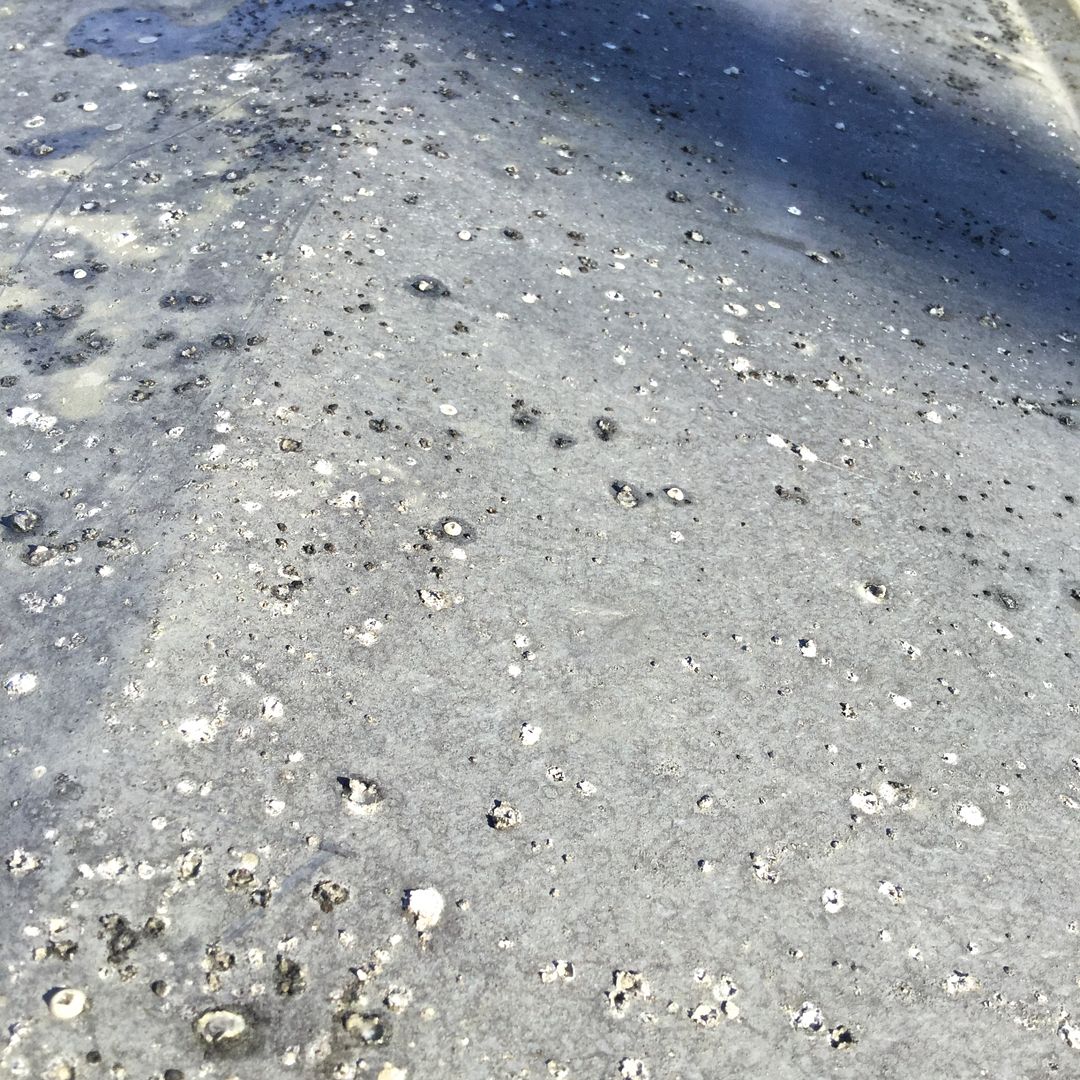
Even before sanding, it became obvious that the underwater aluminum surfaces were badly pitted. The pits appeared to be about 1/8-inch diameter and 1/32-inch deep and there was about one pit in every square inch of wetted surface.
 |
| This photograph shows the overall extent of the pitting--each white spot represents an individual pit. |
| The pits are obvious on the transom surfaces that are normally below the waterline. |
 |
| This is a view of the pitting before sanding was performed, You can see the remains of some small barnacles. |
We decided to apply the two coats of zinc phosphate primer and then, to fill the pits with thickened epoxy to make the surface smooth. (We had to use spray cans for the zinc phosphate since it was the only form in which we could find it--it took four spray cans to get 2 coats of coverage.). We applied the thickened epoxy and allowed it to cure overnight before proceeding.
We applied the Primocon to the underwater aluminum surfaces using a small roller, allowing 3 hours of drying time between coats. We applied a total of five coats as recommended by the paint manufacturer.
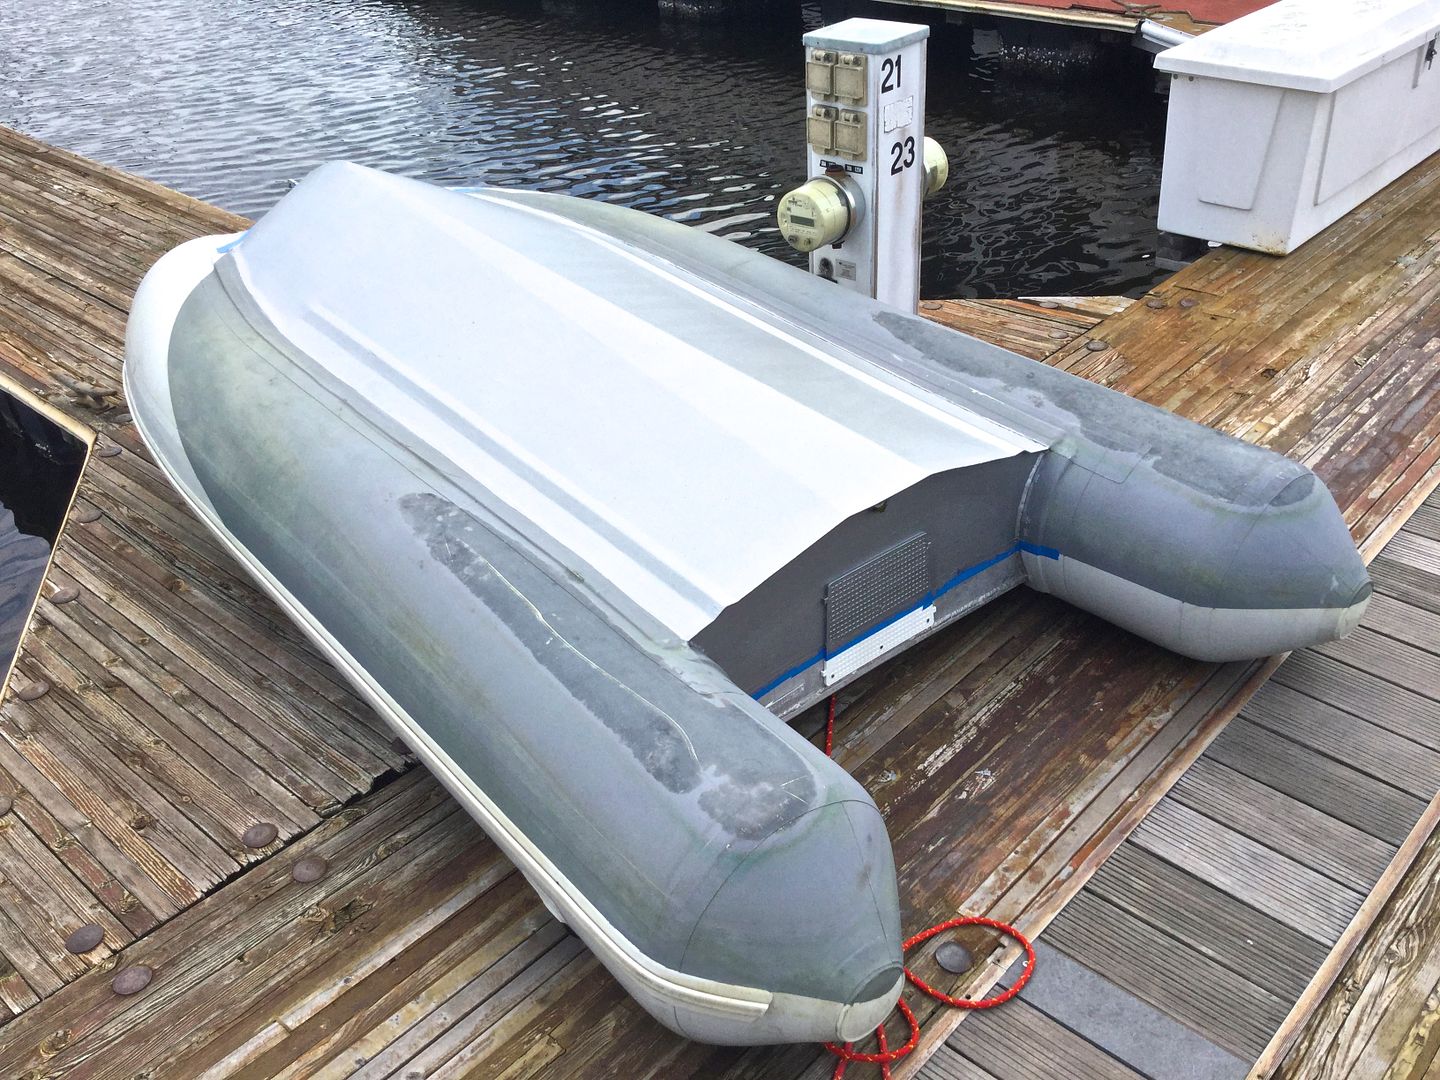 |
| At this point the aluminum hull has 2 coats of zinc phosphate plus 5 coats of Interlux Primocon underwater primer. Incidentally, the dark gray stains on the aft sections of the pontoons are aluminum oxide deposited by transmission from the aluminum hull. |
Upon Further Review
I had never seen pitting like I saw on the wetted surfaces of the aluminum hull. It kept nagging at me throughout the re-painting process. I research the chemical composition of the original Aquagard paint by looking at the MSDS sheets published by the paint manufacturer. I found out that the Aquagard paint used by the dealer on both the aluminum hull and the hypalon pontoons contained between 26 and 27 percent cuprous oxide! Every marine professional should know never to use a copper-bearing paint directly on an aluminum hull.
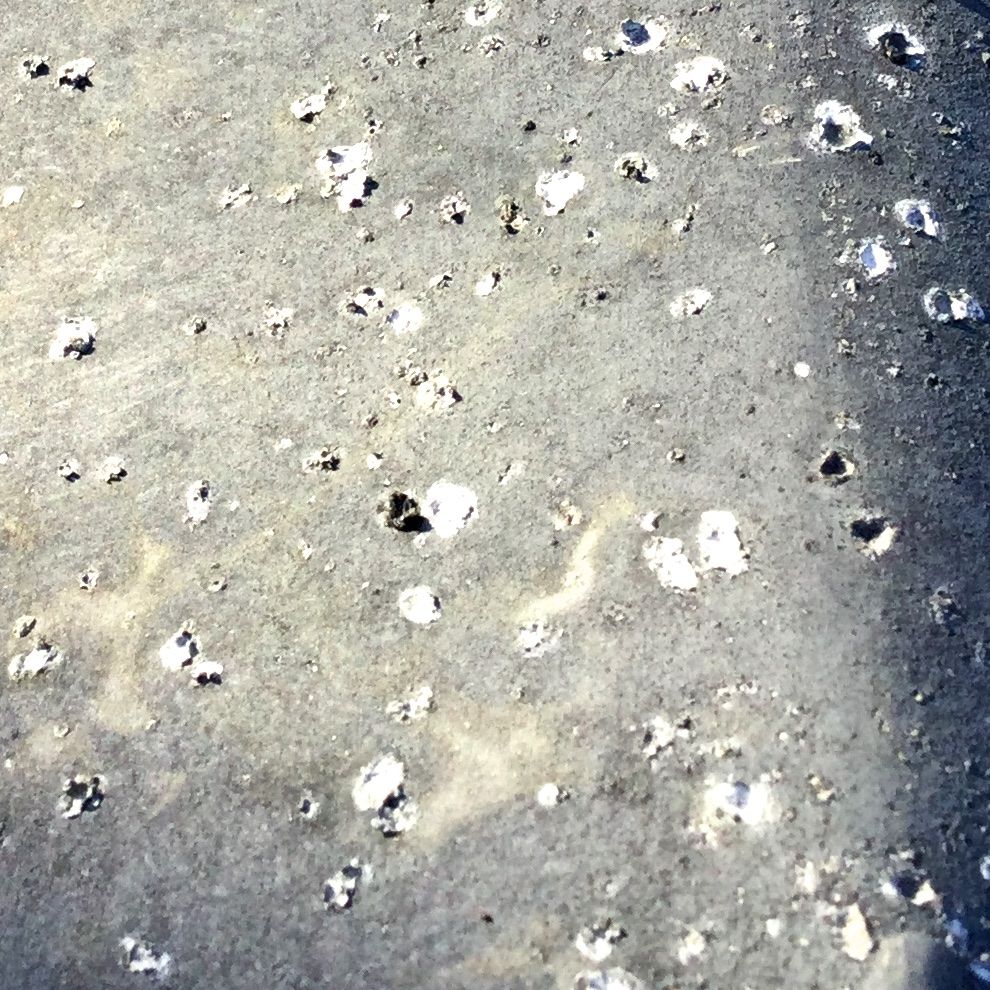 |
| A close up view of the pitting on the aluminum hull |
Now, I had a different problem. My efforts to this point did not include removing all the original paint (since I was very concerned about using mechanical and/or chemical means of removal in vicinity of the attachment of the hypalon tubes) and my current re-painting efforts were encapsulating the copper (contained in the original paint) still attached to the aluminum hull.
Summary
This blogpost ends as we again approach the dealer with the continuing problem of copper in contact with the aluminum hull. Can we count on the new primer system to keep out the salt water which provides the electrolyte for the galvanic corrosion? Or, is our 3-month old dinghy completely ruined? Stay tuned...
Thanks for following our blog!
No comments:
Post a Comment