Changing Fresh Water Inlet Hoses
--Blogpost written by Bob
This was a single (not simple) long weekend project for the two of us. We have three fresh water tanks on board S/V Rainy Days (totaling 104 gallons)--each tank has its own deck fill connection and inlet hose. I believe all hoses were 31 years old but a portion of one hose looked like it had been replaced maybe 10 to 15 years ago. On our sailboat, the hose used for the fresh water inlets and the bilge discharge looks like the same material--it appears to be a wire-reinforced vinyl hose that is opaque and cream-colored, like the following image.
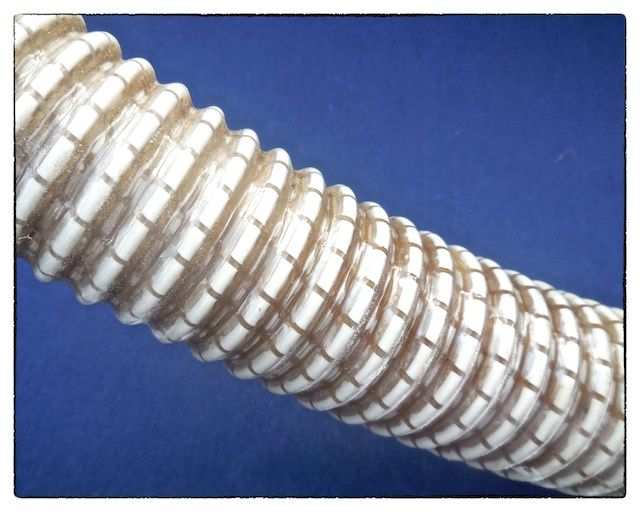 |
| The old hose looked like the above image on the outside and it has spiral-wound wire reinforcement. |
 |
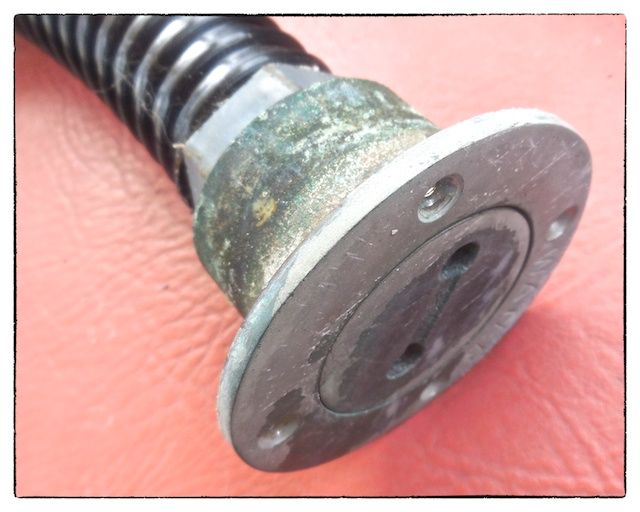
| Looking into the end of one of the old hoses we removed, you can see where the wire reinforcement is exposed and the rust stains that developed inside the 31-year old hose. |
The hose for the port tank was the worst for some reason. This hose had a low spot just before entering the tank and at this spot the inside of the hose was the color of rust and at least one area of the wire reinforcement was exposed and rusted. I'm sure this rusted area tainted our water supply to some extent.
While the new hose does not contain wire reinforcement, I, nevertheless, eliminated any low spots in the inlet hoses where water and sediments could accumulate. I should point out that we have a pretty heavy-duty filter after the fresh water pump which would certainly remove any sediment and a lot more, hopefully.
In addition to changing out the inlet hoses, this project involved removing each deck fill connection, digging out the balsa core around the fitting and filling the area with epoxy.
 |
| After removing the deck fitting and the old hose, I taped off all around the remaining hole and dug out the balsa core between the two layers of deck for a depth of about 3/4-inch all around. After applying duct tape on the underside of the deck, I filled this cavity with thickened epoxy. The West System epoxy (using fast cure hardener) was thickened with #407 low-density filler. |
Even though the mounting screws for the deck fittings only penetrated the upper layer of the deck, there were no signs of leakage of rain water into the balsa core. By filling the cavity around the fitting when we reinstalled it, we assured that there would be no leakage in the future.
 |
| Even though not completely necessary, I allowed the thickened epoxy to cure overnight. After grinding off the excess epoxy with a Dremel tool and a sanding cylinder, I applied a ring of masking tape at the diameter of the deck fill fitting in preparation for the silicone sealant. |
 |
| It seemed to be easier to attach the new hose to the deck fitting and insert the hose from the deck down into the boat. We still had to fasten the hose clamps from inside the boat. The new hose is clear vinyl with a spiral reinforcement of some type of vinyl tensile member. |
 |
| As we inserted the screws in the deck fitting, the silicone we applied to the back of the fitting flange oozed out over the green masking tape. The process of applying masking tape in this way really saved on clean up time. |
While we were in the mode of fixing deck fill connections, we also removed the diesel inlet hose and it's deck fill connection. We dug out the balsa core and replaced about 3/4-inch depth with thickened epoxy in the same manner as we did the water inlet connections. For the diesel fill connection, we did not have to change the hose since it was changed out last winter when the fuel tank was replaced.
 |
| The only signs of any difference after this project was completed is the new hoses that can be seen in a few spots in the boat--this one is in the v-berth. |
This project made absolutely no difference in the appearance or function of the boat but it will eliminate some rust in our fresh water system, prevent a possible hose failure in the middle of nowhere, and it will make me sleep better knowing that I will not have wet balsa core due to rainwater leaks at the fill connections at any time in the future.
Next up will be the installation of our helm-mounted VHF radio.
Thanks for following our blog!
I simply wished to thank you so much yet again. I do not know the things I would've tried without the secrets discussed by you directly on this concern. It was actually the frustrating difficulty in my opinion, nevertheless looking at your skilled style you handled it took me to jump with gladness. I am grateful for the assistance and in addition hope that you comprehend what an amazing job you're accomplishing teaching people today with the aid of your websites. Probably you've never encountered any of us.
ReplyDeletenursery blackout curtains