Adding More Semi-Flexible Solar Panels
--Blogpost written by Bob
We have been using our two 100-watt (Solbian-brand) solar panels for our energy needs during most of 2014 and into 2015, including during our month-long sailing trip around the Chesapeake Bay. During the summer, the 200 watts performed well and kept up with the demands of our refrigeration. As the days became shorter in the fall, I noticed that the 200 watts was no longer sufficient. Since our future cruising in the Bahamas will be mostly during times when daylight hours are shorter, it is clear now that we will need another 100 watts of solar panels.
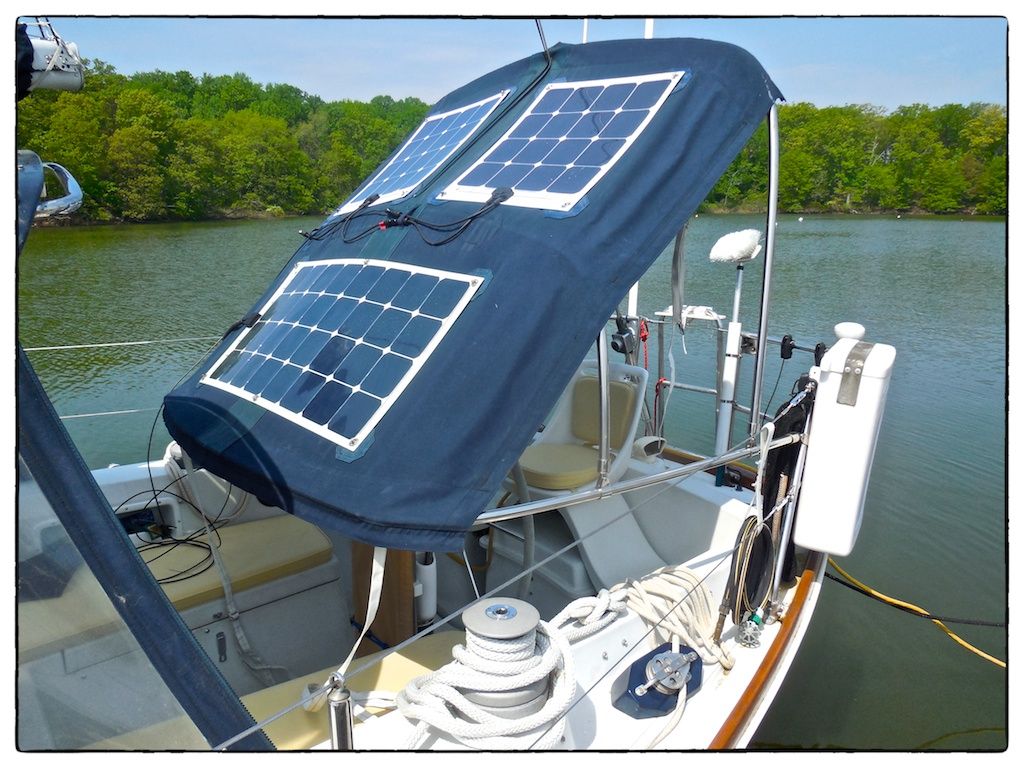
The most convenient place to add solar capacity is on the aft section of our bimini (the dark navy blue canvas awning that covers the cockpit).
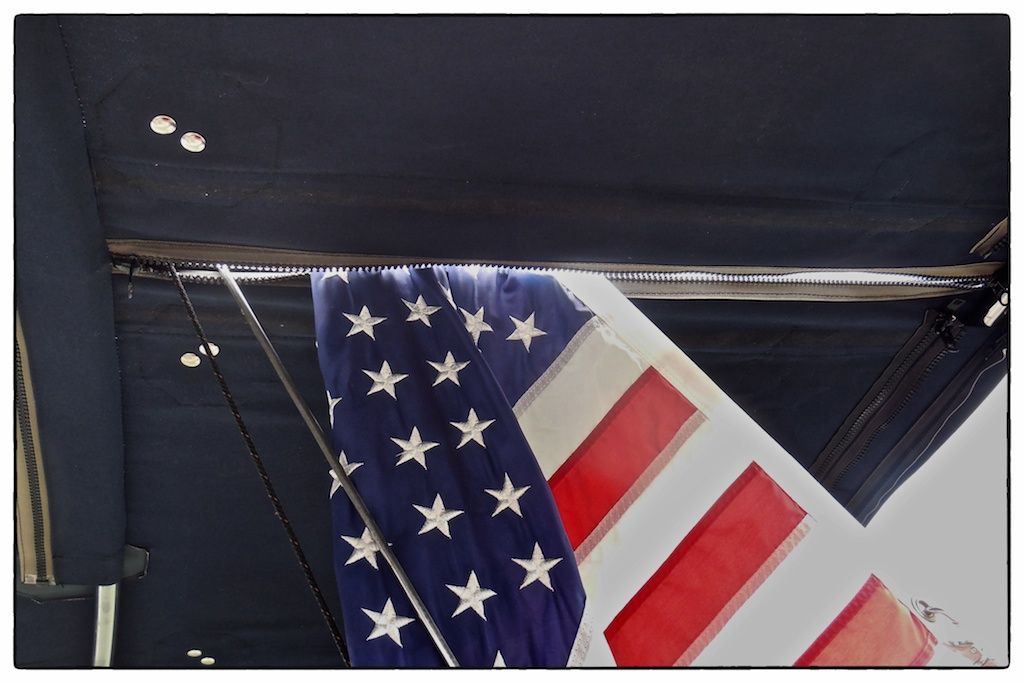 |
| The backstay comes through the aft section of the bimini and a zipper is used on the boat's centerline to accommodate bimini removal. We frequently open the zipper to hoist our American flag up the flag halyard mounted on the backstay. |
To avoid blocking the zipper opening, we decided to mount a 50-watt semi-flexible solar panel on each side of the zipper and wire them in series--this makes them act as a single panel like the other two (100-watt) solar panels onboard. We recently purchased the two new 50-watt Solbian semi-flexible solar panels from Coastal Climate Control, taking advantage of a spring boat show discount.
We've got a pretty good system worked out for attaching the solar panels to the bimini using twist lock fasteners and flexible mounts on one end. (Refer to our blogpost on Installing Semi-Flexible Solar Panels dated April 6, 2014. By the way, this is our most popular blogpost to date.) Since these new panels are smaller than our previous installation, we only need attachment points at the four corners of each panel, instead of six on the larger panels.
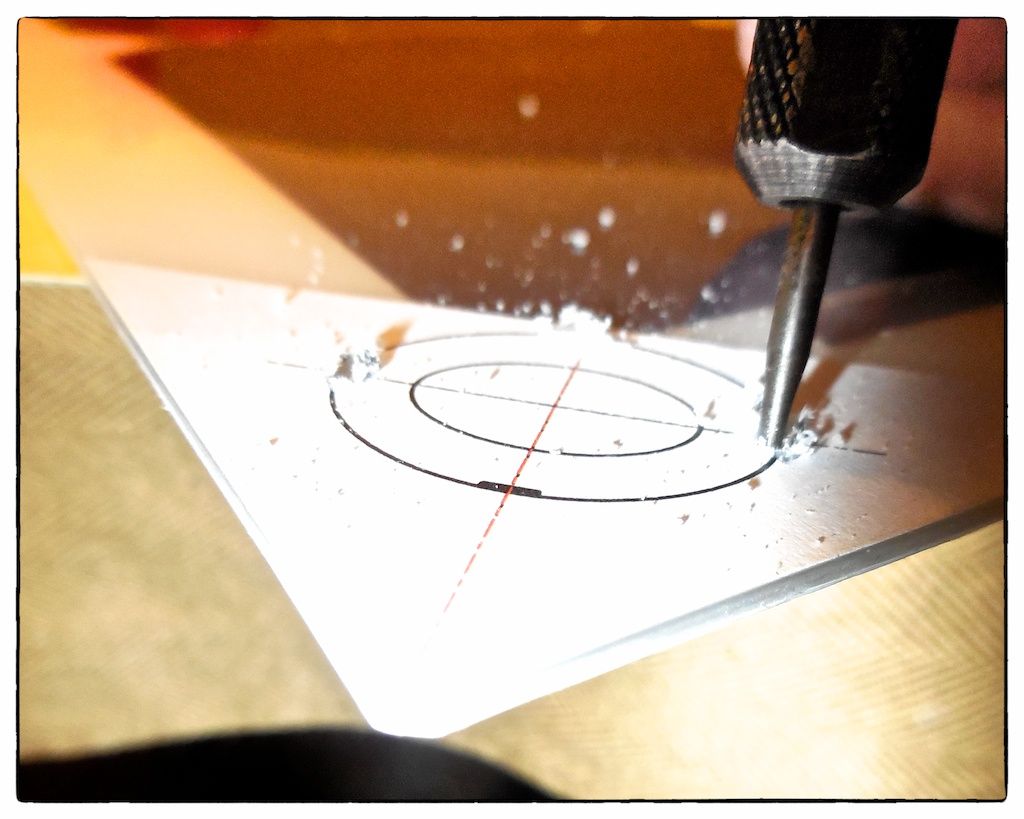 |
| I used the same templates as I used previously on our 100-watt panels. I simply printed out new ones and adhered them in place. The slots for the fasteners prongs were cut with an engraving tool in a Dremel tool. |
 |
| The first fastener was installed with seven more to go. |
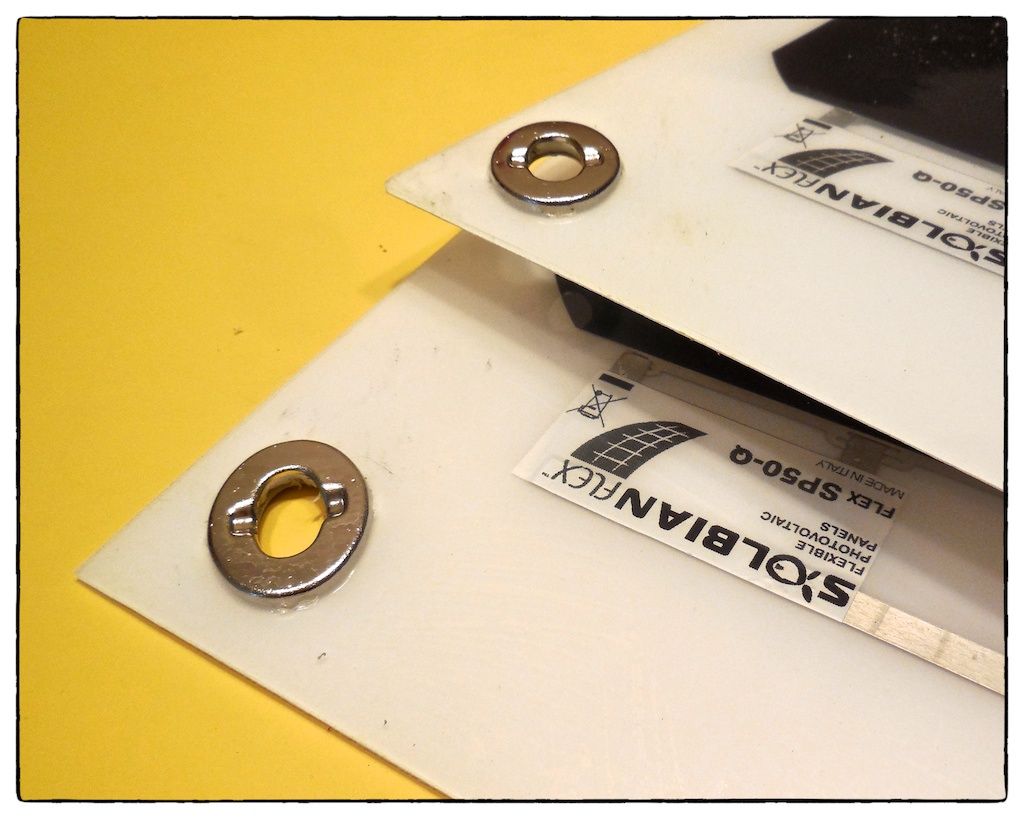 |
| Finally, all eight fasteners were installed--it took me about 1/1/2 hours to install four fasteners in each of two panels for a total of 3 hours. |
Because there are more cable connections using the two (50-watt) panels we had two belt loops installed on the top of the bimini to retain the cables (between the two panels) during high winds.
 |
| To install the solar panels on the bimini, we first have to mount the bimini on its frames. Then we tilt the assembled bimini forward so that we can reach the solar panel mounting locations from the cockpit. |
 |
| Once the three solar panels are mounted on the tilted bimini, we raise the bimini into its normal position and hook up the cables. |
 |
| We can now generate 300 watts of power during most of the daytime hours. The top of our bimini is seldom shaded from the sun and generate power even on cloudy days. |
The two new 50-watt solar panels are connected in series and then to a dedicated (Genasun GV-10) voltage controller before it feeds into our electrical power system. The two new solar panels, the cables, voltage controller, and bimini modifications altogether cost approximately $1300--this was one of our more costly projects and it took less than one day to install. This should provide all the solar energy we need while cruising.
Thanks for following our blog!
Recently, our refrigerator stopped working. I thought it was due to the slow freon leak that we haven't been able to find. When I opened up the compressor compartment, I noticed that the fan that cools the compressor was not operating. I just happened to switch the battery bank and it started up again. In checking further, my battery monitor (which I don't have a lot of faith in) was showing one battery bank as dead. I assumed that it was my bank number "2" which has the oldest batteries. I carted the heavy AGM batteries off the Steven's Battery Warehouse in Annapolis for testing--they tested fine, so I reinstalled them. As I began to look at battery bank #1, I noticed that none of the lights on the voltage controllers for the solar panels were lit. The light goes out when the connection to the battery is lost. The problem soon surfaced as a blown fuse between the voltage controllers and the batteries. I forgot to increase the size of the fuse to accommodate the additional 100 watts of solar power I just added. I changed the fuse to a 30-amp rated fuse and everything works fine.
Addendum - May 18
Recently, our refrigerator stopped working. I thought it was due to the slow freon leak that we haven't been able to find. When I opened up the compressor compartment, I noticed that the fan that cools the compressor was not operating. I just happened to switch the battery bank and it started up again. In checking further, my battery monitor (which I don't have a lot of faith in) was showing one battery bank as dead. I assumed that it was my bank number "2" which has the oldest batteries. I carted the heavy AGM batteries off the Steven's Battery Warehouse in Annapolis for testing--they tested fine, so I reinstalled them. As I began to look at battery bank #1, I noticed that none of the lights on the voltage controllers for the solar panels were lit. The light goes out when the connection to the battery is lost. The problem soon surfaced as a blown fuse between the voltage controllers and the batteries. I forgot to increase the size of the fuse to accommodate the additional 100 watts of solar power I just added. I changed the fuse to a 30-amp rated fuse and everything works fine.
Bob -- I hope you meant that you connected the panels in parallel, NOT series; that would double the voltage, and probably kill your controller.
ReplyDelete-- Fred
Fred:
ReplyDeleteThe Solbian SP-50-Q is rated at 9 volts--so, they must be hooked in series to get 18 volts so that in the end, after the controller, we can get 12 volts. The rating of the 50 watt panel is different that the other 100 watt panels we have onboard.
Bob
Thank you Robert for sharing your installation - it's a beautiful job, well done, both on the installation and the thorough blog.
ReplyDeleteAhhh, got it! I was thinking they'd be nominal 20V open-output voltage like most of the larger panels. Thanks for the clarification. And nice job on the install!
ReplyDelete-- Fred
Really great thought.. and thanks for sharing your idea's with us. The information you shared is really useful keep on updating. Try to use solar cells of monocrystalline which gives more output for more info visit us @ mbc-solar.com
ReplyDeletemonocrystalline solar cells
it is very good thought!The article is really informative.thank you for sharing such a nice article...
ReplyDeletesolar leads
I hope you meant that you connected the panels in parallel, NOT series; that would double the voltage, and probably kill your controller.
ReplyDeletesolar leads
This comment has been removed by a blog administrator.
ReplyDeleteThis comment has been removed by a blog administrator.
ReplyDeleteThis comment has been removed by a blog administrator.
ReplyDelete