Jib Sheet Turning Block Bases
Part 1: Construction
--Blog post written by Bob
I recently noticed that both my jib sheet turning block bases were splitting and allowing water to penetrate the wood interior. Another unplanned boat project and just before the start of sailing season!
 |
| I made these jib sheet turning block bases about 20 years ago by shaping a huge piece of wood and then covering it with fiberglass. I painted the fiberglass to match the deck color. |
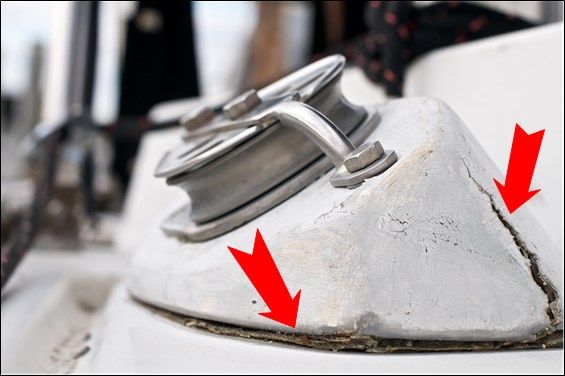 |
| I recently noticed a crack in the fiberglass cover (arrow at right) and then, after looking more closely, noticed that they were also cracked at the base where they mount to the deck (arrow in center). |
I considered several alternatives to fix this problem:
(1) removing the turning blocks and making a repair
(2) making new turning block bases of a different design from stainless steel
(3) making new turning block bases of the same design completely from fiberglass
After several failed attempts to come up with an equally elegant design in stainless steel and realizing the the wood would take a very long time to dry out so that I could make an acceptable repair, I was left with the most viable remaining alternative--making new ones from fiberglass.
I began this project by removing the old turning block bases and making detailed drawings of their shape. I came up with an idea where I could make the external shell of the turning block base from carefully cut pieces of 1/4-inch thick fiberglass sheet and then fill the inside with fiberglass.
I ordered a 24-inch x 24-inch piece of 1/4-inch thick fiberglass sheet from Grainger--it arrived in just a few days.
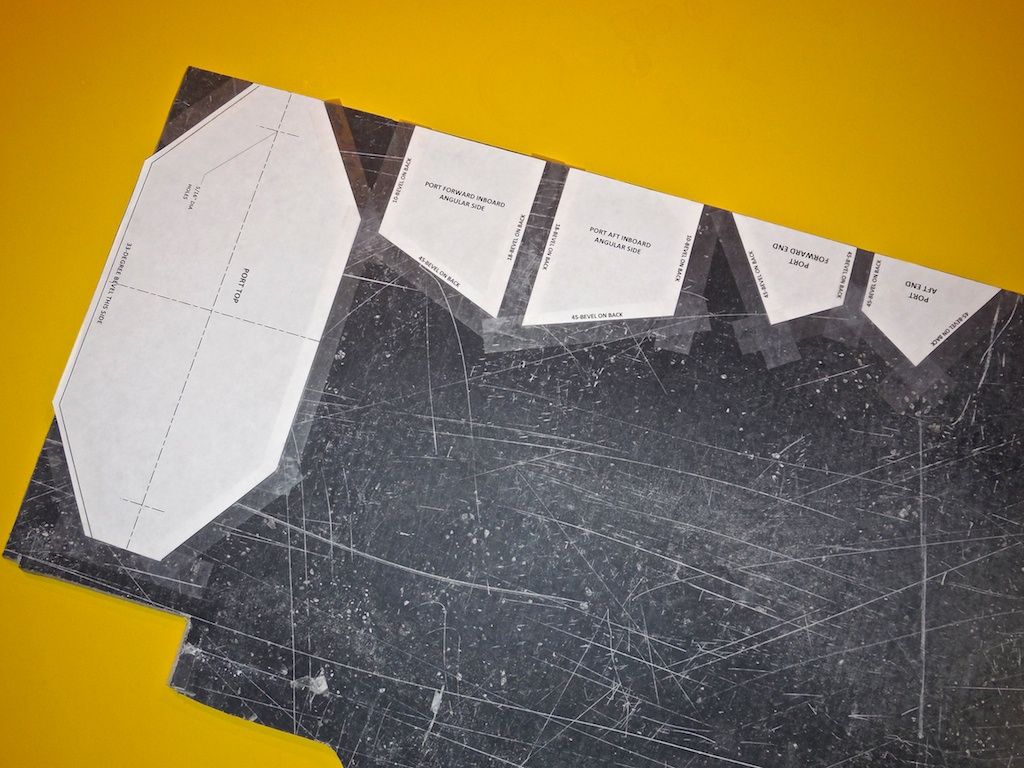 |
| I made paper templates for each piece of fiberglass sheet needed to make the shell (outermost surface). I adhered the paper templates around the perimeter of the fiberglass sheet to minimize cutting time. |
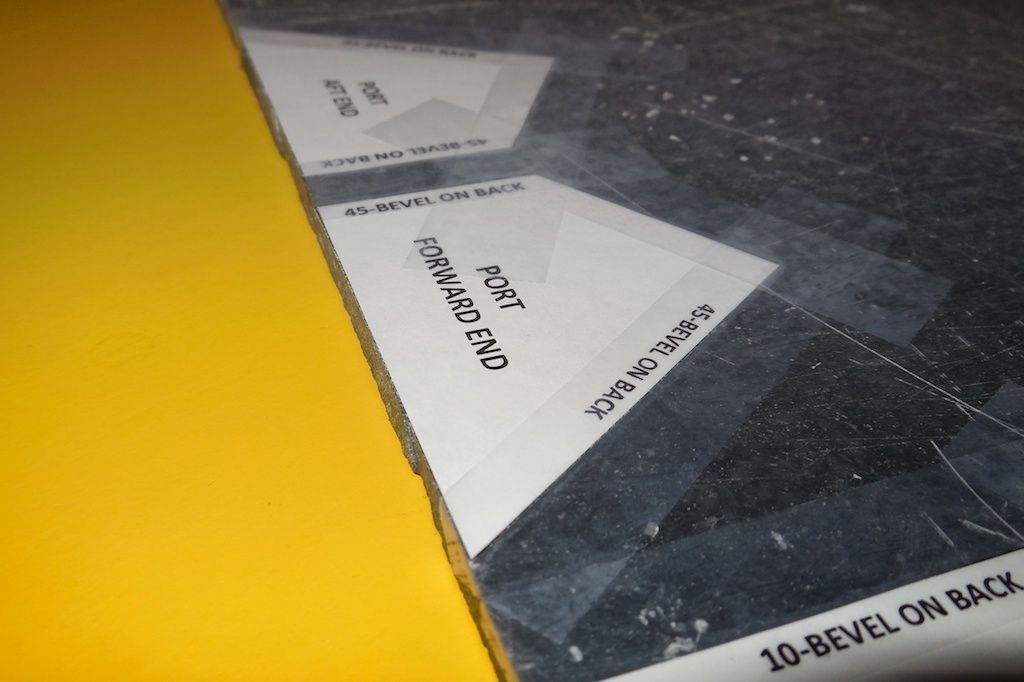 |
| Different bevels were needed on the sides of each piece to properly mate with adjoining pieces at assembly. The amount of bevel needed was marked on the side of each piece. |
 |
| I used my Bosch jig saw to cut the fiberglass sheet and this allowed me to easily change the angle of the bevel from piece to piece. I used fine-tooth blades intended for cutting metal and I went through a lot of blades--10 for the entire job of cutting 18 pieces. |
 |
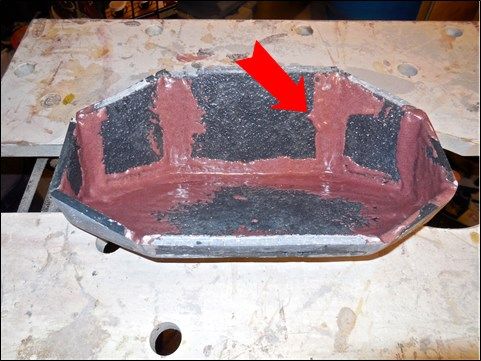
| I made an assembly jig (shown above) to make sure that the pieces were assembled consistently from one turning base to the other. The first 5 pieces were assembled in this jig with the shell being right side up. The remainder of the construction was done outside the jig and with the base situated upside down. |
 |
| As I assembled the pieces of the outside shell, I "tacked" the pieces together using 5-minute epoxy (dark areas in above photo and at red arrow). The temporary "tacking" was intended to hold the pieces together until more substantial reinforcement was added to the inside. |
 |
| Thickened epoxy was applied to the junctions on all the pieces on the inside of the shell. This provided substantial strength to the joints for handling until the internal fiberglass was installed. From this point on, most work was done with the shell position upside down. |
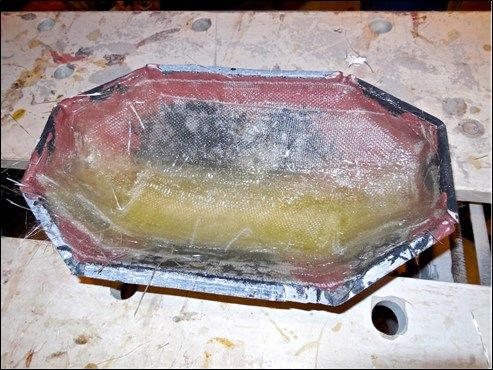 |
| This photo shows the beginning of the fiberglass layup inside the shell. I alternated layers of fiberglass cloth, 1-1/2-ounce mat, and 24-ounce woven roving until the entire shell was filled with layered fiberglass. |
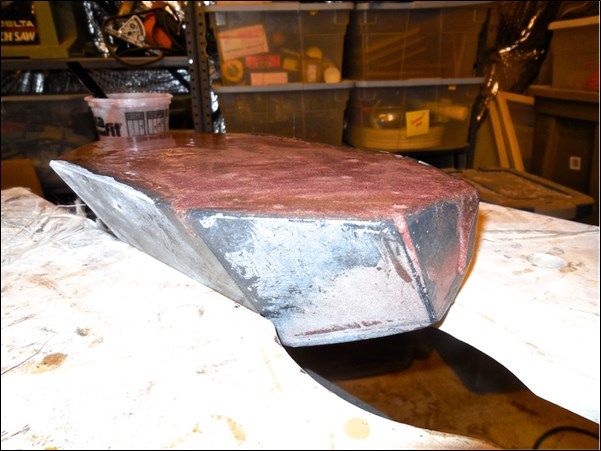 |
| After all the layers of fiberglass, a final layer of epoxy was "floated" to obtain a nice flat surface. This last layer was slightly thickened with #407 low-density fairing filler (the reason for the mahogany color). |
 |
| I constructed a temporary drilling jig that holds the turning block base perpendicular to the drill bit. |
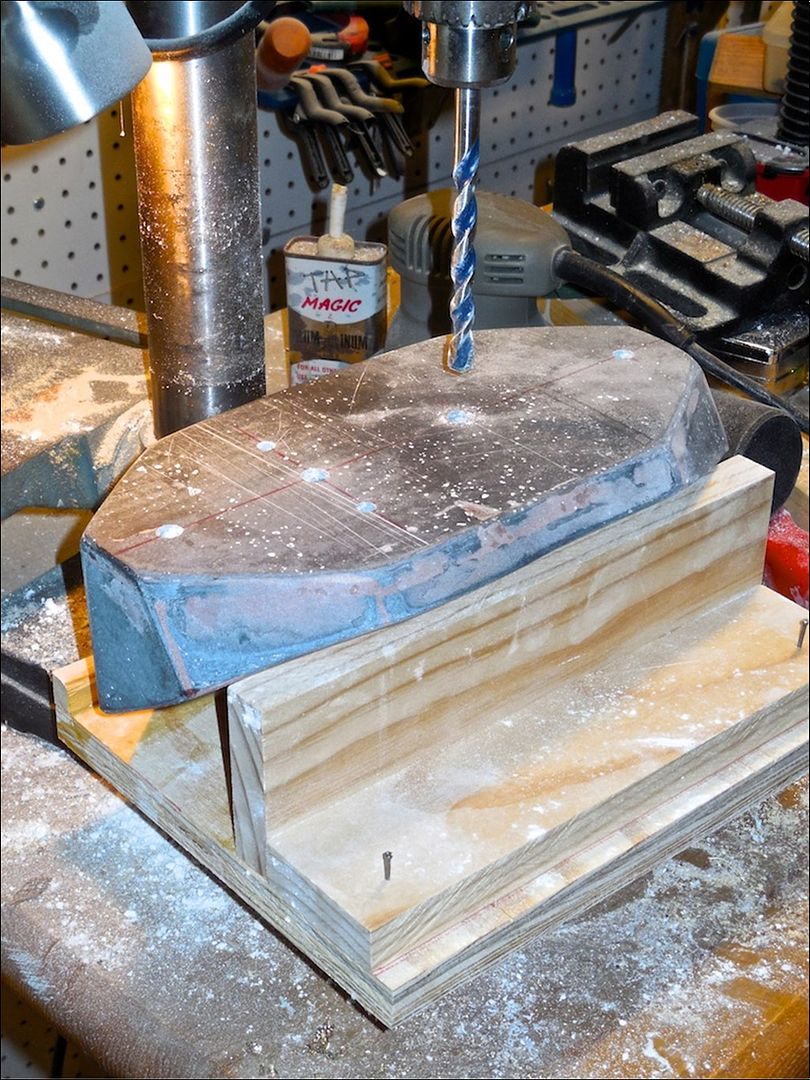 |
| All 5 mounting holes were drilled in each turning block base using 6-inch long masonry bits. |
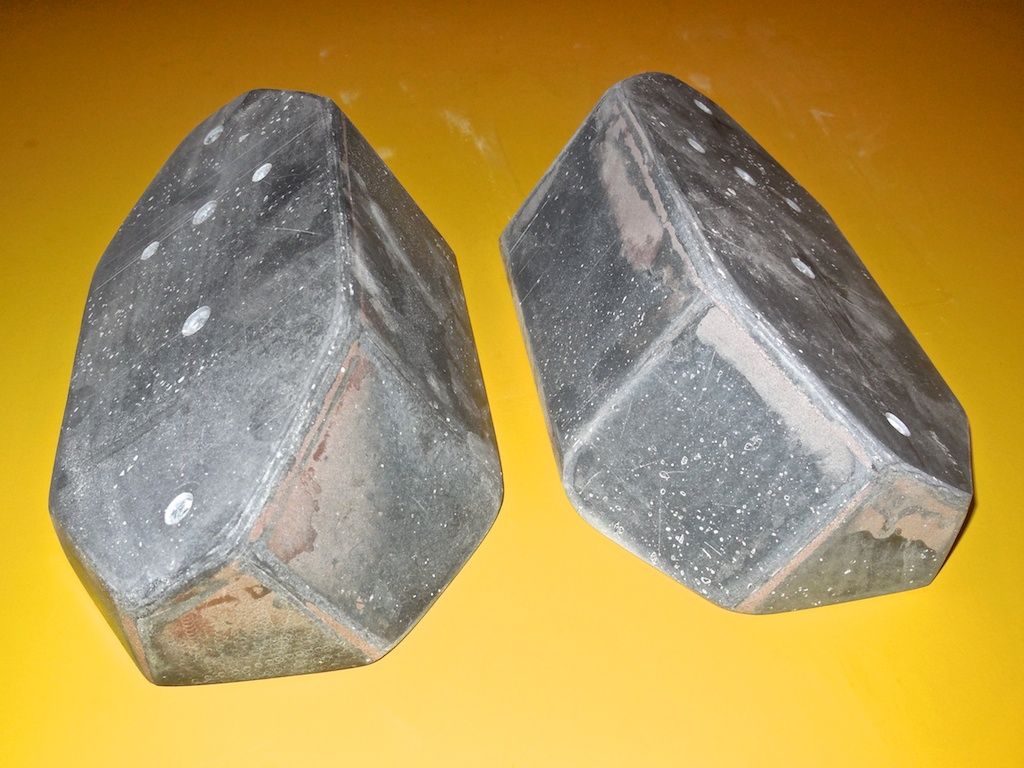 |
| The construction of two new turning blocks is complete but a lot of filling, sanding, and painting remains to be done. |
This concludes the construction of the new fiberglass turning block bases (Part 1). Finishing the exterior and installation on the boat will be covered in Part 2 (a future blog post). To this point the cost of this project is $550 (all materials for two bases).
Thanks for following our blog!
No comments:
Post a Comment