Capturing Oil & New Lifeline Inserts
--Blogpost written by Bob
Capturing Oil Seepage from Breather Pipe
At the suggestion of the diesel mechanic in Crisfield who replaced my starter and solenoid, I added a small project to my list to capture the engine oil seepage from the breather pipe on the engine. Previously, the hose for the breather pipe was about 6 inches long and it barely got to the edge of the engine. Oil seepage from this vent hose would dribble down one side of the engine and eventually make its way to the bilge. In addition to creating an oily bilge content, I believe it also created some additional diesel smell while the engine was running.
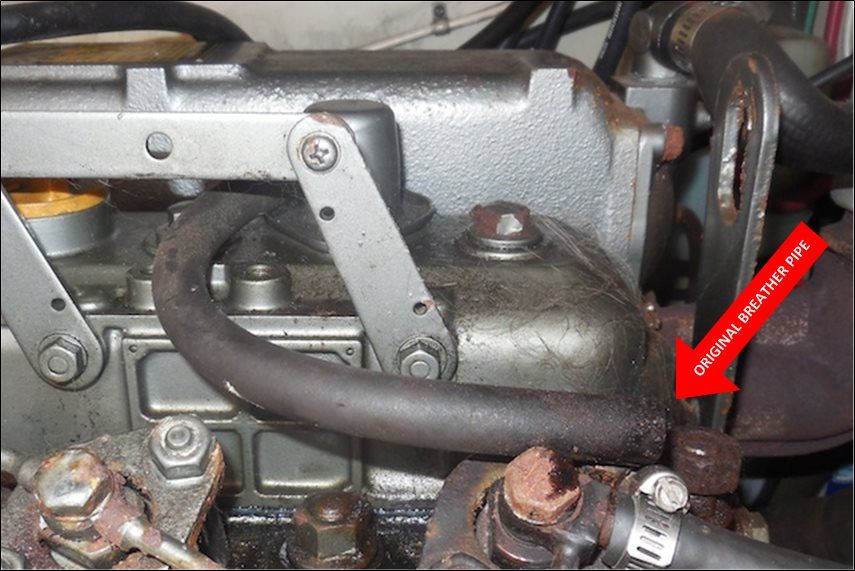 |
| I removed the original 6-inch long hose constituting the breather pipe--it was 3/8-inch diameter fuel line hose. There was no hose clamp on the original connection to the crankcase vent but it fit very tightly--I had to cut it off for removal. |
I installed a tall quart-size plastic bottle near the forward engine mount using two large cable ties through screwed-on cable clamps. I kept the cable ties a little loose so that I could occasionally remove the bottle (by simply lifting it vertically) and dispose of the oily contents. I ran a new 3/8-inch diameter fuel line hose from the vent and into the open top of the bottle. (I don't ever expect enough seepage to fill a quart-size bottle--I made it this big so the breather pipe hose won't easily slip out of the bottle while underway.)
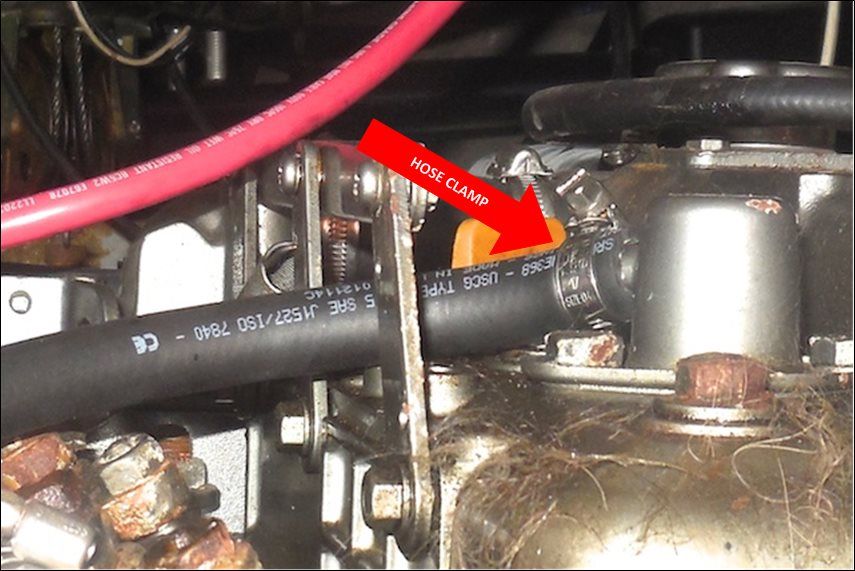 |
| I used a hose clamp on the end of the new longer breather pipe where it attaches to the crankcase vent because I don't want it to vibrate loose while underway. |
I allowed the discharge end of the new breather pipe hose to extend into the plastic bottle, stopping about 1-1/2 inches short of the bottom--I cut this end at 45 degrees to minimize the possibility of creating a blockage in this vent hose.
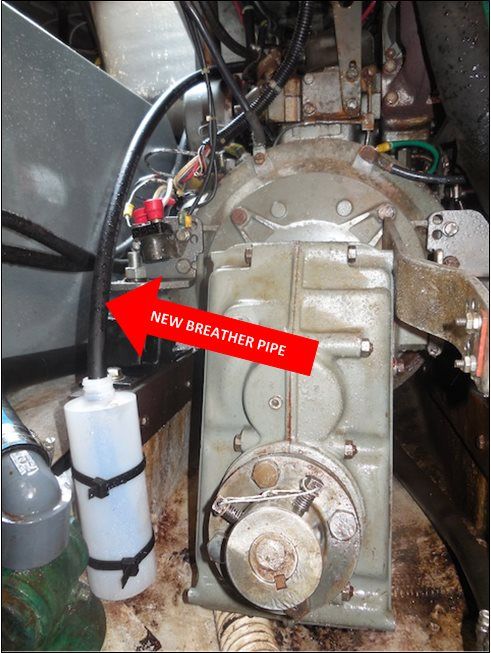 |
| This new system captures the oily seepage from the engine's breather pipe. The new longer breather pipe hose is shown at the red arrow. |
I have not run the engine yet since this addition but I plan to check the bottle every couple of months during the season and empty it when I perform my annual engine maintenance (or more often when cruising full-time).
 |
| Captain Jack supervising the modifications to the breather pipe. |
Replacing Plastic Inserts in Lifeline Stanchions
This subject was brought up on the CnC List and I merely followed the suggestion of others on the list. This, too, was a simple project by comparison to some others on my list.
 |
| The original plastic inserts in the lower lifeline stanchions were cracked after 30 years of UV exposure. Most of them looked like the one shown above. |
 |
| One of the plastic inserts was completely out of place allowing the lifeline to rub against the stanchion. |
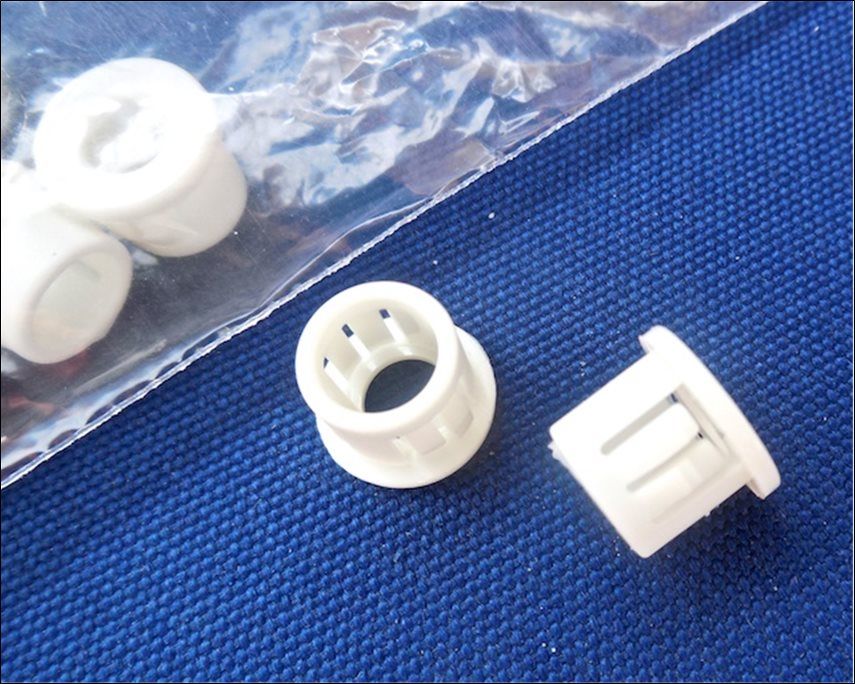 |
| I purchased these plastic inserts from the LampPartsGuy on eBay. These are described as "white snap-in plastic bushing for 7/16-inch diameter hole." By the way, two are needed for each lower lifeline stanchion penetration. |
A few years ago I replaced my lifelines all around the boat. The lower lifelines were of a smaller diameter than the upper lifelines--I'm glad I did this because it wouldn't have worked out so well otherwise since the swaged end of the smaller diameter lifeline barely fit through the new plastic inserts.
 |
| The swaged end of the lifeline barely fit through the new plastic inserts. Fortunately, the lower lifelines are a smaller diameter than the upper lifelines. |
 |
| This project was completed in a couple hours. The most time was spent removing the old plastic inserts and, in most cases, they broke apart and the pieces fell inside the stanchion. |
Hopefully these two tiny projects will get me out of cruising mode and back to being productive. We'll see how that works out for me. One of my next projects will be the installation of a composting head.
Thanks for following our blog!
No comments:
Post a Comment