Repairing Our Whisker Pole
--Blogpost written by Bob
A whisker pole is used when sailing downwind (wind is coming behind the boat) and it is used to hold the headsail away from the boat so it can catch the most wind. It is usually used on the opposite side of the boat from the mainsail and wind from the mainsail conveniently spills into the headsail (or jib) providing more power.
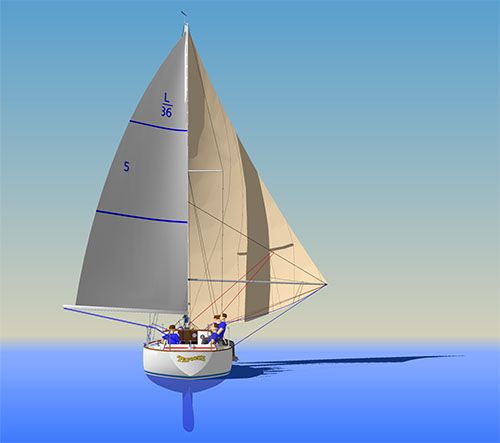 |
| In this beautiful illustration used with permission from L-36.com, a whisker pole is holding the jib out on the right side of this image. For more information on the use of a whisker pole, refer to the excellent on-line article, "Using a Whisker Pole." |
Our whisker pole is 3-1/2 inches in diameter and has an overall fixed length of 174 inches (14' 6")--it's a little shorter than our boat's "J" dimension of 16.2 feet (I'd prefer that our whisker pole be a little longer and adjustable but because we use it so infrequently, we're living with what we have.) Our whisker pole is constructed from aluminum and weighs 25 pounds. When in use, one of the two end fittings clips onto a ring that is mounted on a vertical track on the forward edge of the mast while the other of the two end clips fits in to a loop in the jib sheet that is close to the sail. A topping lift is used to carry the pole's weight and a downhaul is used to keep it in from raising--the combination holds it in an effective position. When not in use, our whisker pole is mounted on chocks on the forward portion of the port foredeck.
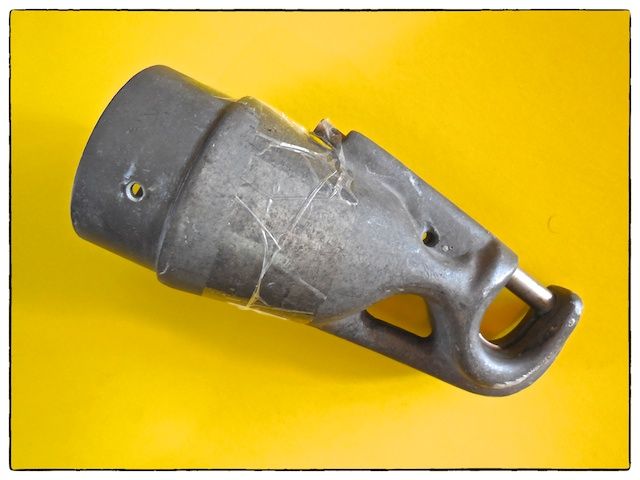
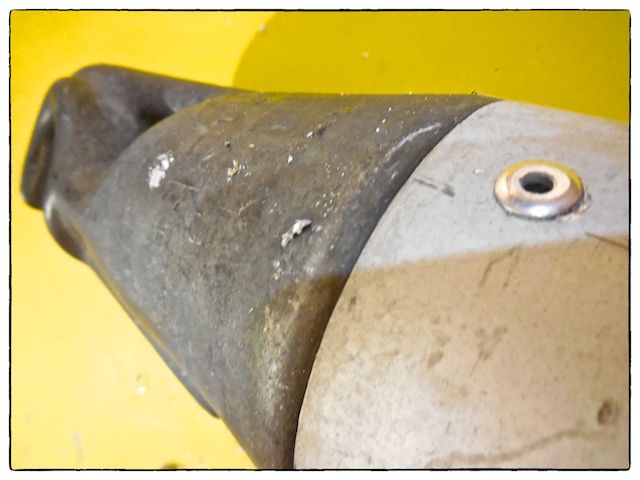
Jammed & Inoperable End Fitting
One of the end fittings on our whisker pole was completely jammed and inoperable and this project was undertaken to fix it. The whisker pole has been sitting on our home's rear deck for several months waiting for a solution (like a solution just might appear at the change of seasons or something).
 |
| I still have no idea what caused the pin mechanism to jam but I was unable to free it after many different attempts. |
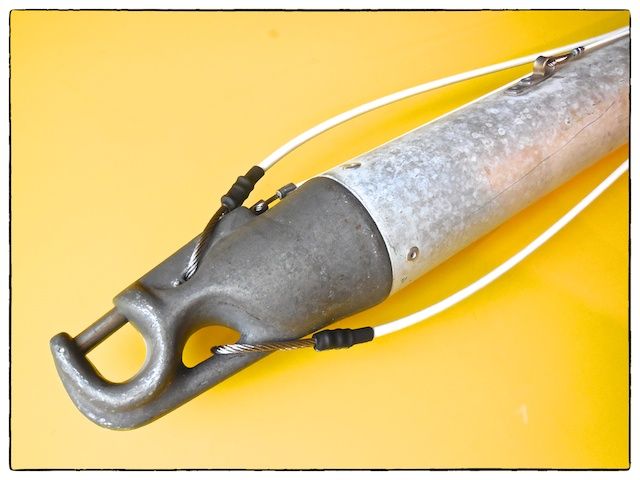
Finding a Replacement End Fitting
While recently browsing at Bacon's (a local marine equipment consignment shop), I found a used end fitting that looked like it might work. I went home and measured the old jammed end fitting and went back to Bacon's with the measurements--it was an exact replacement! So, I bought it for $75--a new fitting would cost a couple hundred dollars. (A new whisker pole of the same size would cost a couple thousand dollars.)
 |
| The replacement end fitting was found at Bacon's, a local marine equipment consignment shop. |
Replacing the Jammed End Fitting
On the coldest day of the year so far (10 degrees F in the early morning) I brought the whisker pole into our house from our deck--it's longer than our dining room! In preparation for removing the end fitting, I cut the three wire ropes leading to the old fitting with a cutoff wheel mounted in a Dremel tool. Using a 1/2-inch diameter drill bit in a battery-powered drill, I drilled off the exposed areas of all four old rivets.
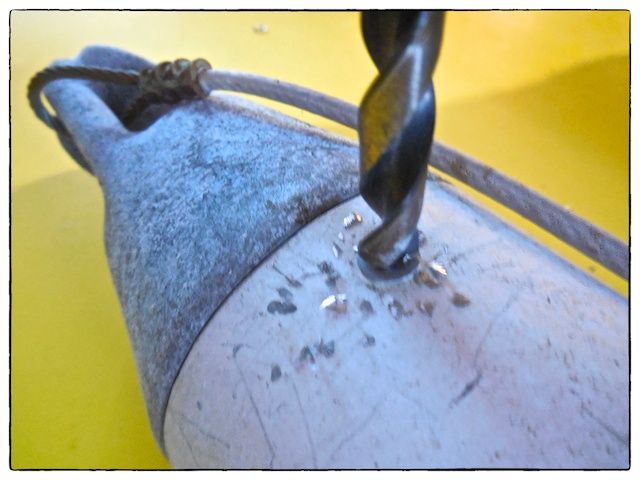 |
| I carefully applied pressure on the drill until the exposed head of the old pop rivet freely spun, |
After drilling the exposed heads off, I used a flat punch to knock the interior portions of the four rivets loose. At this point, the old fitting easily came off the whisker pole.
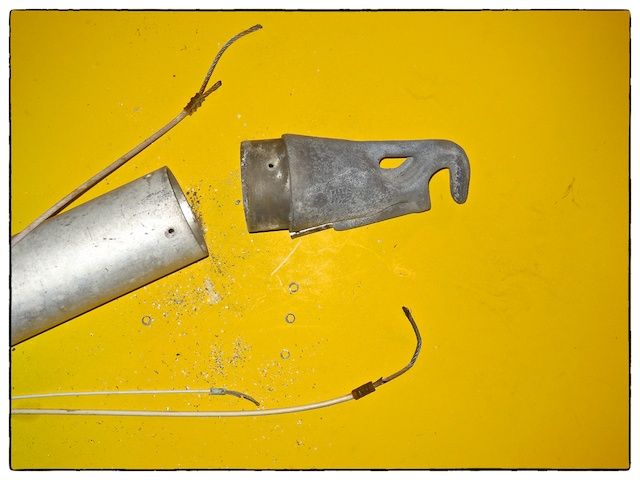 |
| The remainder of the old pop rivets had to be forced inside the old fitting but once that was done the old end fitting easily came off the whisker pole. |
The location of the holes in the new fitting did not match the locations in the old fitting or the whisker pole--so, I had to drill new holes in the new fitting so that the fittings could be aligned. I then installed aluminum pop rivets (3/16-inch diameter x 1/2-inch grip range) to fasten the new end fitting. (This is the first time I ever used pop rivets--I had to watch a YouTube video on using pop rivets before I fastened the replacement end fitting.)
 |
| Installing the new pop rivets was very easy--it only took a few minutes. |
Since I don't have the necessary tools to fasten new wires ropes, I carted the whisker pole (in my car) to the rigging department at my local West Marine (about a block away from our home) to replace all the wires ropes with new ones.
 |
| New vinyl-covered wire ropes were installed by West Marine's rigging shop, replacing the old worn out wire ropes. Our whisker pole is now completely restored. |
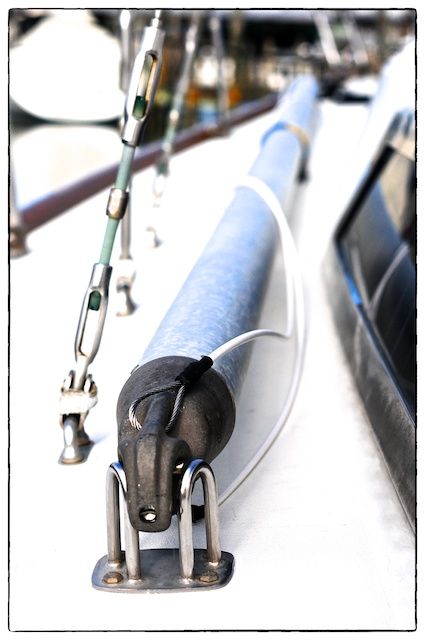 |
| The completely restored whisker pole is stored in it's chocks on the port foredeck. |
Summary
This project became #144 on the completed project list! The total cost of this repair was $275 and it really only took a day or two to complete with West Marine's help. We've had outside temperatures in the 20's this week and it was nice working on this project indoors. Now that I've discovered the ease of using pop rivets, you can expect to see them more on future boat projects.
The next blogpost will either be the next step on the auxiliary diesel tank or making new backing plates for our lifeline stanchions. Stay tuned...
Thanks for following our blog!
No comments:
Post a Comment