Spaghetti Wires
Part 3: A Do-Over
--Blogpost written by Bob
Even though all the wires and terminals were properly labeled, I didn't like the way the mass of wires looked behind my hinged electrical panel and I felt there was still a big mess to deal with.
 |
| After my first attempt at rewiring the primary electrical panel, the mass of wires didn't look much different--they simply had labels. |
Also, there were a couple wires underneath it all that didn't comply with the established color code for boat wiring and this, too, bothered me to no end. For example, the main wire from the discharge of the voltage controller for the solar panels was green (the color for electrical ground) when it should have been red (for positive). There were a few others wires like this too and I was concerned about making a mistake with these mis-colored wires at some time in the future. So, I removed all the wires from the terminal blocks and started over--a do-over, if you will.
Removal of Old Wiring
I replaced all the mis-colored wires with the appropriate color--this involved four or five wires and it was time consuming since I had to track them down from equipment to terminal block.
I found old wires that came from the old engine-driven refrigeration that was no longer in service--these were promptly removed. Also, the wiring for the fresh water pump took a very circuitous route (to an old terminal strip where the original pump was located)--all this old wiring was removed. I also found some very old wires that looked like lamp cord--these were removed as well.
Terminal Strips
After replacing several mis-colored wires, I installed a supplemental terminal strip and bus bar to handle a couple circuits that simultaneously control a lot of individual equipment--specifically for the chart table and the running lights The chart table switch handles various lights in the vicinity, USB ports, and a small Hella fan. The running lights have multiple cables coming from different locations. This allowed the wiring to be distributed better and alleviated some of the wire congestion around the three primary terminal strips.
I intended to put the auto pilot, instruments, and chart plotter all on the same circuit breaker but was advised against it due to the possibility of interference to the instruments caused by the heavy draw of the auto pilot. So, the chart plotter and instruments are together on one circuit breaker while the auto pilot is on a separate (heavier) circuit breaker.
Improved Routing & Bundling
In addition to the plastic loops, I used cable ties to make the entire wiring look neater and better organized. Another factor which reduced bulky wiring was the fact that I stripped off the white cable covering shortly after the cables entered the electrical cabinet.
 |
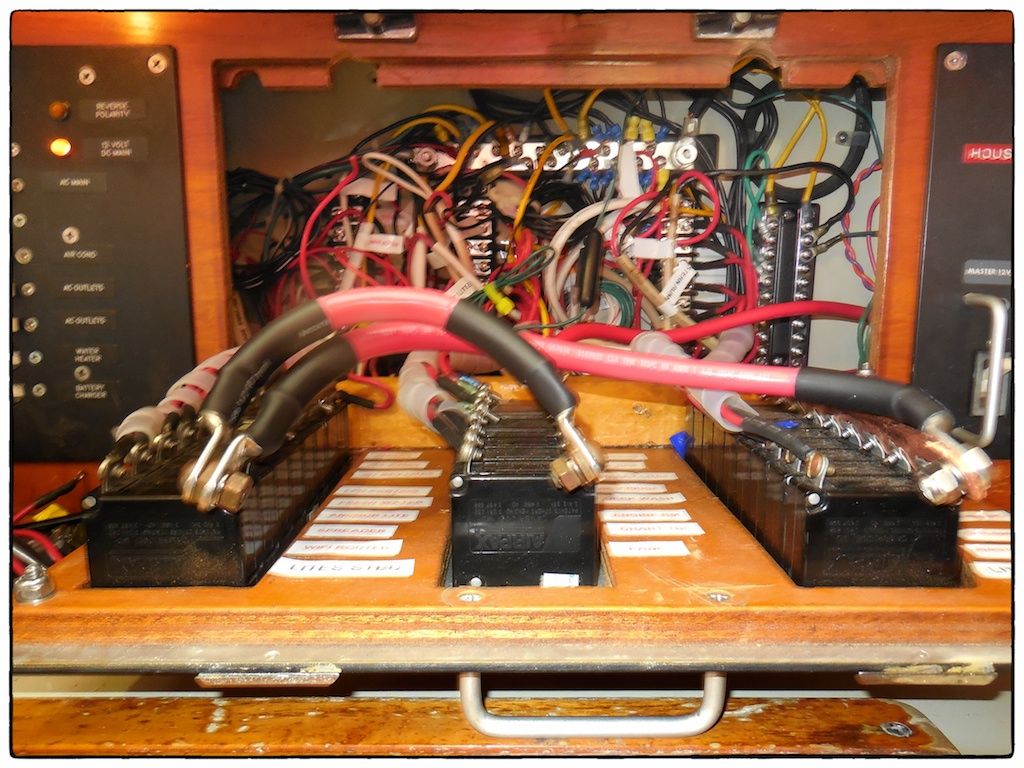
| This photograph shows the big improvement in the wiring organization behind the hinged electrical panel. It no longer looks like spaghetti wires! |
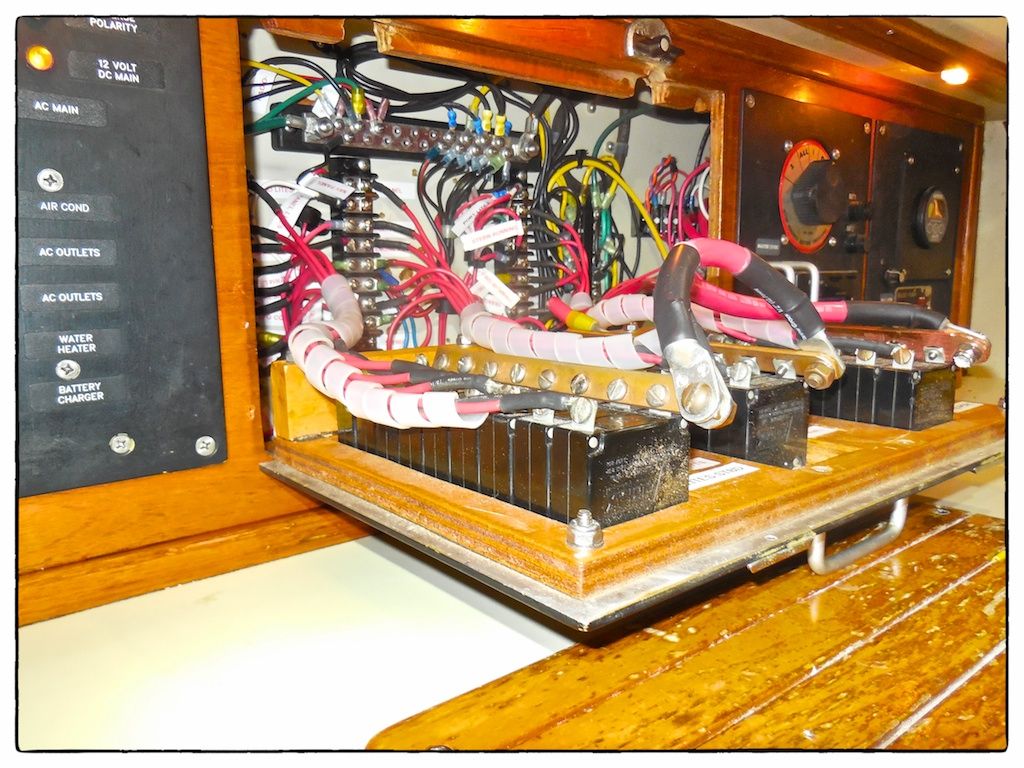 |
| The newly organized wiring shown with the hinged electrical panel opened, |
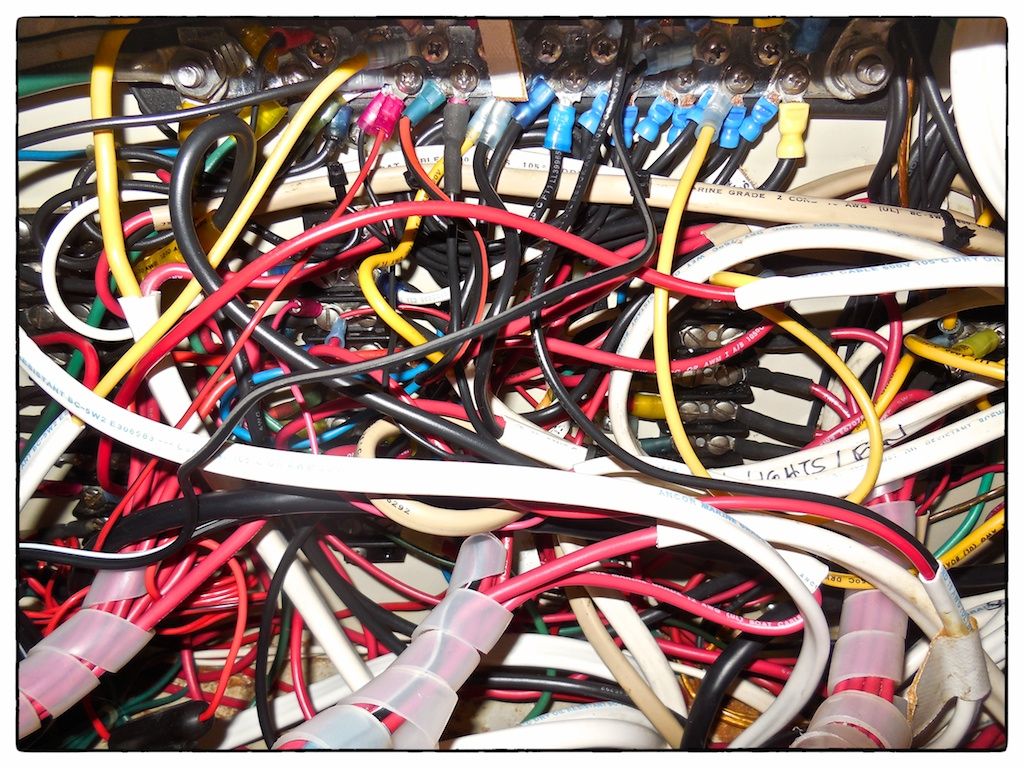 |
| This is what it looked like before I started, It was difficult to tell which wire fastened to which terminal. |
Summary
Finally, I can feel good about the outcome of this project! I feel that it has been done to the best of my ability and future changes can be made safely and efficiently. The cost of this do-over was relatively minimal but took two weekends to complete.

The next area to be rewired is the area around the engine gauges. Since I have to add a fuel gauge for the auxiliary diesel tank, this is a natural next step.
Thanks for following our blog!
This comment has been removed by a blog administrator.
ReplyDeleteLooks great!
ReplyDeleteThanks so much!
ReplyDelete