Auxiliary Diesel Tank: Part 4
--Blogpost written by Bob
For this project, I have had no one to follow. I had to design everything from scratch and assemble all the components. The completion of this project involves installing a diesel transfer pump, an inlet fuel filter, the tie-in to the inlet hose of the primary tank, and some electrical wiring. This project used a lot of my mechanical engineering skills.
Installing the Diesel Transfer Pump
The diesel transfer pump I selected is rated at 2.6 GPM--this means it will transfer the 19 gallons of diesel fuel held by the auxiliary fuel tank into the 32-gallon primary fuel tank in about 7-1/2 minutes.
| The small 2.6 GPM diesel transfer pump was manufactured by Marco and purchased from Jamestown Distributors. |
I installed the pump on the bulkhead in the starboard cockpit locker outboard of my battery charger with the pump outlet directed vertically upward. The level of the pump inlet connection was slightly lower than the top of the tank, making the actual net positive suction head about 18 inches.
Inlet Filter
To protect the pump from possible debris in the fuel, I installed a filter at the inlet to the pump because it was recommended in the instruction manual for the pump.
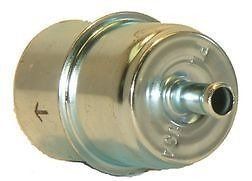 |
The NAPA #3253 Gold Fuel Filter was purchased from Amazon. This filter was installed between the auxiliary diesel tank and the inlet to the diesel transfer pump. |
 |
| The filter is shown here installed ahead of the diesel transfer pump. |
Tying Into the Old Diesel Fill Hose
This took a lot of thought but worked out perfectly. I purchased a steel 1-1/2-inch wye with female NPT connections on eBay. For two of the connections I installed 1-1/2-inch hose barbs adaptors--these connected into the fill hose for the primary fuel tank. For the third connection of the wye, I installed a 3/8-inch to 1-1/2-inch adaptor and connected a 3/8-inch brass hose barb adaptor to the 3/8-inch end. Because the wye was carbon steel and used in a marine environment, I spray painted it with two coats of Rustoleum XO-Rust Professional (for metals) which has both a primer and finish coat in one paint.
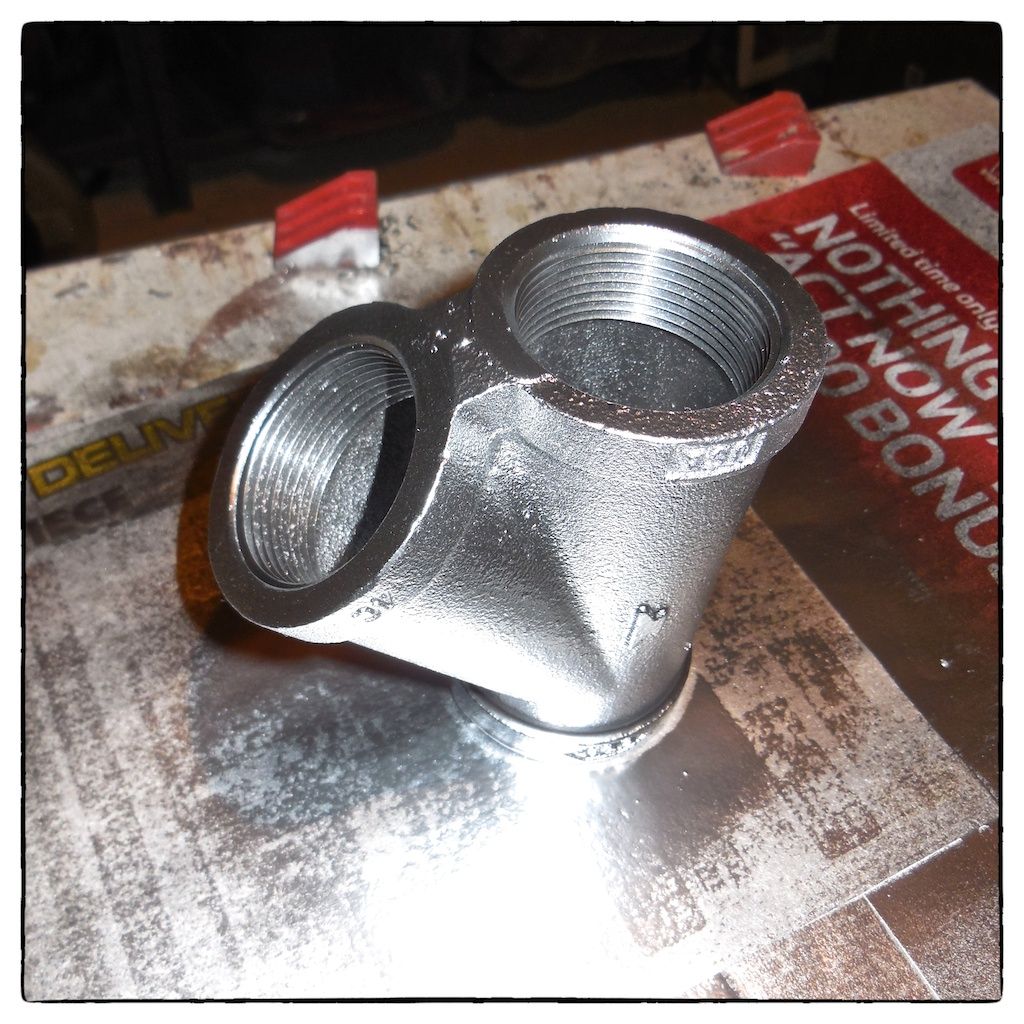 |
| Because the wye was made from carbon steel or cast iron, I painted it with Rustoleum XO Rust Professional (for metals) which contains both a primer and the finish coat. |
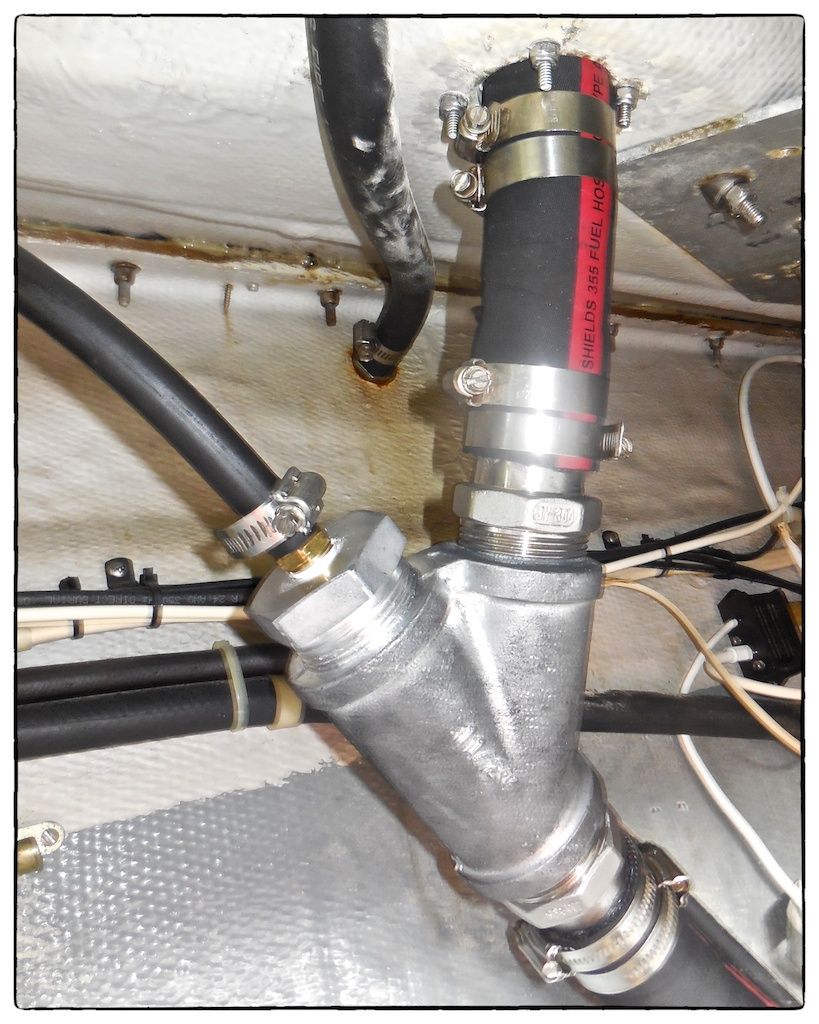 |
| The 3/8-inch diameter hose from the pump discharge was routed high, just under the deck level so that there was no possibility of back flow. Using the branch of the wye that was at 45 degrees for the inlet hose connection conformed well to the routing of the primary inlet hose. |
It was very difficult hooking up the existing fuel hose to the hose barbs and I thought the hose might be old and the rubber harder--so, I replaced the fuel hose and it went on a lot easier.
Electrical Wiring
The pump requires a 5-amp fuse and it states on the pump that the maximum run dry time is 30 minutes. I thought about using some sort of timing switch so that we couldn't burn up the pump by running it dry but instead, we'll just have to be attentive and careful. I wired the pump to a circuit breaker on the main 12-volt electrical panel.
Another potential problem would be if the diesel transfer pump were turned on inadvertently and the pump tried to pump diesel fuel from the auxiliary tank into a potentially full primary tank--the diesel fuel would flow overboard thru the 1/2-inch diameter tank vent. I thought about wiring in a warning light and an alarm but if our cats were on board alone and they caused the circuit breaker to flip to the "on" position, they are not likely to care about warning lights or alarms.
The solution I chose was to use a second switch (in series) located in the cockpit on the engine panel where I could see both fuel gauges. This turned out to be an easy solution!
Summary
This final phase of the project cost $200 making the total for the project about $1,050. Maggie and I both feel that the extra 19-gallon capacity (28 hours of additional runtime) is worth the price. I have to wait for warmer weather to fill the auxiliary tank--so I have no way of testing the complete system until later in the Spring.
Earlier in the year, many of my boat projects were held up waiting for things to arrive by mail or UPS but now the situation has turned completely around and many things have accumulated, awaiting installation...
Thanks for following our blog!
No comments:
Post a Comment