Making New Hatch Screens
--Blogpost written by Bob
Before last summer's month-long sailing trip, we made some insect screens that loosely fit over the outside of our hatches. We fitted small lead weights around the perimeter to keep them in place. They didn't work out as well as we would have liked. Many times the wind blew them off the hatch. They were also one more thing to store somewhere and you couldn't easily tell them apart.
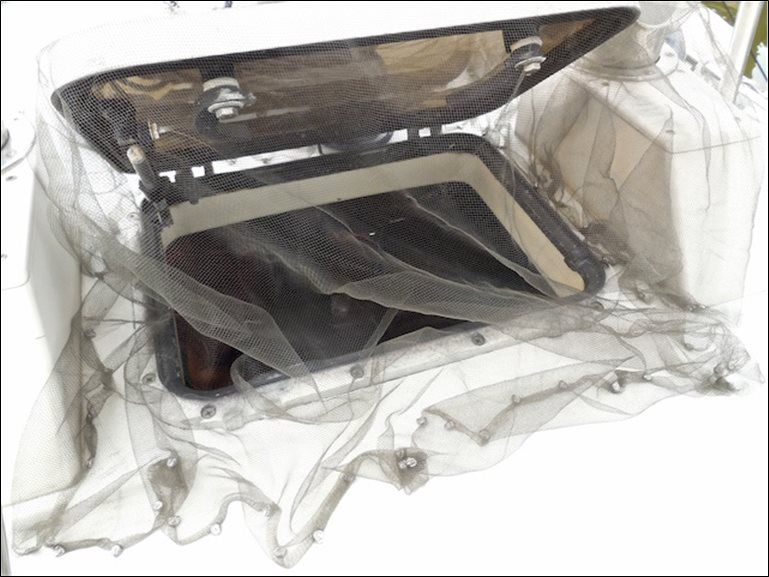 |
| This is last year's hatch screens--they loosely fit over the outside of the hatch |
So, Maggie copied and improved an older hatch screen design that I used previously. The new design mounts on the inside of the hatch frame using twist lock fasteners--they can't blow off in the wind. The new hatch screens store in place, mounted on the hatch frame when the hatch is open or closed--so storage issues are eliminated.
Maggie purchased black fiberglass screen material at the local hardware store and made beautiful fabric frames that went around the perimeter. They even had rounded inside corners to match each hatch. The cloth frames were made from a light colored Sunbrella called oyster.
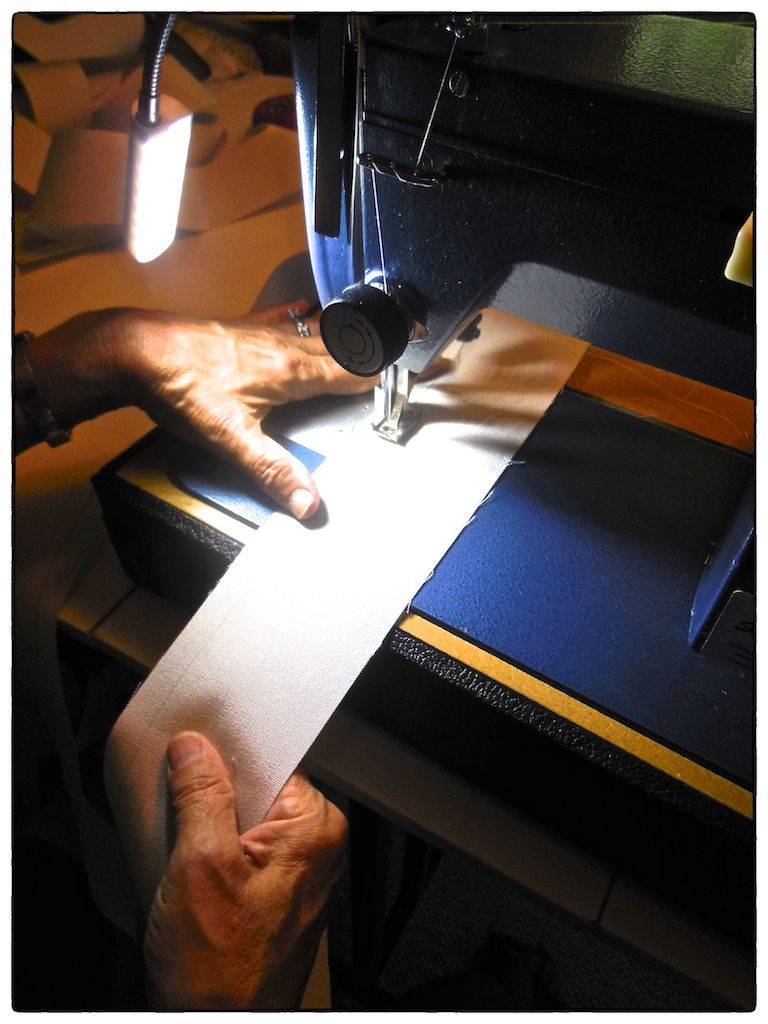 |
| Maggie spent about 7 hours making the four screens. |
We purchased twist lock fasteners and borrowed a punch from Dave at Fawcett's to complete the screens. You would think mounting the hatch screens would be a simple couple hour project, right?
We started with the two smallest screens. It was clear that the border was too big to be able to install the fasteners to the removable internal frames of the small hatches. So, Maggie had to remake both of them with smaller inside and outside dimensions.
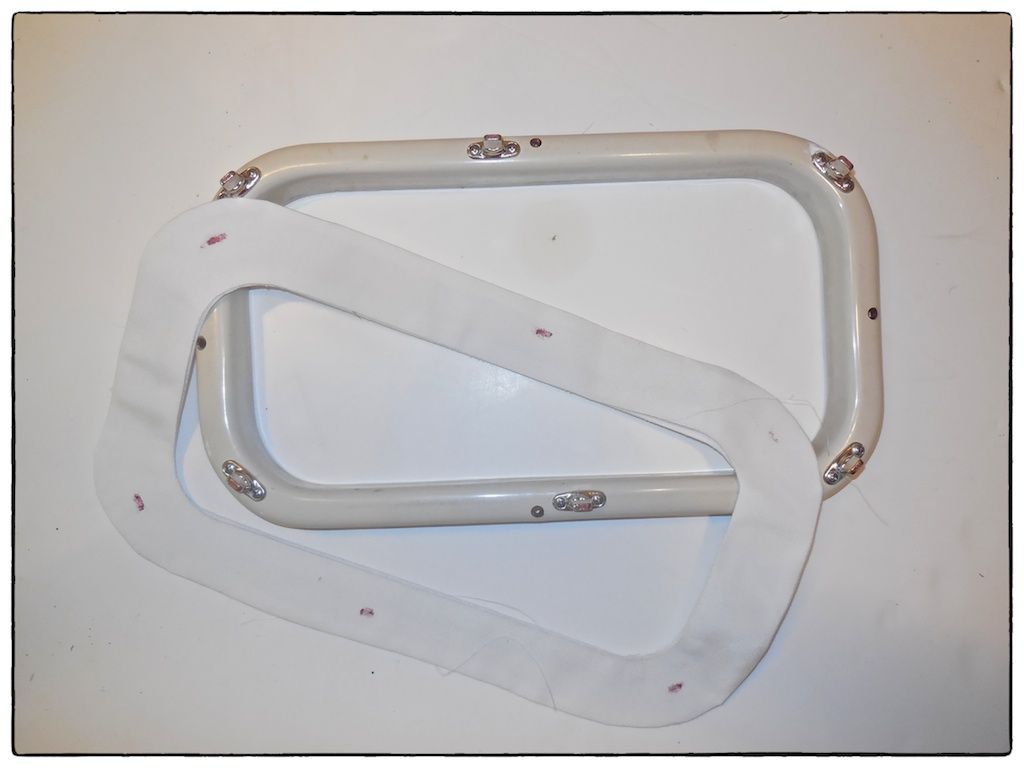 |
| Since the frames on the two smallest hatches were removable, we took them home to make the new screens to fit. We installed the fastener's studs to the frames before we installed the eyelets in the new screens. We used red lipstick on the studs and positioned the frame over the new screen to leave a red mark where the eyelets had to be installed. |
The next hatch we attempted was the mid-ship hatch. For this hatch, we took the old screen which contained snaps and we drilled a hole through the center of the old snaps so that we could mark the pattern from the old screens onto the new screen frames. This was a great idea but turned out to be poor execution on my part. The pattern wasn't exactly on straight lines--so, I punched the holes and installed the fasteners on straight lines (like a good engineer) that were fairly close to the old hole locations. It turns out that they weren't close enough and I really messed up the mid-ship hatch screen, so bad that Maggie had to remake it too.
 |
| Because I screwed up the holes on screens that Maggie spent seven hours making, I'm writing this blogpost from the doghouse. |
With one new screen left to mount (on the forward hatch) I finally got smart and followed the old hole pattern exactly and it fit perfectly! It wasn't on a perfectly square pattern with straight lines but it works.
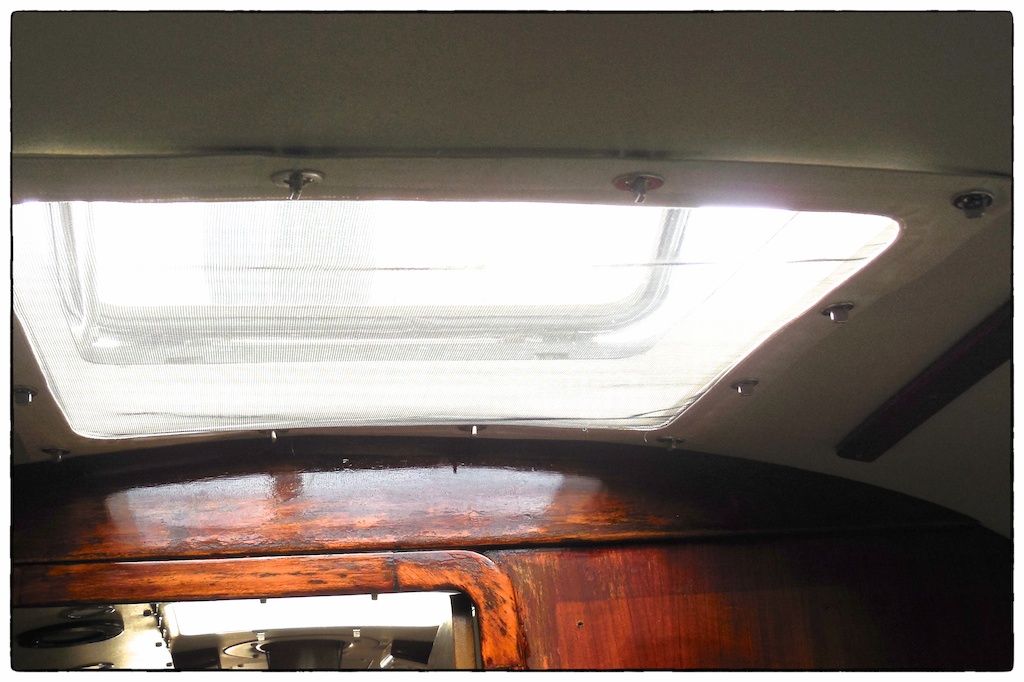 |
| The forward hatch screen fit perfectly. What looks like a little gap between the twist lock fasteners is actually filled with the fuzzy side of VELCRO to keep insects from getting through. |
During this past week Maggie remade the three hatch screens. So, on the second weekend of this project, we mounted the eyelets in the screen frames to match the pattern of the studs already fastened to the hatch frames (over the old holes).
 |
| This punch made all the difference in the world. It punched through all the layers of the screen border with ease. If only we would locate the holes properly. |
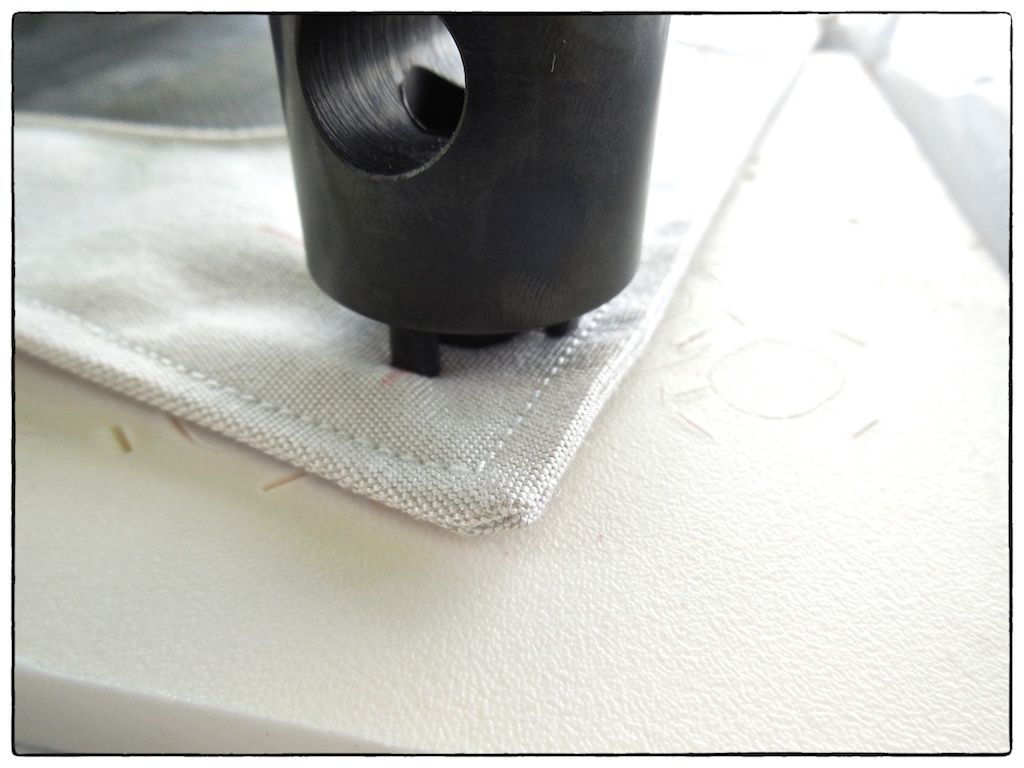
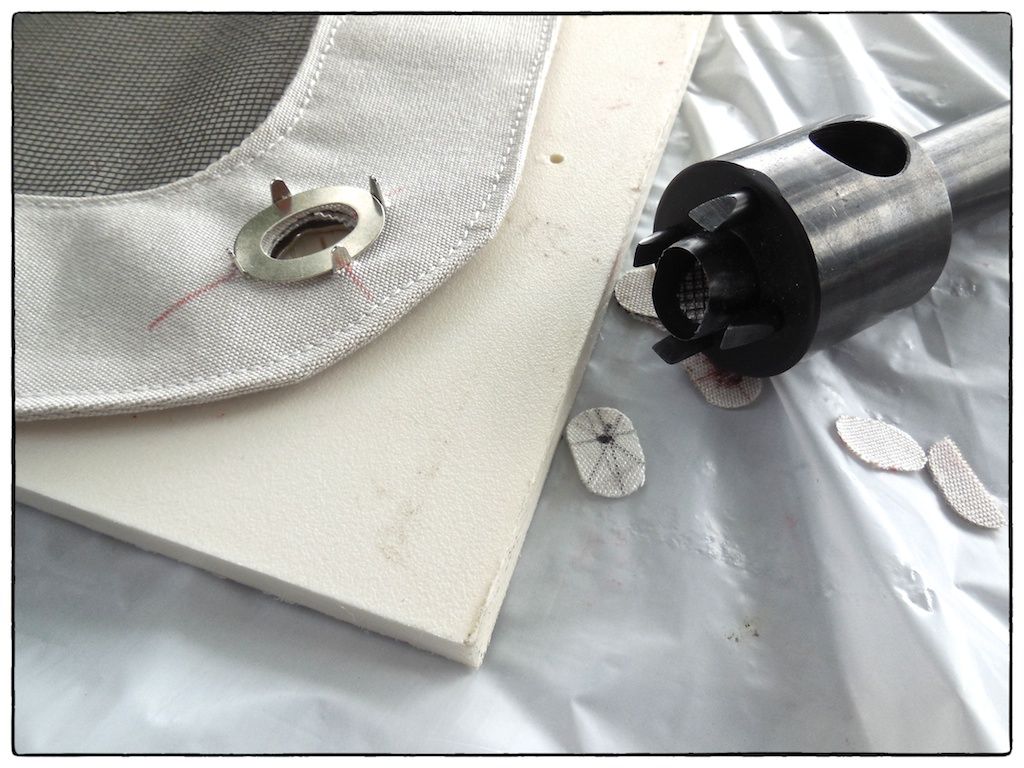 |
| I found it easiest to use centerlines for all the punched holes--the centerlines could be seen and aligned outside the punch. I used a piece of Starboard for the backer board for the punch to dig into without breaking. |
 |
| Now, if only I could figure out a use for all the holes! |
Next up will be the planning of the new and demolition of the old refrigeration system...
Thanks for following our blog!
No comments:
Post a Comment