Refrigeration System Upgrade: Part 1
--Blogpost written by Bob
Our refrigeration system, after over 15 years of good service, has finally died. We decided to stick with the same brand (SeaFrost) but upgrade to the latest model (with a BD 50 variable speed compressor). We will be upgrading from the old holding plate used in my first engine-driven system to a new evaporator plate which is more efficient. (This will be the third SeaFrost refrigeration system I've had in the 30 years I have owned s/v Rainy Days and hopefully this new system will last another 15 years.) Of course, new electronic controls for both temperature and compressor speed will be included.
Besides the new updated equipment, we will be relocating the condenser from under the aft section of the quarter berth to the forward section of the quarter berth where all the runs of copper tubing, air cooling ducts, and wiring will be much shorter. This relocation will greatly improve access, and efficiency at times. There will be no copper tubing connections (except for the compressor connections) and this will go a long way toward minimizing leakage of refrigerant in the future. (Throughout the years I have had small leaks at threaded connections and simply minimizing the number of them should improve reliability.)
 |
This week is the first week of our stay-cation and we have spent most of it removing the old refrigeration system and working on the preparation for the new system. And I thought I'd be sailing this week... |
Out with the Old
The old condenser pulled air from the cabin and it would allow it to pass over the condenser coils and then exit behind the primary battery bank in the engine room. When motoring for long periods of time, the engine room would get quite warm and reduce the efficiency of the condenser and the entire system.
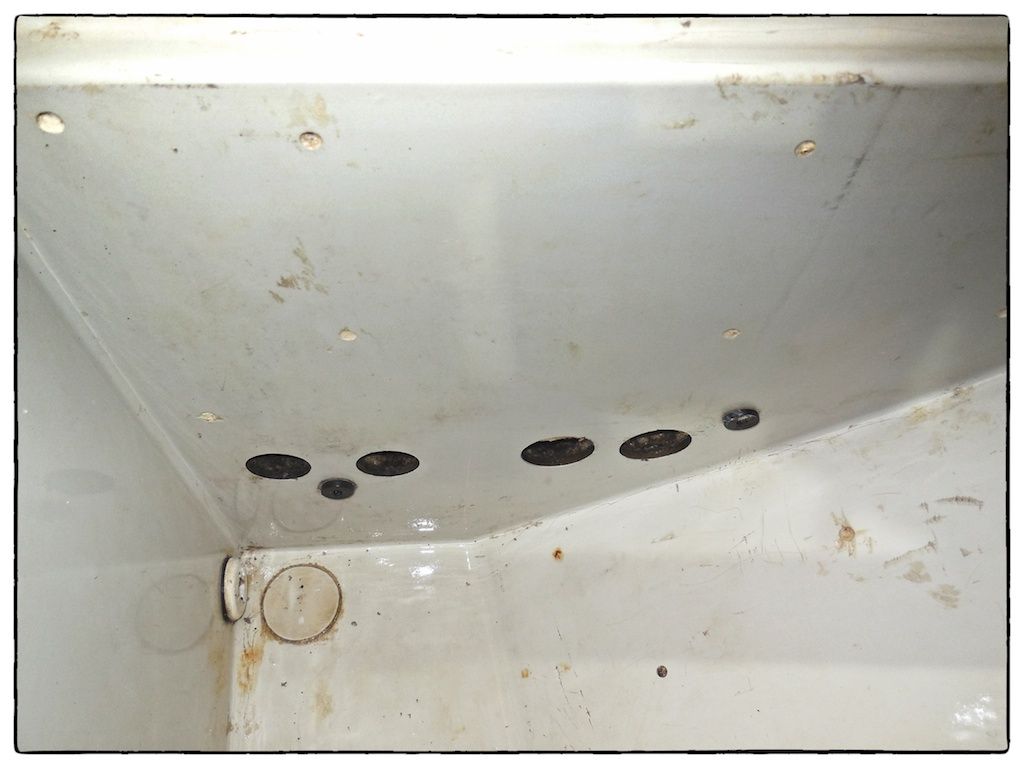 |
| The old cold plate has been removed from the ice box. The four holes were connections to be condenser/compressor, two for the original engine-driven unit and two for the 12-volt unit. |
Besides removing the old condenser/compressor unit, the receiver/dryer is no longer needed nor is the expansion valve and a lot of interconnecting copper tubing--this all used up a lot of space in the forward section under the quarter berth
The Mount for the New Unit
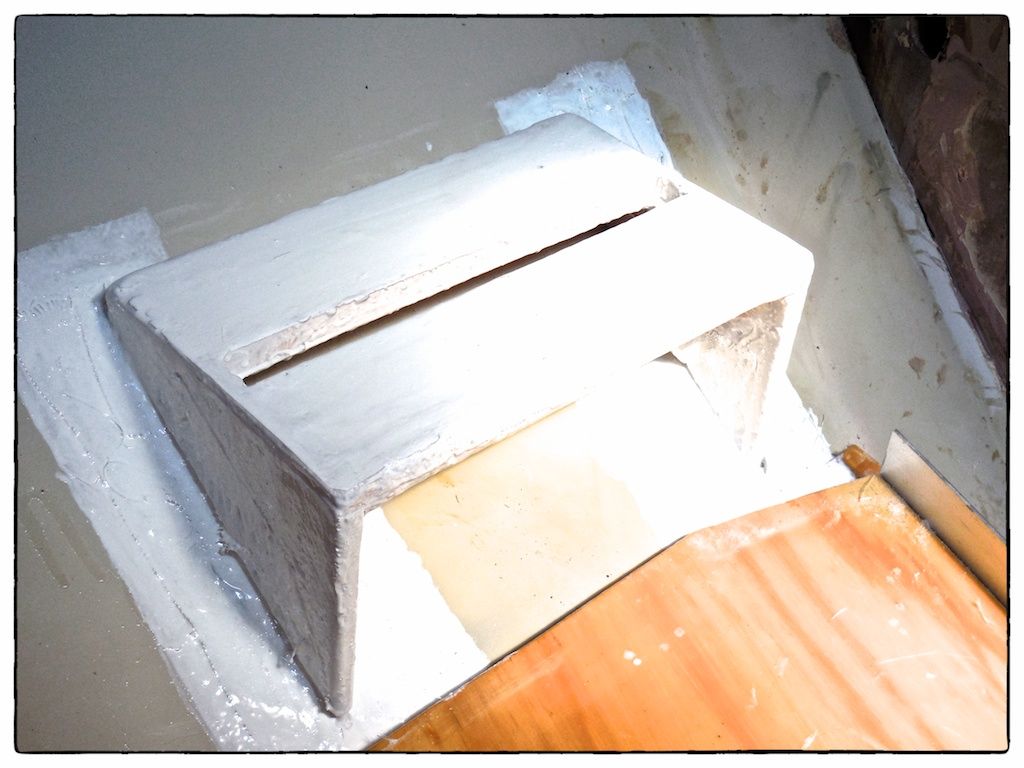
In order to determine the shape of the support I clamped the lid of the old condenser box (same size as the new one) to a brace from above with a 1 x 4 spacer--this established a 3/4-inch clearance between the top of the unit and the underside of the plywood that forms the platform for the quarter berth. Making measurements at all four corners of the lid allowed me to determine the shape of the needed support. I subtracted the height of the box from all four measurements to get the shape of the support.
 |
| I clamped the lid of the old condenser/compressor box to a board that bridged the area, along with a 3/4-inch thick spacer to make sure that the new unit cleared the plywood base for the quarter berth, |
This is the first time I can remember that something I built having such a complicated shape fit perfectly without modification on the first trial fit up.
 |
| The completed support for the condenser/compressor box for the new refrigeration system |
Increased Storage Area
The relocation of the condenser/compressor box opened up more storage area under the quarter berth.
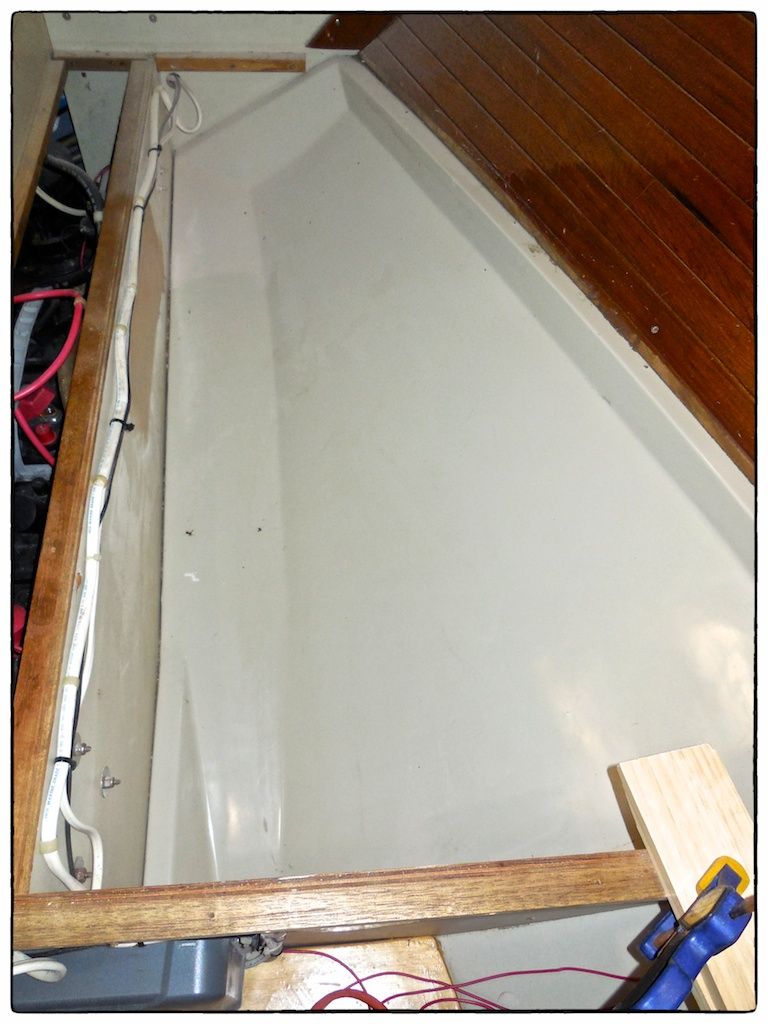 |
| Relocating the condenser/compressor box opened up a lot of space under the aft section of the quarter berth. |
I've added an opening lid to the aft end of this section and will add a new divider in the middle of the length. Hopefully, this will help keep things organized.
Summary
With the condenser/compressor box support completed and installed, we turned our attention to adding more insulation in the ice box. In Part 2 we will be adding polystyrene sheet insulation into the ice box in situ and coating the polystyrene with fiberglass cloth and West System epoxy. I don't know of anyone who has tried to do this without removing the countertop. In any event, it will be new to us.
Thanks for following our (boat project) blog!
No comments:
Post a Comment