New Swim Ladder
--Blogpost written by Bob
Our original swim ladder was bent, apparently from bumping into a dock some time ago--I'll blame it on the previous owner, more than 30 years ago. We could have lived with the bend and possibly have even fixed it. However since the swim ladder will be so important while cruising, there are a couple of improvements we wanted to make and they could best be incorporated into a new one.
 |
| Not only will the swim ladder be used when we check the anchor almost everyday, but it will be our means of getting into the dinghy and back onto the boat. It will certainly be used many times each day. |
To make the new swim ladder perfect, we needed to use teak steps and add one more rung in roughly the same overall length.
Teak Steps
Used as a ladder rung, one-inch diameter tubing really hurts your bare feet. As a remedy, I found teak steps that could be bolted onto the one-inch diameter ladder rungs and make climbing the swim ladder a lot more comfortable. I purchased them from Thai Teak. I had to pay in advance and wait a couple weeks for them to arrive but it was well worth it!
 |
| The swim ladder steps from Thai Teak are 12 inches long x 2-1/2 inches wide x 1-1/4 inches thick with a round groove on the bottom to fit 1-inch tubing and two small rectangular grooves on the top for water drainage. They are certainly robust! |
For the three middle rungs, I used the full 12-inch lengths. For the top and bottom steps I cut the length to 6-1/2 inches and 9 inches, respectively. For each of the rungs, I first drilled 3/32-inch pilot holes through the teak steps using my drill press. Then, I clamped each step in position on the metal rung, taking care that it was positioned perpendicular to the metal riser. At this point, I drilled a 3/32-inch pilot hole into the stainless steel tubing using a portable battery-powered drill using the teak step as a drill guide. Even using titanium bits, I consumed six 3/32-inch bits for all the pilot holes.
I decided to mount the teak steps on the stainless steel ladder rungs using 1/4-inch socket head cap screws inserted from the top and barrel nuts inserted from below the step. The barrel nuts allowed a very clean installation, eliminating any hint of a sharp edge on the bottom of the steps.
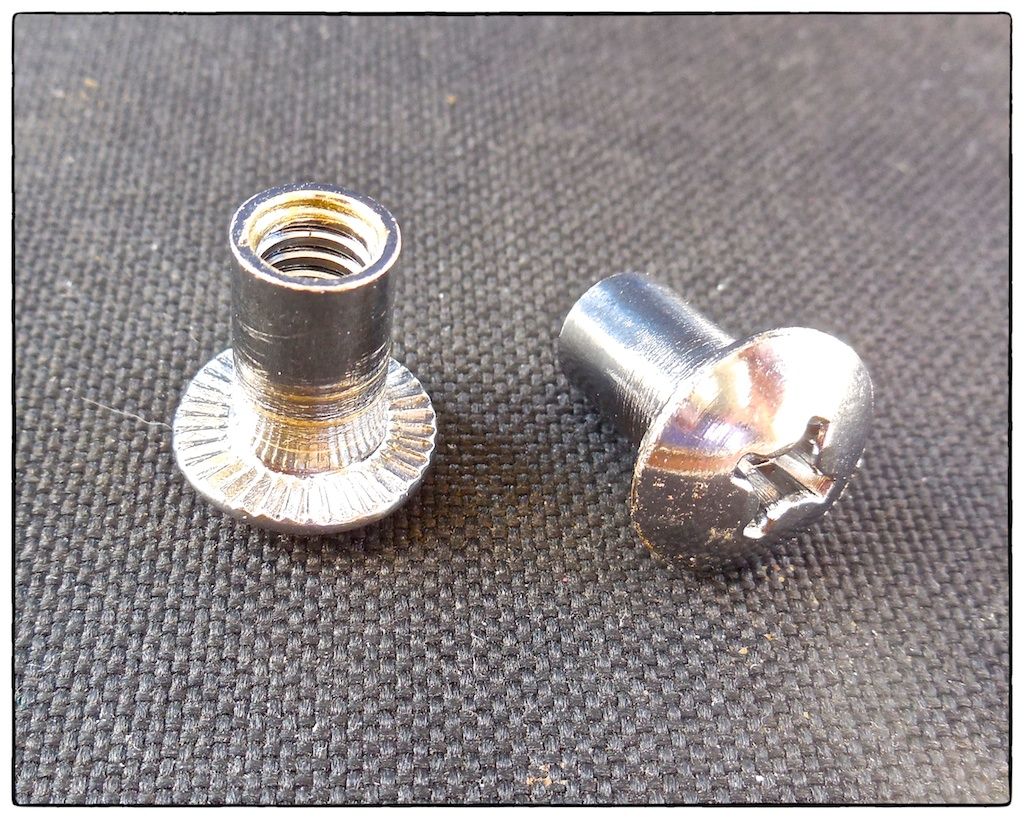 |
| The barrel nuts are threaded internally to receive the 1/4-inch cap screws. While they are designed to be tightened with a phillips head screw driver, I used vice grips for a more secure hold while I tightened the socket head cap screws with an allen wrench. Applying blue Loctite-brand adhesive should keep them from vibrating loose in the future. |
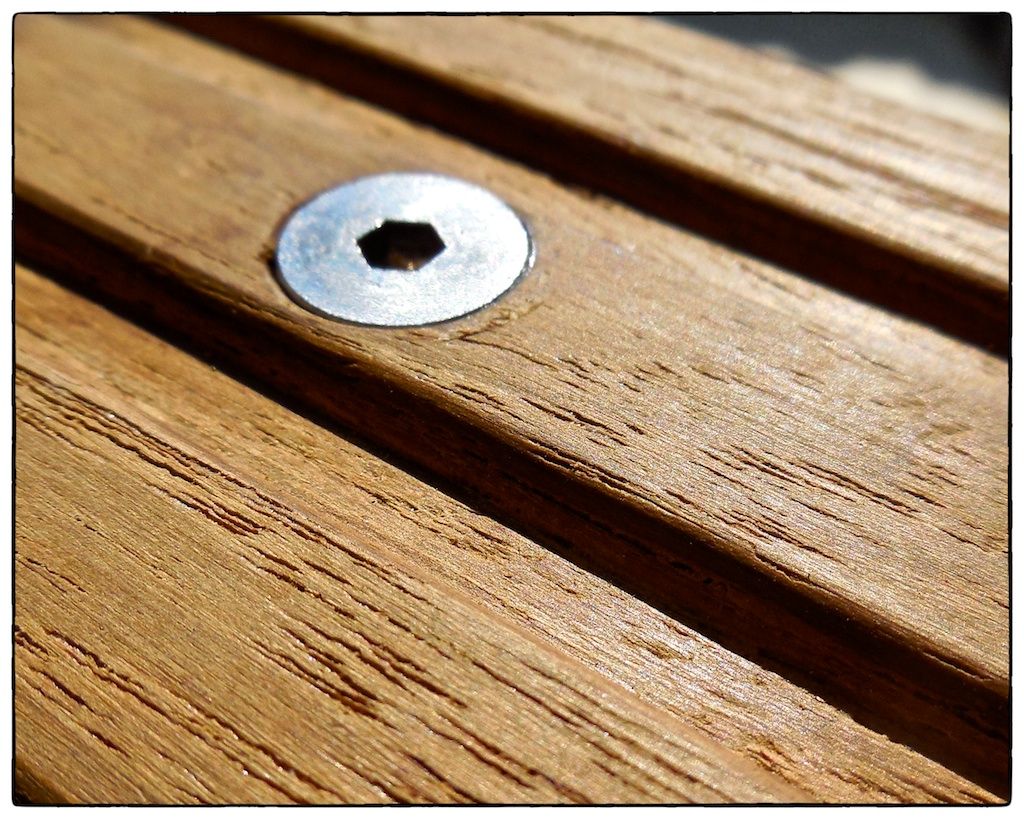 |
| The countersunk holes in the teak steps make the head of the socket head cap screw perfectly level with the top of the teak step. |
Mounting the teak steps turned out to be a more difficult task than I imagined. It was very time consuming drilling holes thru the stainless steel tubing, 17/64-inch on the top to clear the 1/4-inch bolts and 21/64-inch on the bottom to clear the 5/16-inch body of the barrel nuts.
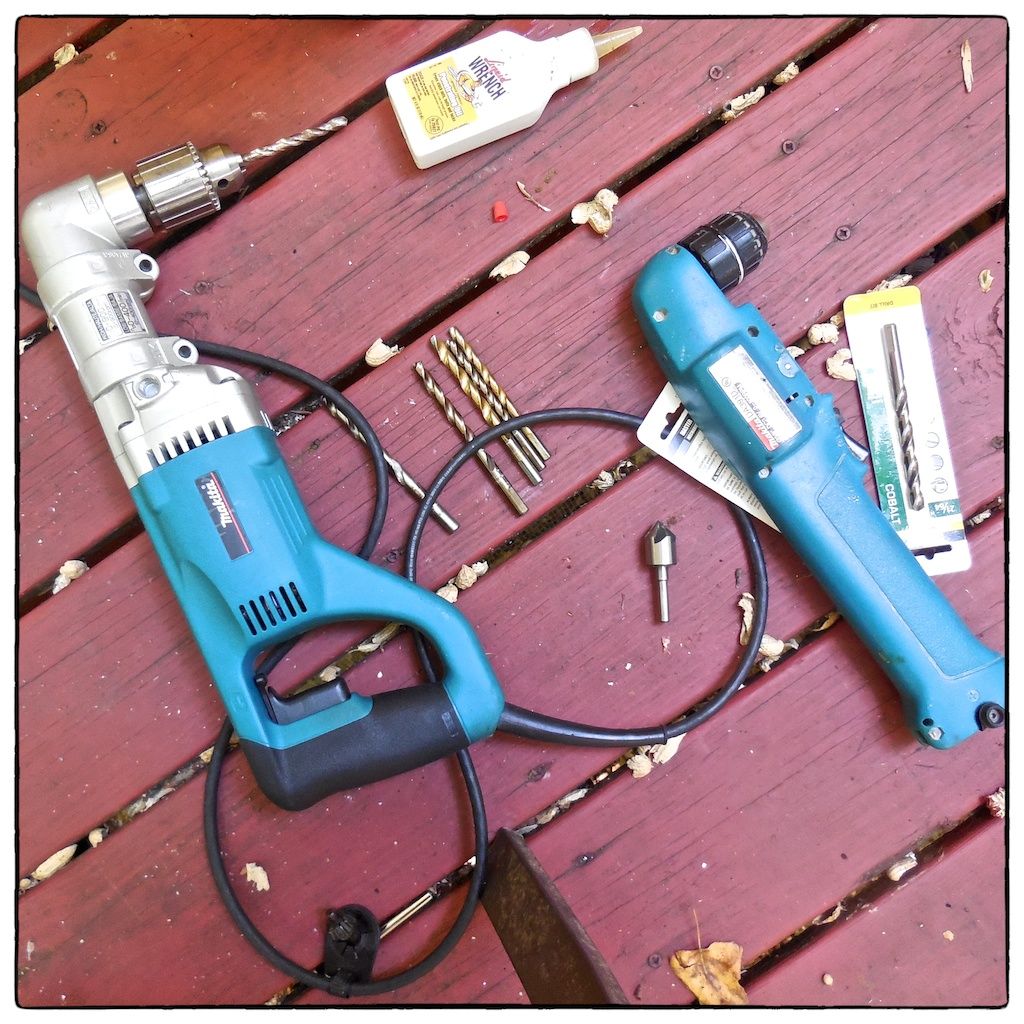 |
| I rented a 110-volt right angle drill from Home Depot's tool rental. I also used my Makita battery-powered right angle drill and my Ryobi portable drill (not shown). The slow speed of the Ryobi portable drill with cobalt bits (and using cutting oil) worked best of all three drills but it could not be used on all the holes because it wouldn't fit between the steps. |
It took all of 10 hours to drill all the holes and mount all the teak steps, the bottom step taking the most time because it had to be shaped to clear the radius of the bottom of the ladder. I did the shaping of the underside of the bottom step with a Dremel tool and a wood carving bit.
We considered using Cetol on the steps to match the finish on our toe rail. However, the maintenance (re-coating the steps from the dinghy every year or two) was not at all appealing. So, we've decided to leave them natural.
One More Rung
The original ladder seemed to be the perfect overall length. However when folded up, one rung was located right at the teak toe rail at the stern--this would prevent us from simply adding teak steps because one step would interfere with the toe rail and the ladder couldn't be folded up completely.
 |
| Our old swim ladder was bent and generally was not very comfortable to climb. |
The existing spacing of the ladder rungs was 13-3/4 inches when, ideally, it should be more like 10 inches.
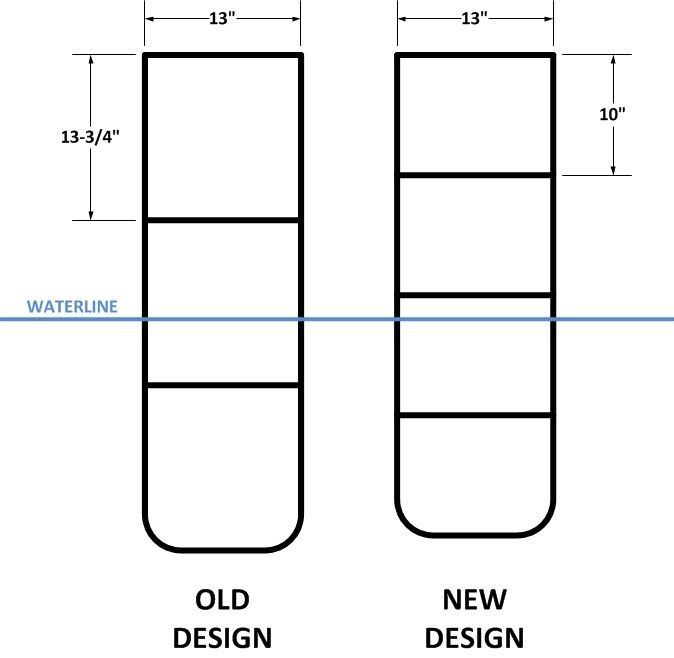 |
A diagram of the old ladder design versus the new ladder design |
Adding one more rung in roughly the same overall length, makes the spacing a nice even 10 inches and prevents the interference of a teak step with the toe rail.
Our new stainless steel ladder was custom made by Kato Marine in Annapolis. It was constructed from 1-inch diameter x 14 gauge Type 316 stainless steel tubing.
Summary
Most of the construction of the ladder was done by Kato Marine--and they finished earlier than promised. It is a pleasure dealing with Kato Marine because they consider every little detail, like adding a weep hole in the hinged area so that water doesn't accumulate in the ladder when in the up position and freeze over the winter.
The project cost was just under $1500 (for the new ladder, teak steps, sales tax, and shipping costs) and took about four weeks elapsed time, most of it was delivery time for the teak steps.
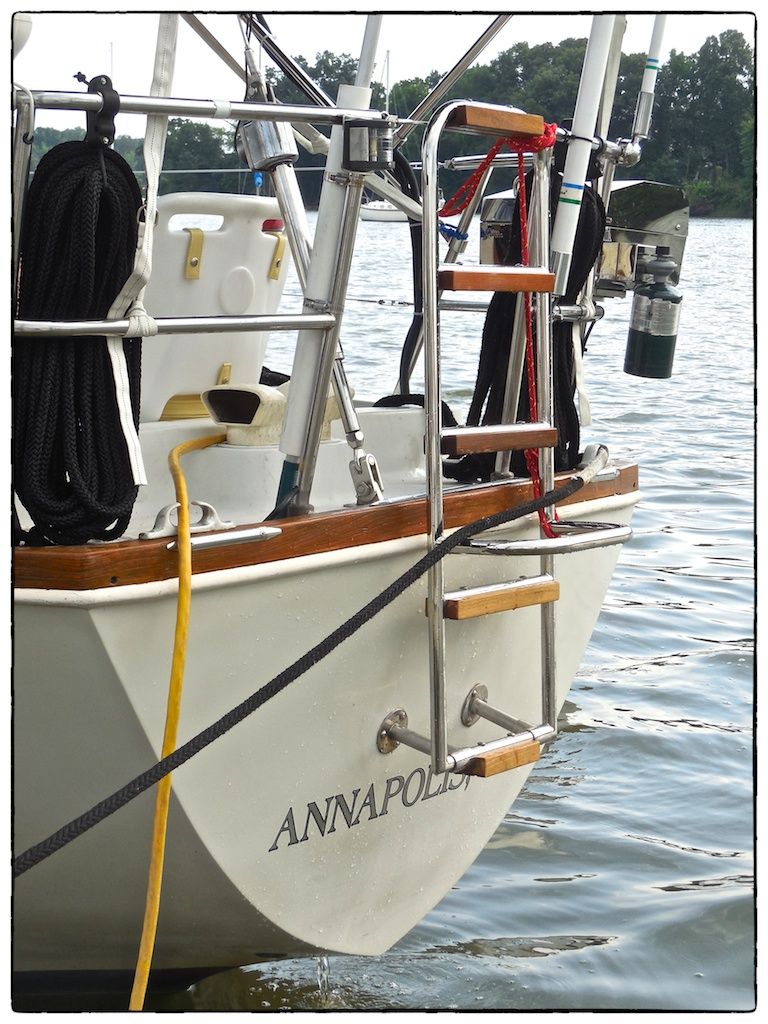 |
| We now have the perfect swim ladder and it should last throughout our future cruising adventures. |
It's a shame than none of our boat projects will add anything to the resale value of our boat. We are investing our time and money solely for our enjoyment over the next 10 years of cruising.
Thanks for following our blog!
The new ladder is very pretty!
ReplyDeleteI am enjoying reading your blog very much.