Refrigeration System Upgrade: Part 3
--Blogpost written by Bob
We've been living aboard while the renovations are being done at our house. Our food has been stored in a large ice chest since our onboard refrigeration system has been out of commission. So, it's been a little more like camping than boating lately.
This blogpost is the third and final one of this series and covers the installation of the new SeaFrost refrigeration unit. Even though I probably could install it myself, I let the pros at Horton Marine Services do this part of the project.
About the New Unit
Our new SeaFrost refrigeration unit is primarily an air-cooled 12-volt unit but it has the capability of using supplemental water cooling at some point in the future. The compressor is a Danfoss BD-50 with variable speed capability. (Most marine refrigeration systems use Danfoss compressors.)
 |
I had to remove an AC receptacle from the galley area to make space for the new electronic controls for the refrigerator. This proved to be interesting since it was not controlled by a switch on the AC panel. |
The new evaporator plate will be mounted on the aft wall of the ice box where the old cold plate was mounted--the new evaporator plate is much thinner than the old cold plate. A set of copper tubes runs through a single opening in the aft wall to the compressor which will be mounted on the support I installed under the forward section of the quarter berth.
The new electronic controls can be used for temperature control and compressor speed control. (Due to the fact that our old unit was undersized, the old "snowflake" thermostatic control didn't really do much--the compressor operated almost all the time.)
We will be using what SeaFrost calls a widget fan which circulates air within the ice box and minimizes the different temperature zones from the coldest at the bottom to the warmest at the top.
The Installation in Pictures
 |
| With the condenser/compressor box simply sitting in place, the copper tubing was routed from the evaporator plate in the ice box to the compressor. Six feet of tubing was required. |
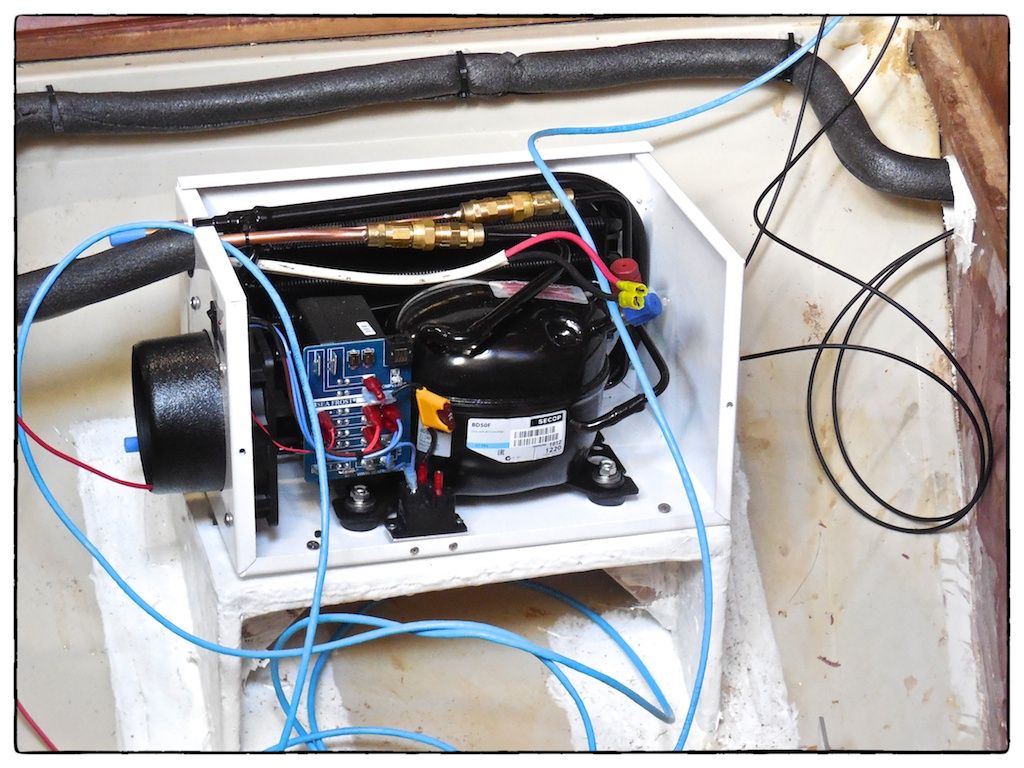 |
| With the copper tubing installed and insulated, the wiring was done. The white cable provides power while the blue cable is a data cable for the controls. |
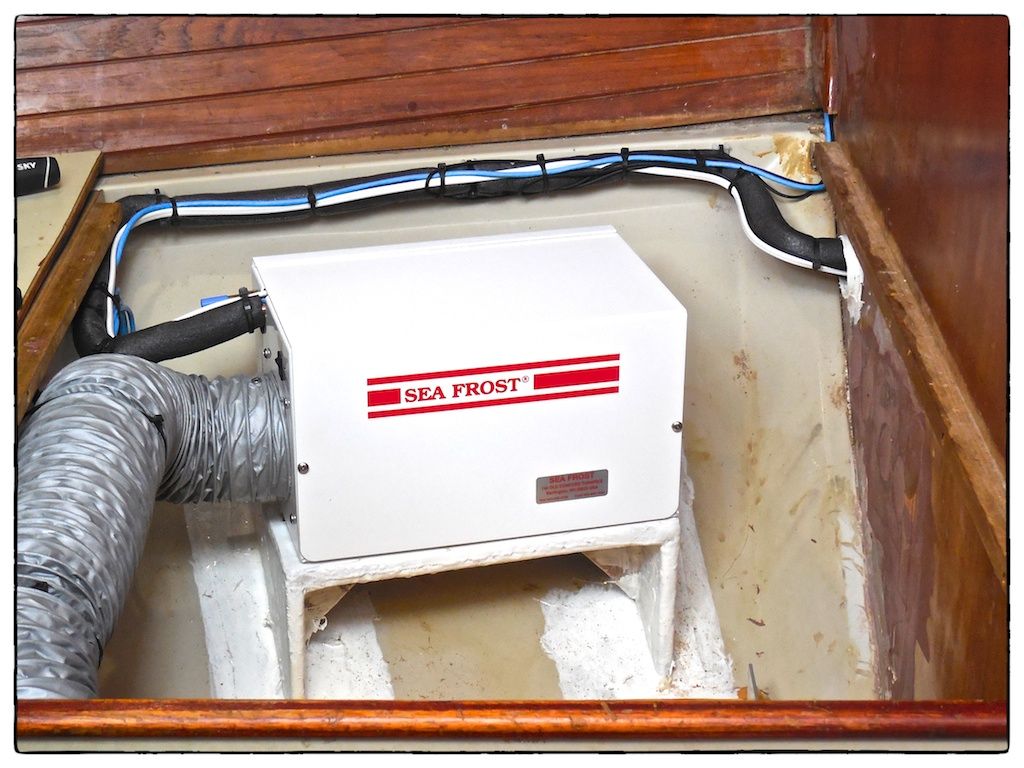 |
| The completed installation of the condenser/compressor in the forward area under the quarter berth. The big gray hose on the left is the cooling air discharge into the cabin. |
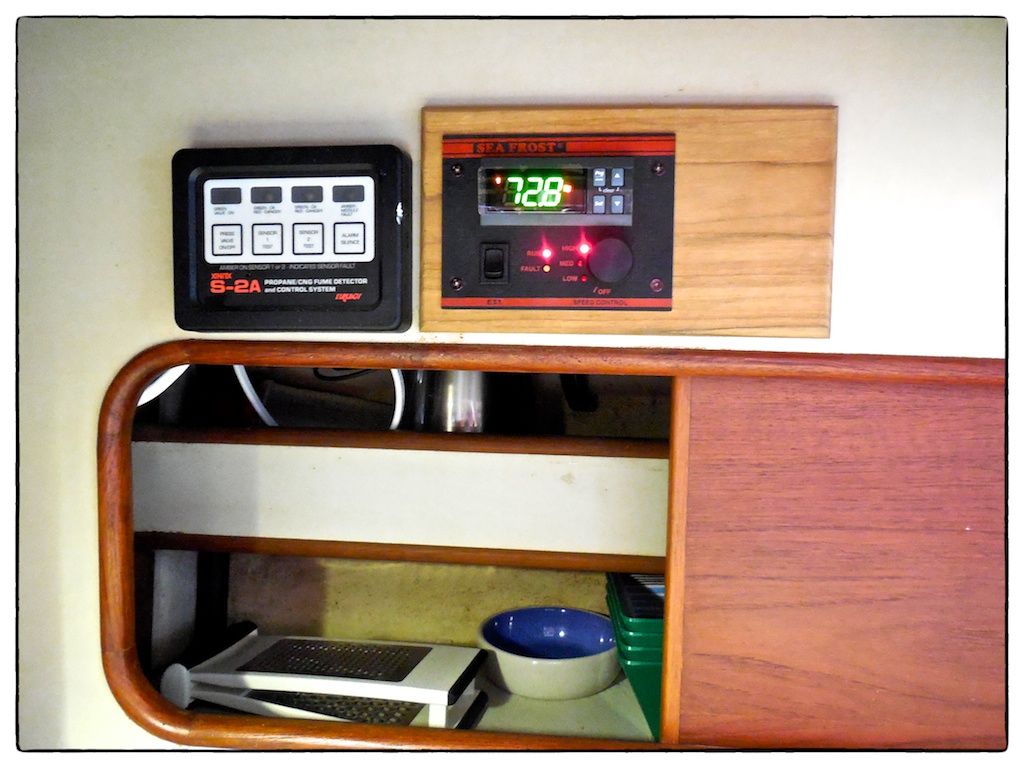 |
| The refrigerator control panel is used to control the evaporator plate temperature as well as the ice box temperature and compressor speed. |
 |
| Within minutes of starting, the new evaporator plate begins to frost up, starting at the bottom. The new evaporator plate is a lot thinner than the old cold plate. |
 |
| Food chilling in the new refrigerator system. The cost of the new refrigerator system, including installation was about $2500. |
What's Next?
Now that the refrigeration upgrade project has been completed, I've ordered the replacement port water tank and I've designed a new swim ladder and both are being fabricated now--each will be blogpost subjects in the very near future. In addition, we are looking at a new satellite-ready entertainment center and a bigger onboard air conditioning unit.
Thanks for following our blog!
I think the grey duct is air intake to cool the compressor. I just ordered one of these today to install on my boat. I opted for the less fancy, i.e.,cheaper, thermostat. The digital really looks nice!
ReplyDelete