Air Conditioner Upgrade
--Blogpost written by Bob
After about 13 years of great service, our MarineAir Systems-brand air conditioner quit working--the compressor had failed. Our air conditioner was undersized for the boat (at 12,500 Btu) and, as a result, worked harder than necessary. It was noisy too. Because we expect to be spending future summers in a slip in Baltimore, we felt we needed to upgrade the air conditioner to 16,000 Btu and now was the time to do it.
We considered four different options:
(1) self-contained 16,000 Btu unit in same space
(2) split gas 16,000 Btu system with only evaporator and fan in existing space
(3) replace compressor and add 6,000 Btu self-contained unit in another location
(4) two new self-contained units (maybe 10,000 Btu plus 6,000 Btu)
 |
This project involved some plumbing, electrical wiring and cabinet making. No duct tape was used anywhere! |
Option #1 was the most desirable if we could find a single unit that would fit into the existing space. The only 16,000 Btu unit we could find that fit into the existing space was a MarineAir Systems Vector Turbo and even this took some cabinet modifications. (Sticking with the same brand allowed us to reuse the existing digital display and save about $200.)
About Marine Air Systems
Marine Air Systems started building air conditioning systems for boats in 1977. In 2003, Dometic acquired Marine Air (and Cruise Air) from Taylor Made Corporation. Dometic sells air conditioners for boats under 3 different names: Marine Air Systems, Cruise Air, and Dometic. I believe it has taken quite a while for Dometic to consolidate all three operations but the three brands are practically identical now.
There is a completely different company, called MarinAire (founded in 2007) which sells a line of competing products at lower prices--it was difficult sorting this out but it was clear that the products were very different compared to those of Dometic's Marine Air Systems. At first, the prices are attractive but then you quickly realize that they are a larger physical size and don't have the sound reduction features.
I bought the Marine Air Systems air conditioner and needed accessories from Annapolis Cruisair (a local dealer for Dometic products)--they had everything I needed in stock and were great to work with.
Unchanged
What made this replacement less daunting was the fact that the cooling water system, electrical wiring, and most of the air handling system did not require changes of any kind. The latter was due to generously sizing the cold air supply grills and ducting for our previous air conditioner system.
Improvements in the New Unit
The new unit was clearly designed with sound reduction in mind. The high-speed fan is totally enclosed in sound-absorbing foam and the motor is tucked inside the rotating blades. The heavy plastic base used as a condensation pan is mounted on vibration-absorbing rubber feet and the hold down clips also use rubber vibration isolators.
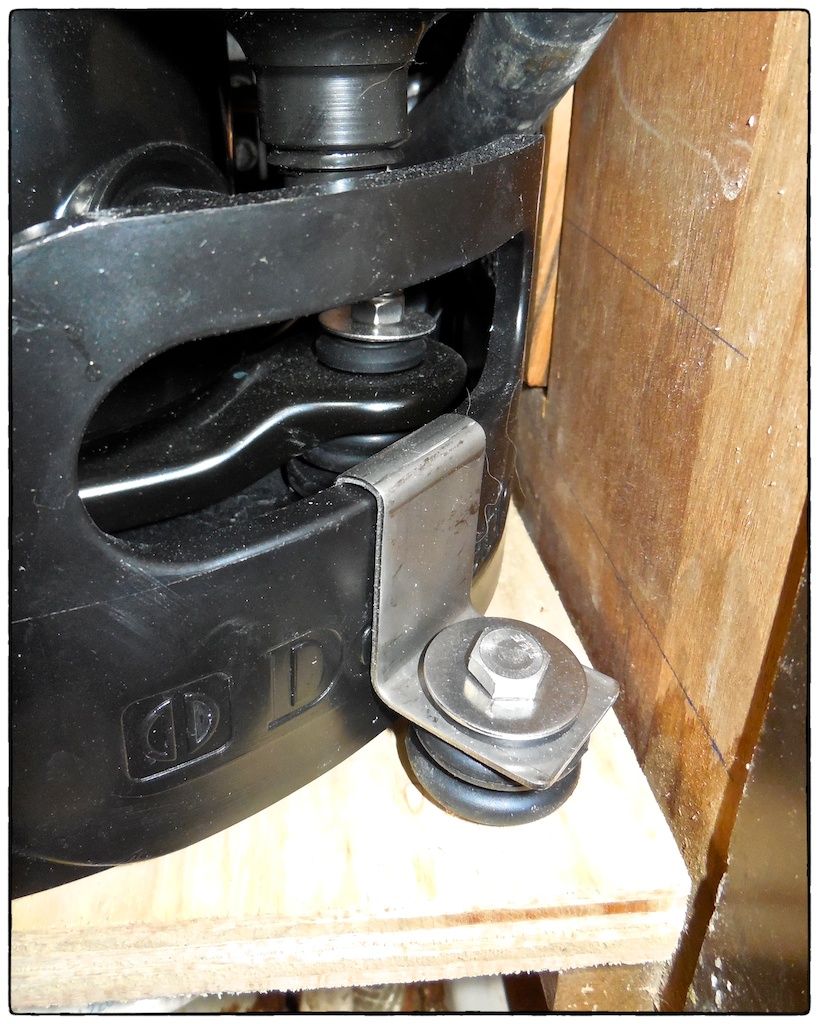 |
| Shown in this photo is the hold down bolts and the vibration isolators which help reduce sound transmission. |
Return Grill Change
The return grill for our old unit was situated perpendicular to the unit and 2-inch internal space allowance was made for the return flow to turn into the unit. This was an alternative to putting the return grill in the head since, at the time, we had a conventional head which always had some odors and we didn't want to circulate them throughout the boat. However, now that we got rid of the odors through the use of our composting toilet, the return grill could now be located in the head (with the door to the head normally open when not in use).
Since I had plenty of wall space in the head for the return grill, I opted for a 14-inch by 14-inch teak-framed return--this is larger than needed but by making it removable it also allowed better access to the unit for maintenance.
 |
| With the toilet temporarily removed, I cut the hole in the bulkhead and first up the new 14-inch x 14-inch return air grill. |
Air Outlet Change
Our old unit had a 6-inch round outlet. It connects into the air distribution system using a 6-inch diameter hose. The tee at the top of the outlet hose split the flow into a 6-inch round duct going forward and a 4-inch round duct leading aft--it was a 6 x 6 x 4 tee.
The new unit has a 6-inch square (flanged) outlet which was to be connected to a 7-inch diameter hose. So, the outlet hose and the plastic tee had to be changed to match the larger outlet size of the fan.
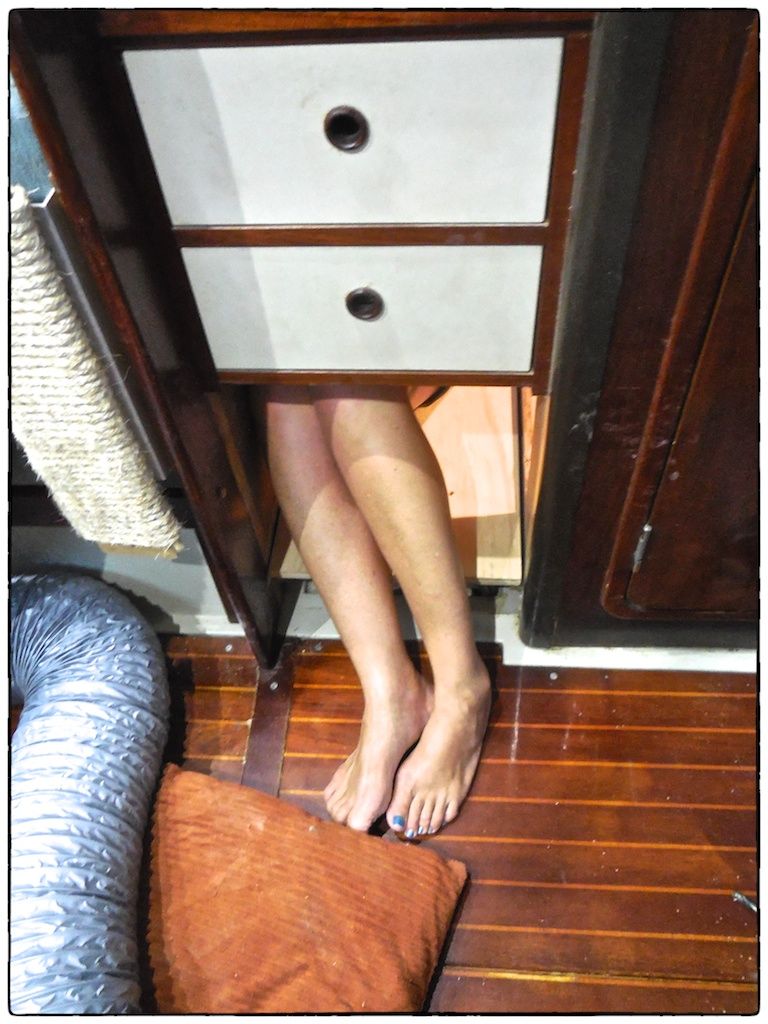 |
| Maggie crawled up through the A/C cabinet to get into the wet locker so we could replace the large plastic tee in the air distribution system. |
 |
| It was nearly impossible to replace the large plastic tee located in the wet locker from outside the locker. We spent a lot of time trying. She wasn't sure that she could get back out of this area but she made it. |
Rear Enclosure Improvement
The cabinet where the air conditioner was mounted had a big opening into the hanging locker and I'm sure it pulled some air in through the hanging locker and certainly allowed some noise to escape.
While I was changing the A/C unit, I decided to fix this and make a rear enclosure. I constructed it from 1/4-inch thick teak-veneered plywood. Now, the outboard side of the unit is closed off and inlet air must come through the new return grill.
 |
| The rear enclosure is shown at the lower section of this photograph. This photograph is looking down from the top of the wet locker. |
Cabinet Face Change
The face of the cabinet where Maggie crawled through had a teak louvered insert--this is where the air used to return to the unit. Now that a nice big return air grill is located in the head, this cabinet face could be made from solid teak-veneered plywood. The cabinet face was fastened with screws so that it could be removed for future maintenance.
Summary
 |
| There is a lot of equipment packed into this small cabinet but it is complete and working great. |
Now that the installation has been completed the difference in performance and noise level is amazing! The total cost of this project was approximately $2,600 and we completed it in 3 days. It was a lot of work but it was well worth it.
Thanks for following our blog!
This was a project whose completion lingered on for a couple weeks after the unit was running. I made a closure panel from 1/2-inch thick teak-veneered plywood and applied a special stain mixture and 4 coats of Epiphanes varnish, sanding between each coat.
For anyone else adding central air conditioning to a Landfall 38, 16,000 Btu is the perfect size.
Addendum - August 21
This was a project whose completion lingered on for a couple weeks after the unit was running. I made a closure panel from 1/2-inch thick teak-veneered plywood and applied a special stain mixture and 4 coats of Epiphanes varnish, sanding between each coat.
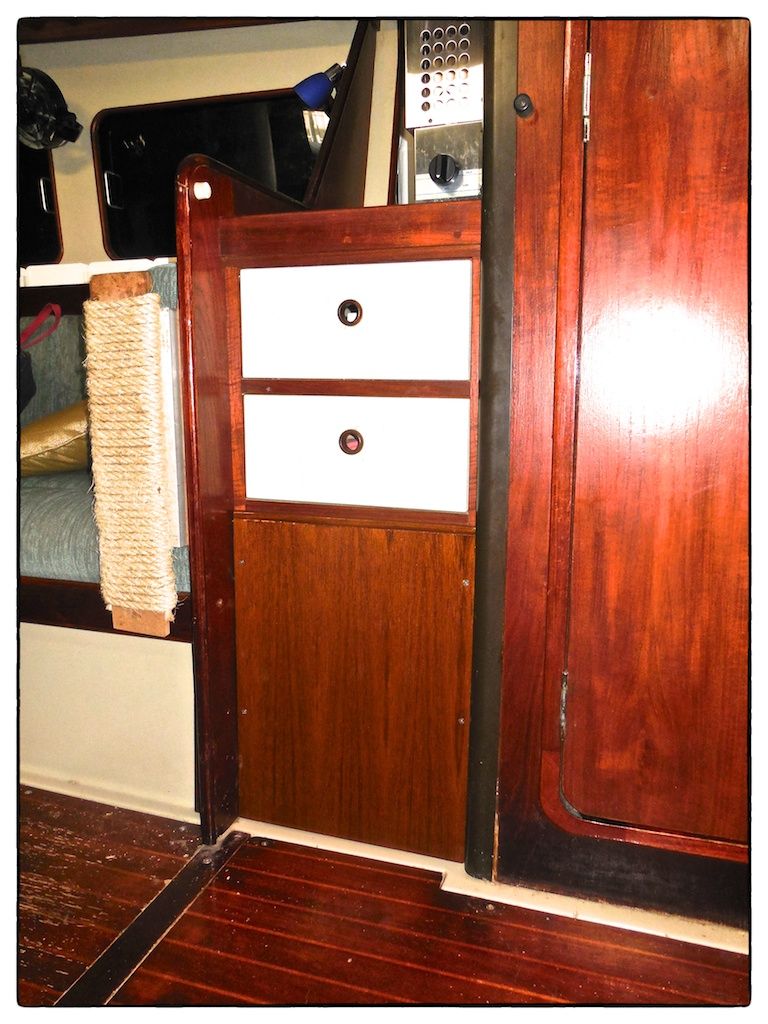 |
| Many years ago, there used to be a cabinet door below the two drawers and we used to store pots and pans in the cabinet. Now our air conditioner resides in this cabinet and there is no longer a need for a door. Adding this teak panel made a further reduction in noise level. |
Another area that needed more work was the return grill. Since the return grill must be removed frequently to clean the inlet air filter and to do any other maintenance, I used brass inserts in the bulkhead and #10 cap screws to fasten the grill in place. I did staining and varnishing on the teak frame to make it match the existing teak bulkhead.
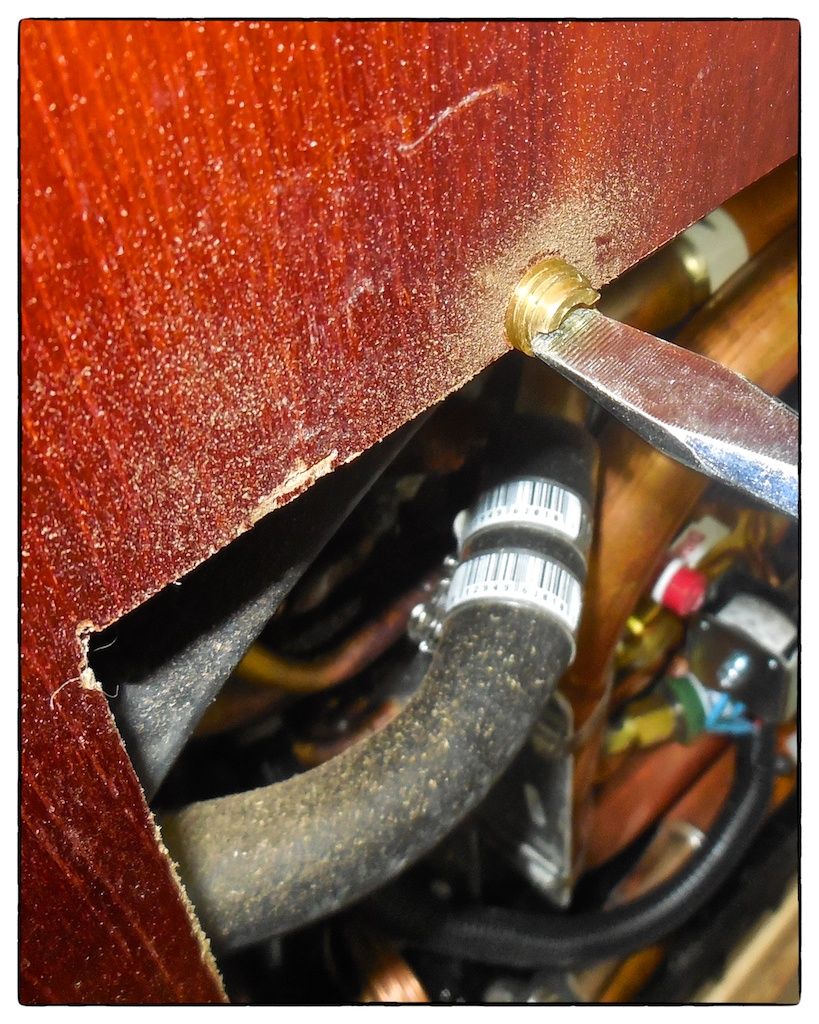 |
| I over-sized the holes in the bulkhead to accommodate brass threaded inserts. I used brass instead of stainless steel inserts so that I could avoid galling. |
 |
| The finishing of the return grill turned out pretty nice. Matching the shade of the existing teak was difficult--the result is not perfect but close enough. |
For anyone else adding central air conditioning to a Landfall 38, 16,000 Btu is the perfect size.
No comments:
Post a Comment