Creating a Boat Burgee
--Blogpost written by Bob & Maggie
One of the fun boat projects we recently tackled over Memorial Day weekend was creating a boat burgee. The name of our boat is Rainy Days and we've had some wild ideas of umbrellas with rain drops falling around it and some others but none that captured our boat's name in a very simple and recognizable way. So, we started our selection process by searching online for images of "rainy days" and there were a lot to choose from for sure. During this search we ran into weather symbols and we zeroed in on the following simple and easily recognizable image:
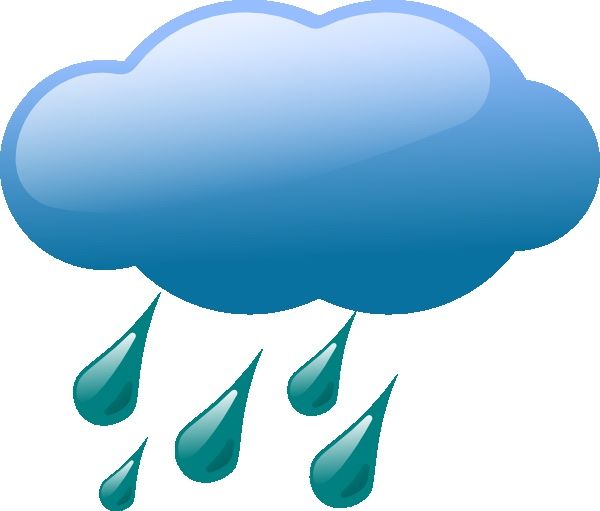 |
This weather image is simple and easily recognizable (as a "rainy day") and formed the basis for design of our boat's burgee. |
So, we purchased plain white 12-inch by 18-inch rectangular nylon flags from Gettysburg Flag Works--they arrived in just a couple days. The next step was spending about an hour at our local UPS Store sizing the selected image to one that would fit and be centered onto an 11-inch x 17-inch piece of paper, which would leave at least a 1/2-inch border all around on the actual flag. I made four prints, allowing for some mistakes along the way. The image had to have the rain drops falling at an angle from the flag halyard toward the stern (when the flag was flying fore to aft) and we had to reverse the image on the other side of the flag--these were design details that I thought were important. (By the way there are two unused prints out of the four I made.)
Maggie took over the project at this point--she'll describe the remaining parts of the project since on this project I was the designer and she was the implementor (if that is a word).
Maggie: The fabrics we chose for the design were dark blue and light blue nylon for the cloud and green polyester for the raindrops. All of the fabrics were purchased at Jo-Anne's Fabrics. I created a template by cutting out the paper design leaving small tails of paper between the various pieces. I used this template to trace the design on each side of each flag to insure proper placement of the fabric pieces. (Fortunately, we could see through the white nylon flag fairly easily--so the two sides were easy to align.) Then I cut the individual components apart to use as patterns for the fabric appliqués. After pressing "Wonder Under" to one side of each of the fabrics I traced around the patterns being careful to make a front and back of each piece of the design. Next I cut them out and ironed them in place on both sides of the flags using the original tracing as a guide for placement. (An iron was used to provide the heat needed to activate the adhesive.) The final step was sewing around each component using a wide satin stitch (about 1/4-inch wide and pretty solid looking) with thread that matched the color of each fabric.
 |
| This photo shows me sewing the satin stitches for the outline of the raindrops on our new boat burgee. |
Looking over this description it seems like it was very easy to accomplish, but remember Bob and I now live on a boat. So, the ironing had to be done outside on the dock box using the spare electrical outlet and an extension cord from the dock's pedestal lest I continually blow circuits inside the boat by using an iron that pulls a lot of electrical power (because our air conditioner was running). This process of applying the appliqués required several (like 100) trips up and down the companionway, weights to keep the various pieces from blowing away, and some experimentation with and correction of my appliqué pieces. It should have been a 2-hour job, but with the interruptions of occasionally helping with a boat neighbor's project, it took me 2 days to complete.
Summary
 |
| Here, I am raising our boat burgee for the first time. |
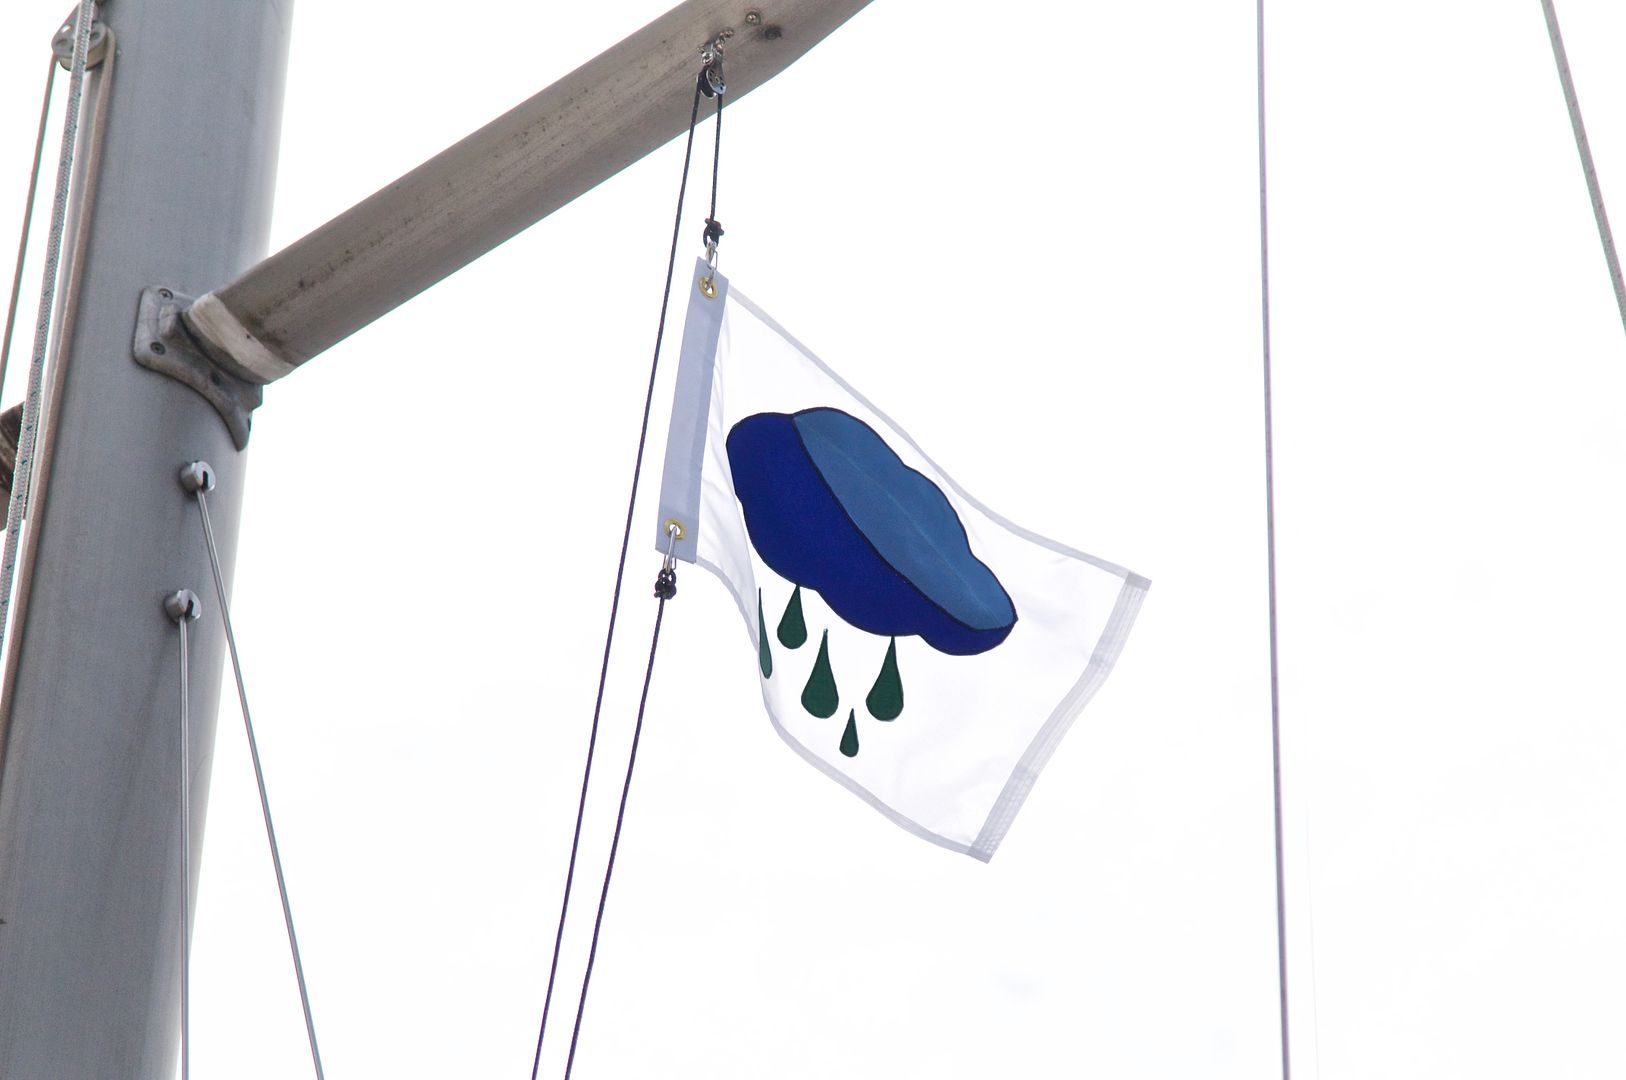 |
Our boat's custom burgee is now flying from the port flag halyard. |
Thanks for following our blog!
No comments:
Post a Comment